We’ve been eating simple fare of late, all unprocessed, wholesome, and mostly home grown dinners.
Due to the crazy heat we’re having in March (which is actually supposed to be autumn), we have been serving salads from the newly repaired Vegtrug, with organic or free-range meats.
However, last night was a special treat.
During a lovely day trip showing our friend Cheryl around, we stopped off at the Pastry King Bakery in Daylesford and picked up some delicious wholemeal rolls. We then swung by Ballan to visit Jessie (aka Rabid Little Hippy) to drop off some wooden picture frames and to collect a bag of tomatoes.
As we were travelling home to Melton, we stopped off in Bacchus Marsh (Fruits of Life) to collect some BioDynamic milk ( I can feel a cheese coming on).
I had an abundance of home-grown Basil, so I picked a bunch and with Cheryl’s assistance began to prepare dinner.
Firstly I made quick Mozzarella with the milk. If you want to learn how to make that, then check out my Quick Mozzarella video tutorial.
Then we sliced up the ripest tomatoes, washed all the basil leaves, and cut the bread into slices. The Mozzarella was left to chill in the fridge for a few hours before I cut it up.
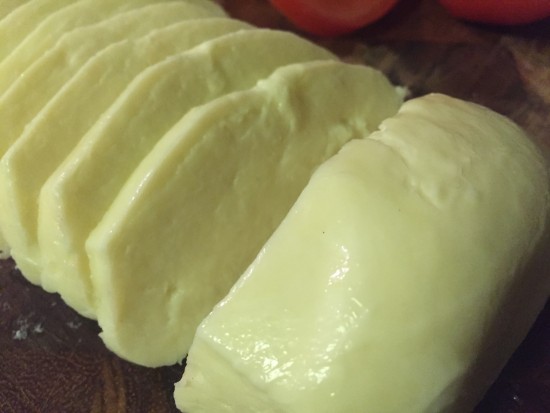
Fresh Bio-Dynamic Mozzarella
This was the basis of our dinner.
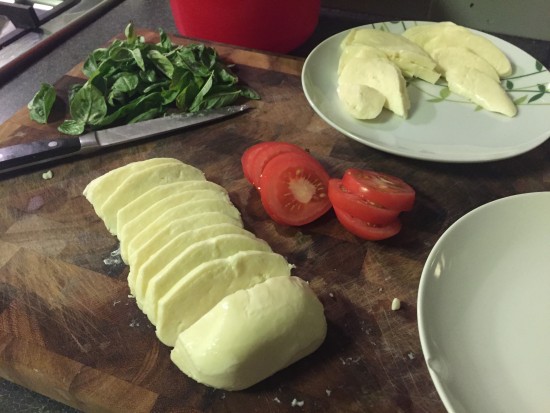
Fresh Mozzarella, Basil, and Tomato
All this was served with the wholemeal bread, basil infused extra virgin olive oil, and freshly cracked black pepper and sea salt. Oh, and with a little drizzle of balsamic vinegar on top to add a little sharpness.
It was delicious. Cheryl had never tasted such amazing flavours, especially heirloom tomatoes and fresh Mozzarella. No pictures of the final serving, because we ate it so fast!
We also washed it down with a bottle or two of delicious cider from Daylesford Cider Company.

Local Map – 160 km radius
And just to think that all these ingredients came from within 160 km (100 miles) of where we live! Not only does locally grown produce taste great, but it also has a lot less food miles, which means less carbon emissions.
Who can argue with that!