So as I mentioned yesterday, today’s task was to build a battery box out of scrap that I had laying around the yard.
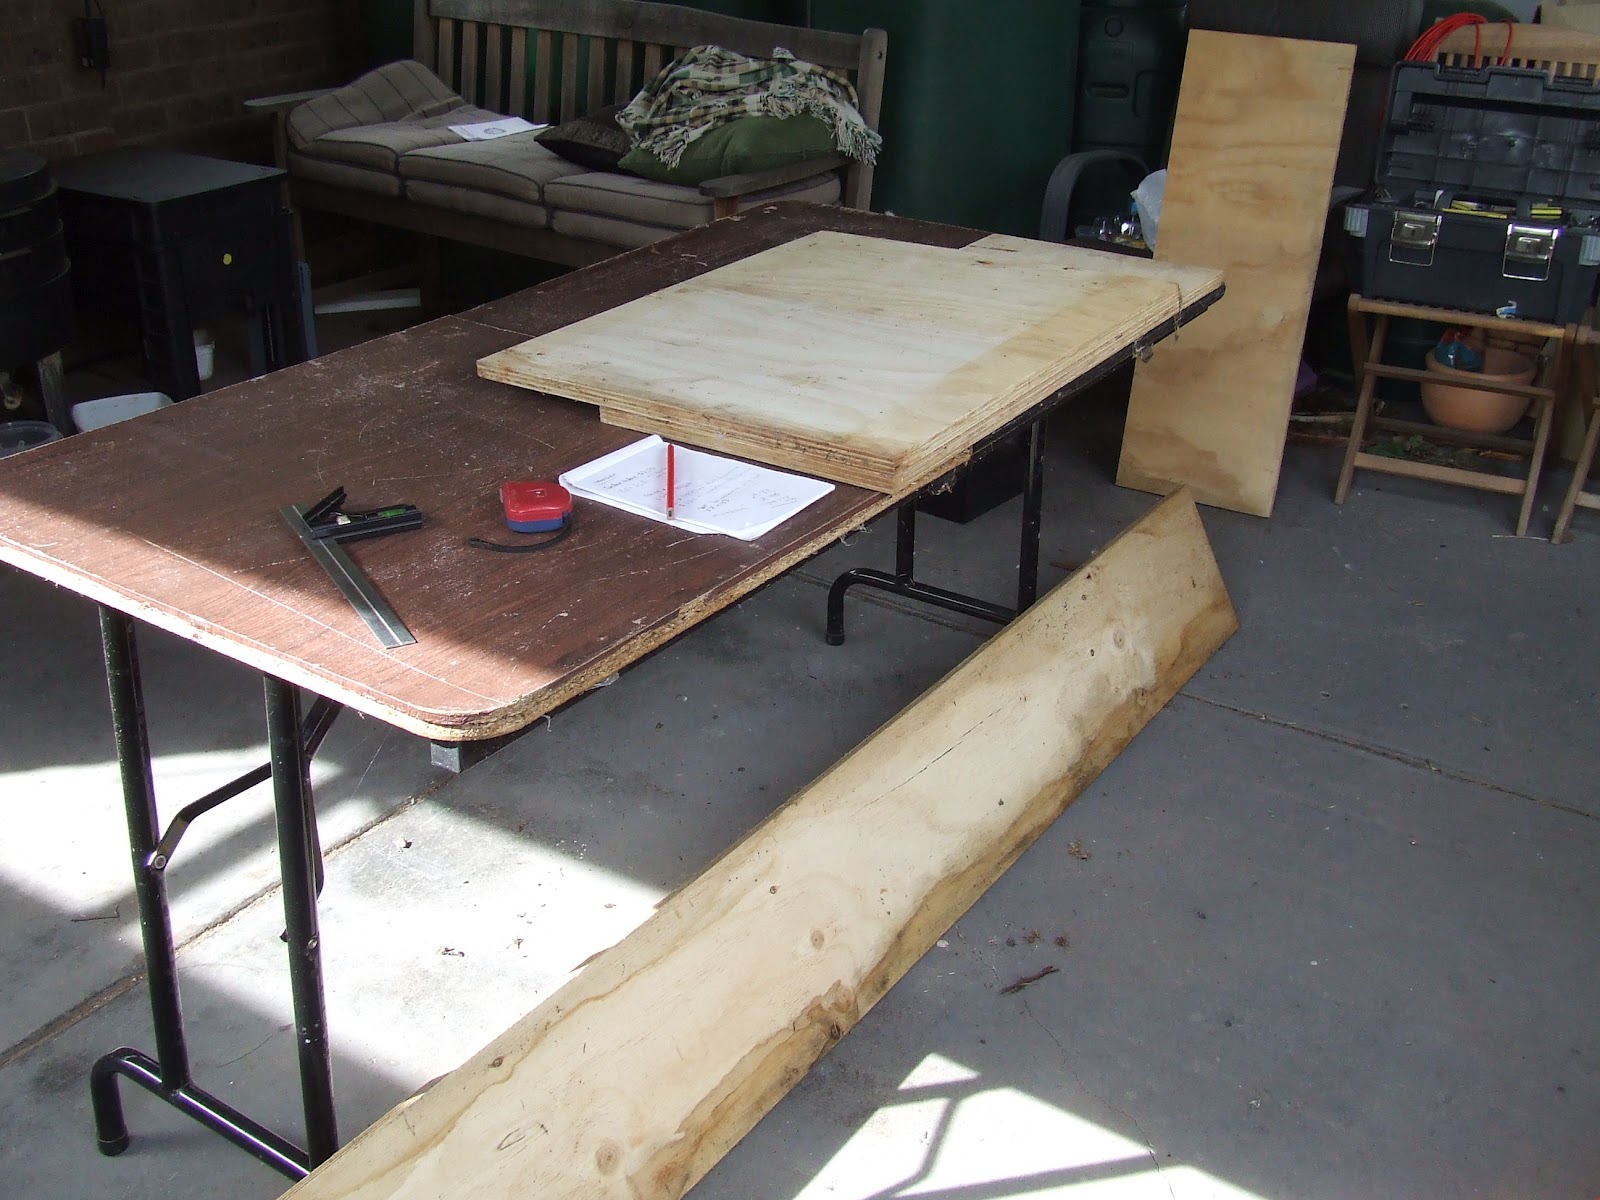
I kept some scrap marine ply that was left over from the construction of the gazebo last year, and managed to scrounge up enough for my box

It is pretty simple to construct, just screwed together so it is secure.
I didn’t have a single piece left to make the lid so I joined two smaller pieces together with battens underneath. The hand in the picture is Kim’s as she kindly offered to paint it whilst I had to duck out to the hardware store for some hinges for the lid.

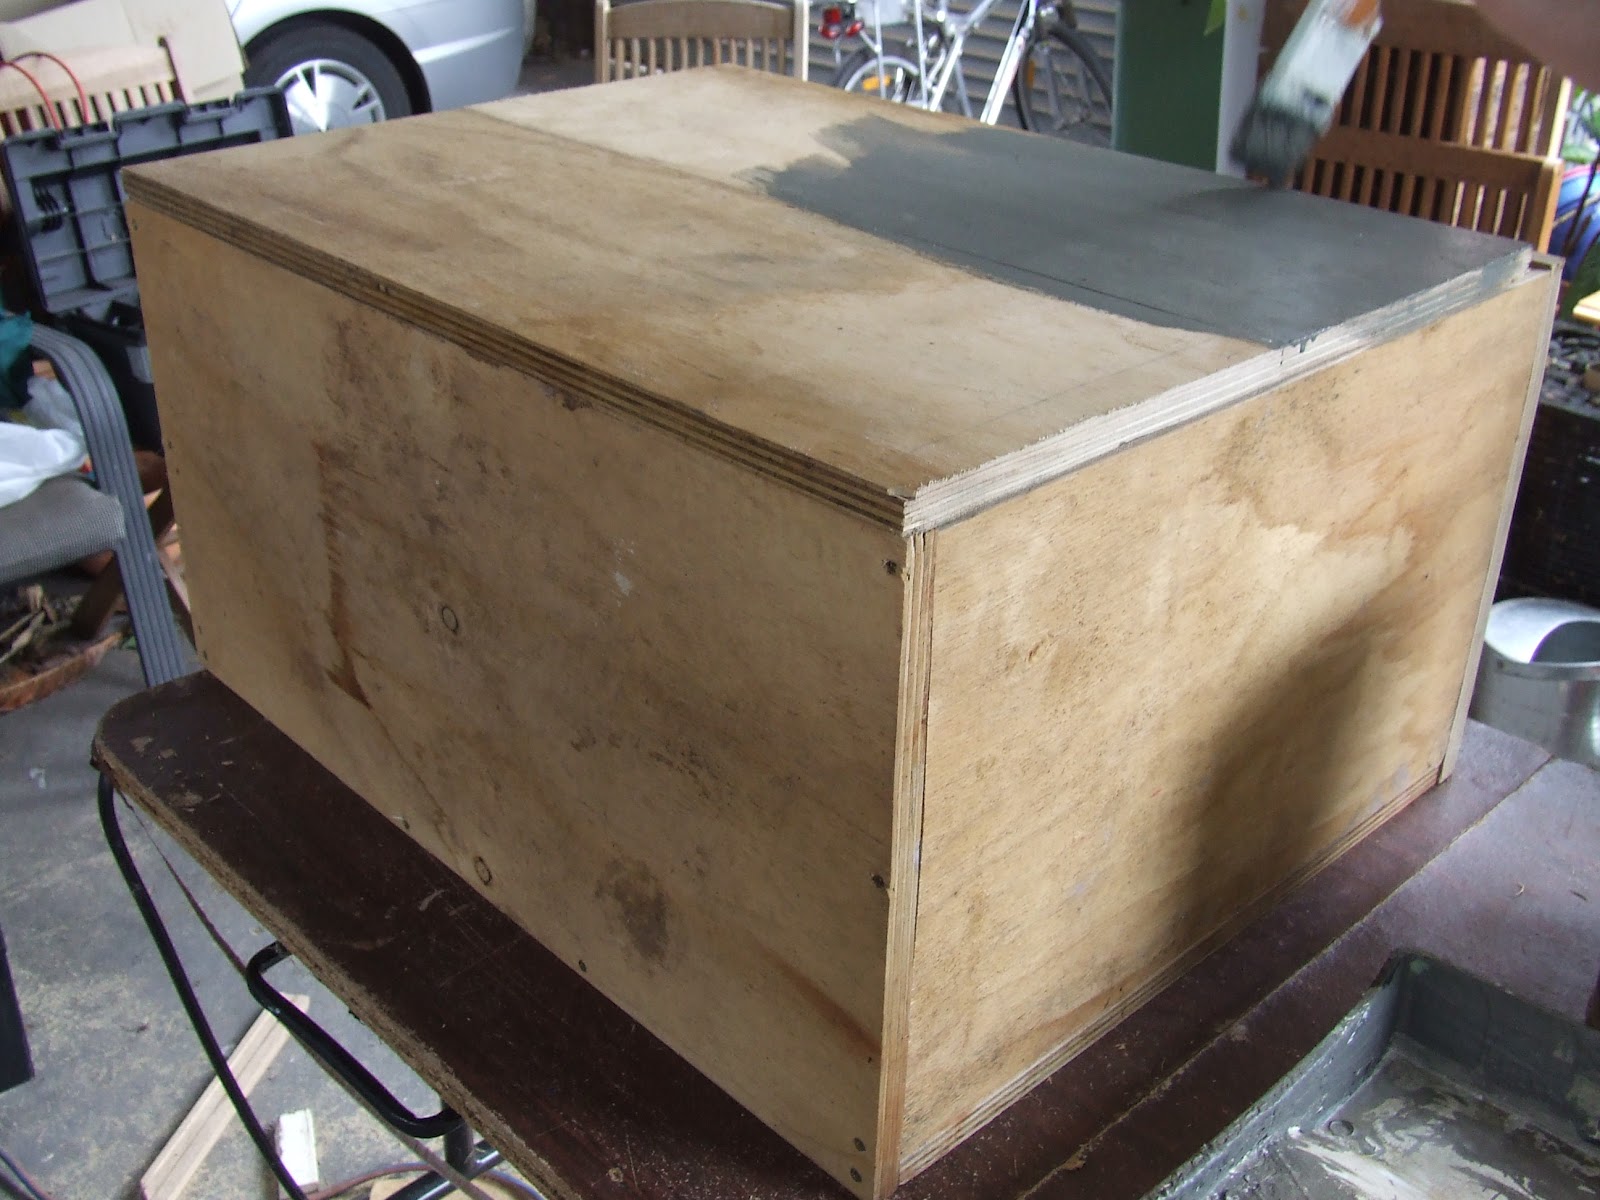
It looked a bit rough and ready, but nothing a lick of paint couldn’t fix. The gap at the front of the lid is there on purpose to allow for ventilations. I will also be drilling some holes in the back towards the bottom to allow for air flow.

I found some castors in the shed, and screwed them on the bottom. As the box will house the battery and potentially a second to increase capacity and the solar charge controller and all the wiring, it needed to be mobile. With my dodgy back, there was no way I could have lifted it all, so the castors solved that problem.

Ben helped me fit the lid with the hinges, and here is the finished product ready to be wheeled into place.

I had to move the two worm farms which were located under the existing grid tied inverter, so that I could place the battery box in its new home. All the solar equipment is now all in one place. Total cost of hardware for this box was $6.50 for the hinges!
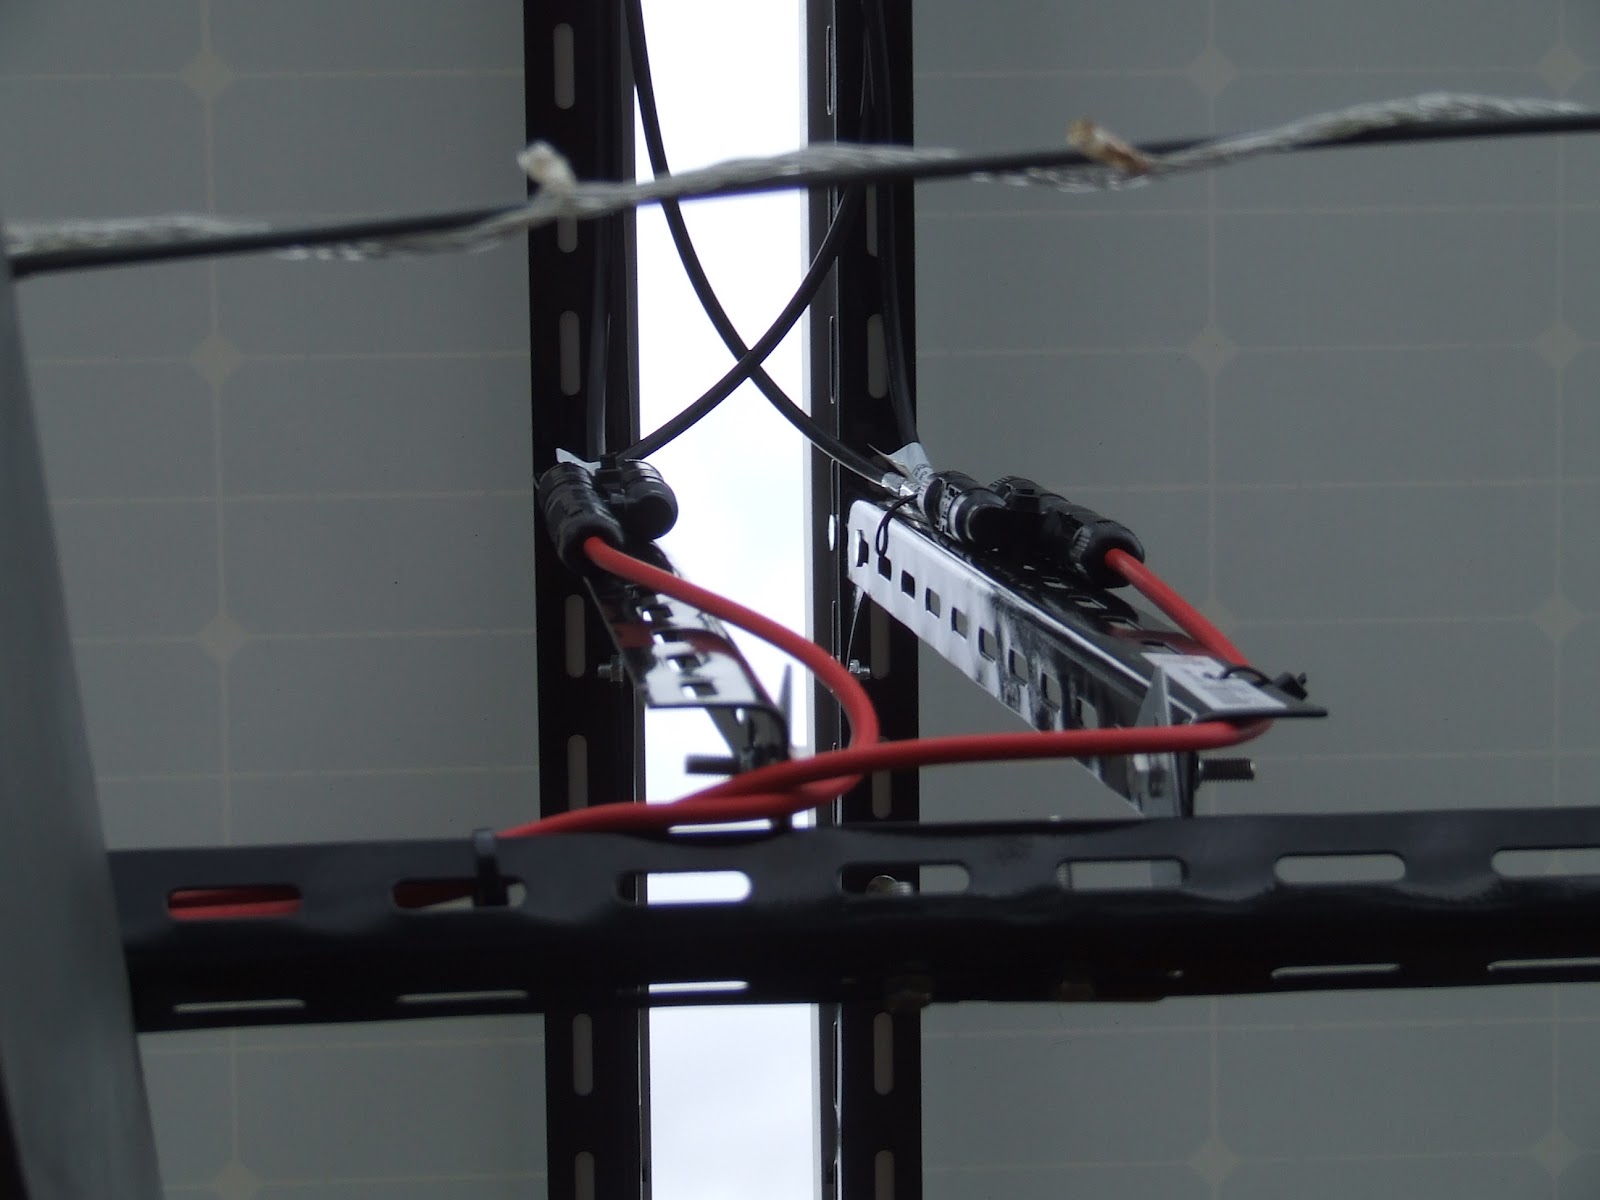
Then it was back up the ladder to finish the wiring. The 12 metre length of wire was cut in half with the negative end taped with duct tape off so not to accidentally short circuit the panels if the two exposed ends touched. The two connectors were cable tied into place and I ran the wire along the supports that I installed yesterday.

Then it was time to install the conduit which I ran across the top of the arbour, fixed in place with clips.
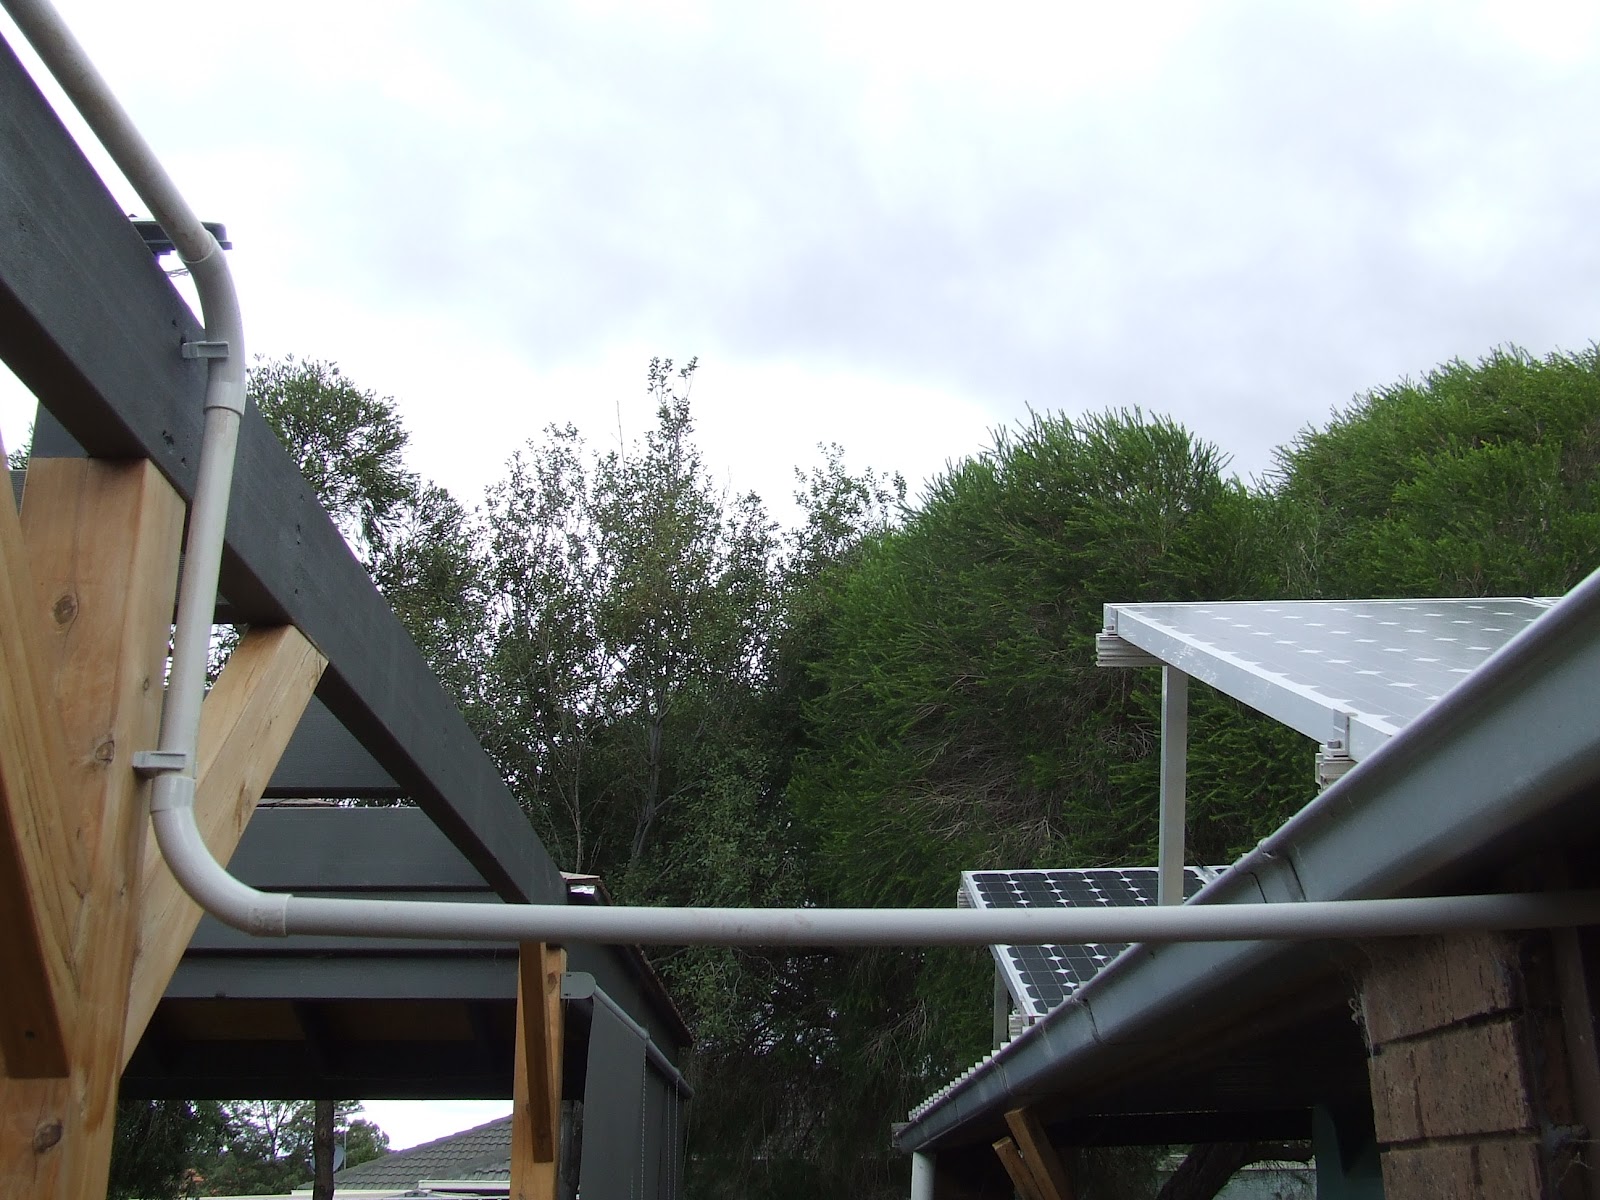
And finally down the post a bit and across to the carport where the battery box is located. Total cost of a neat wiring run = $20 for elbow joints and clips. Just as fate would have it, the cable was about a metre too short so I have to wait until Tuesday until I can source some thick gauge wire (10mm2) to connect the panels to the charge controller.
Looks like I will be planting onions and garlic tomorrow instead of playing with my new electronics kit and meccano set! I had a ball, and now Kim wants me to build more boxes, but I told her that I ran out of materials! She will just have to wait 😉
Looks good Gavin! Now I’m curious, what do you plan to run off the batteries? We recently bought a second-hand campervan complete with solar panels, but the system wasn’t working, we spent hours with the multimeter and researching on the internet trying to find the problem and finally realised that the batteries were broken (would no longer fully charge, as they were old-style gel type its a common problem), once the batteries were replaced, we’ve had no problems and use the solar panels to run a small camping fridge and our lights when we’re “on the road”. Its amazing how much there is to know about batteries, solar panels and inverters! Makes me think twice about running the entire house, as the batteries do still need to be replaced every few years and a large bank of batteries can cost thousands. Better than relying on the grid though I suppose. Anyway, I can’t wait to see your finished project!