As mentioned in part 2, I laid the main 19mm line all along the back of the veggie patch beds, and inserted a 19mm to 13mm T piece so that I rig up the piping for each bed. This is what it looked like before I started work today. When using harvested rainwater, make sure you put in an in-line filter to stop your drippers from getting blocked. Some silt may get into your tank so this is a simple precaution to avoid having to purge your system everytime you inadvertently put dirty water into the pipes. Here is the filter setup;
Here is the mainline with the T pieces inserted;

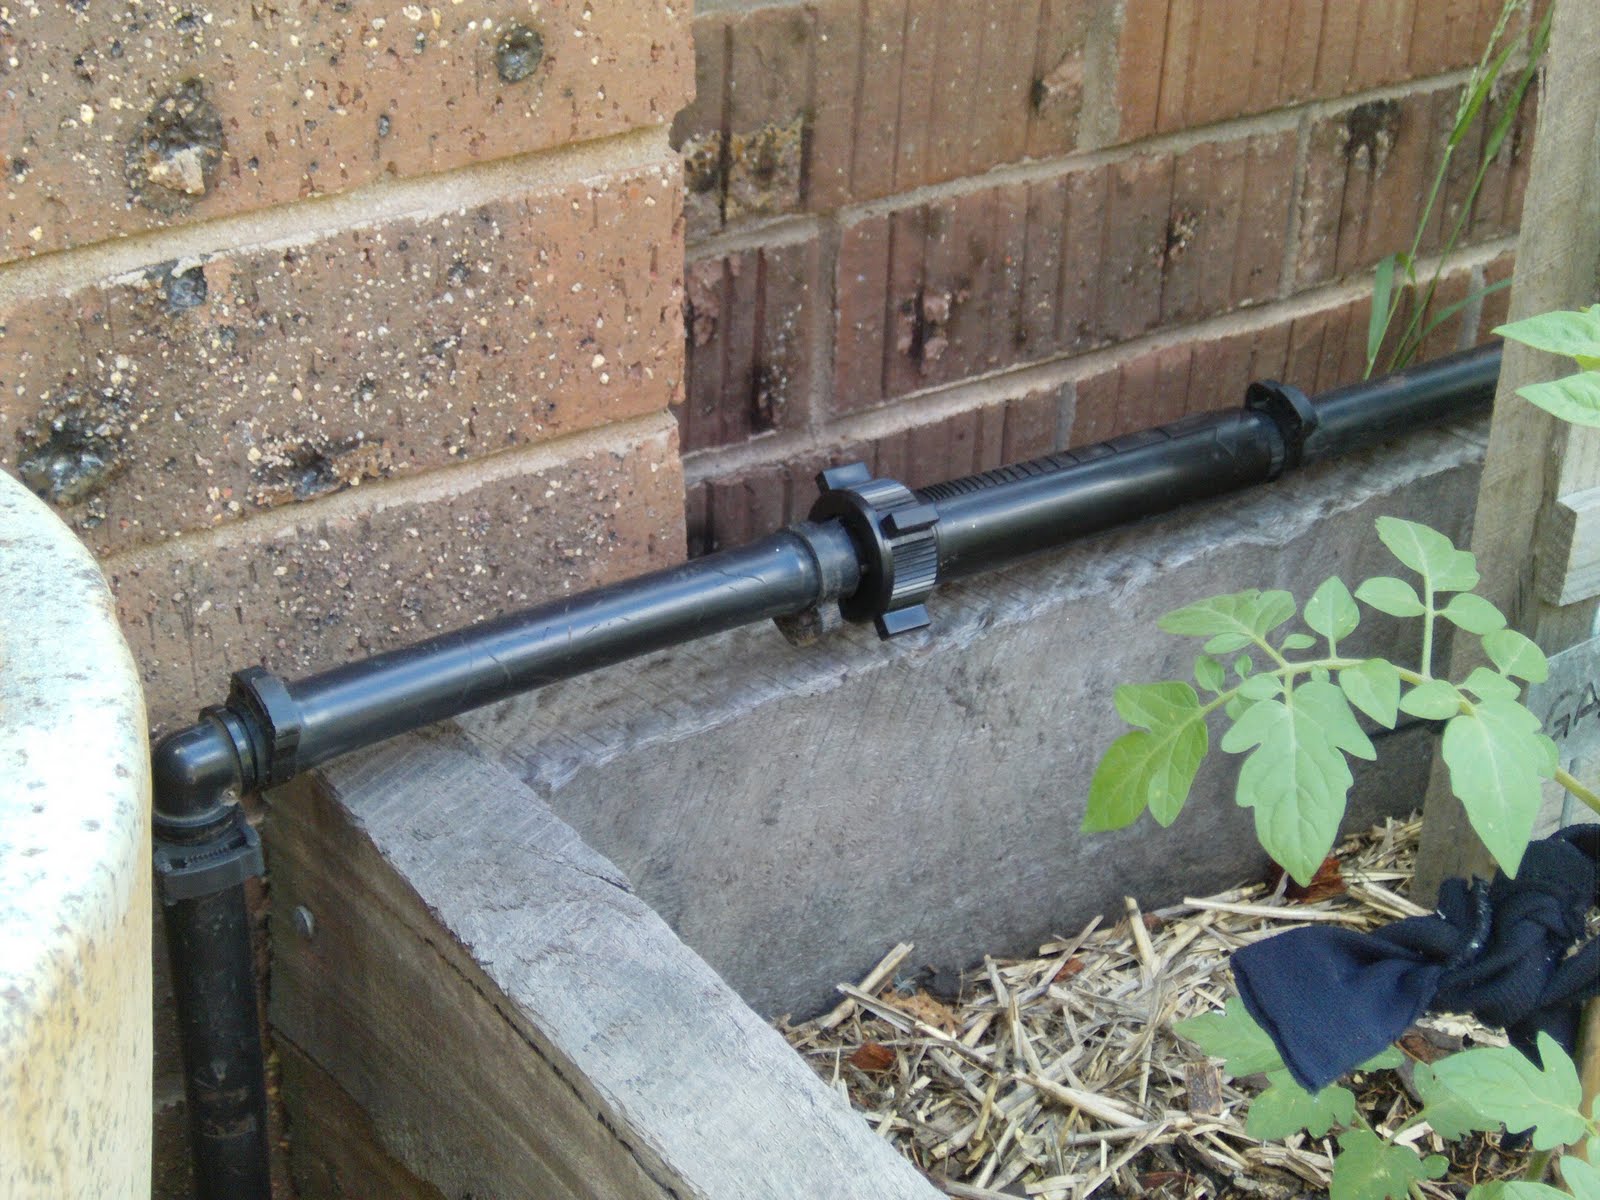
So, today I began by making a set of isolating taps for each bed which were all 13mm fittings. It was a little bit fiddly, but once I made one, I managed to bang out the other 4 very quickly. This is the mainline isolation tap and the secondary tap assembly for one of the beds;

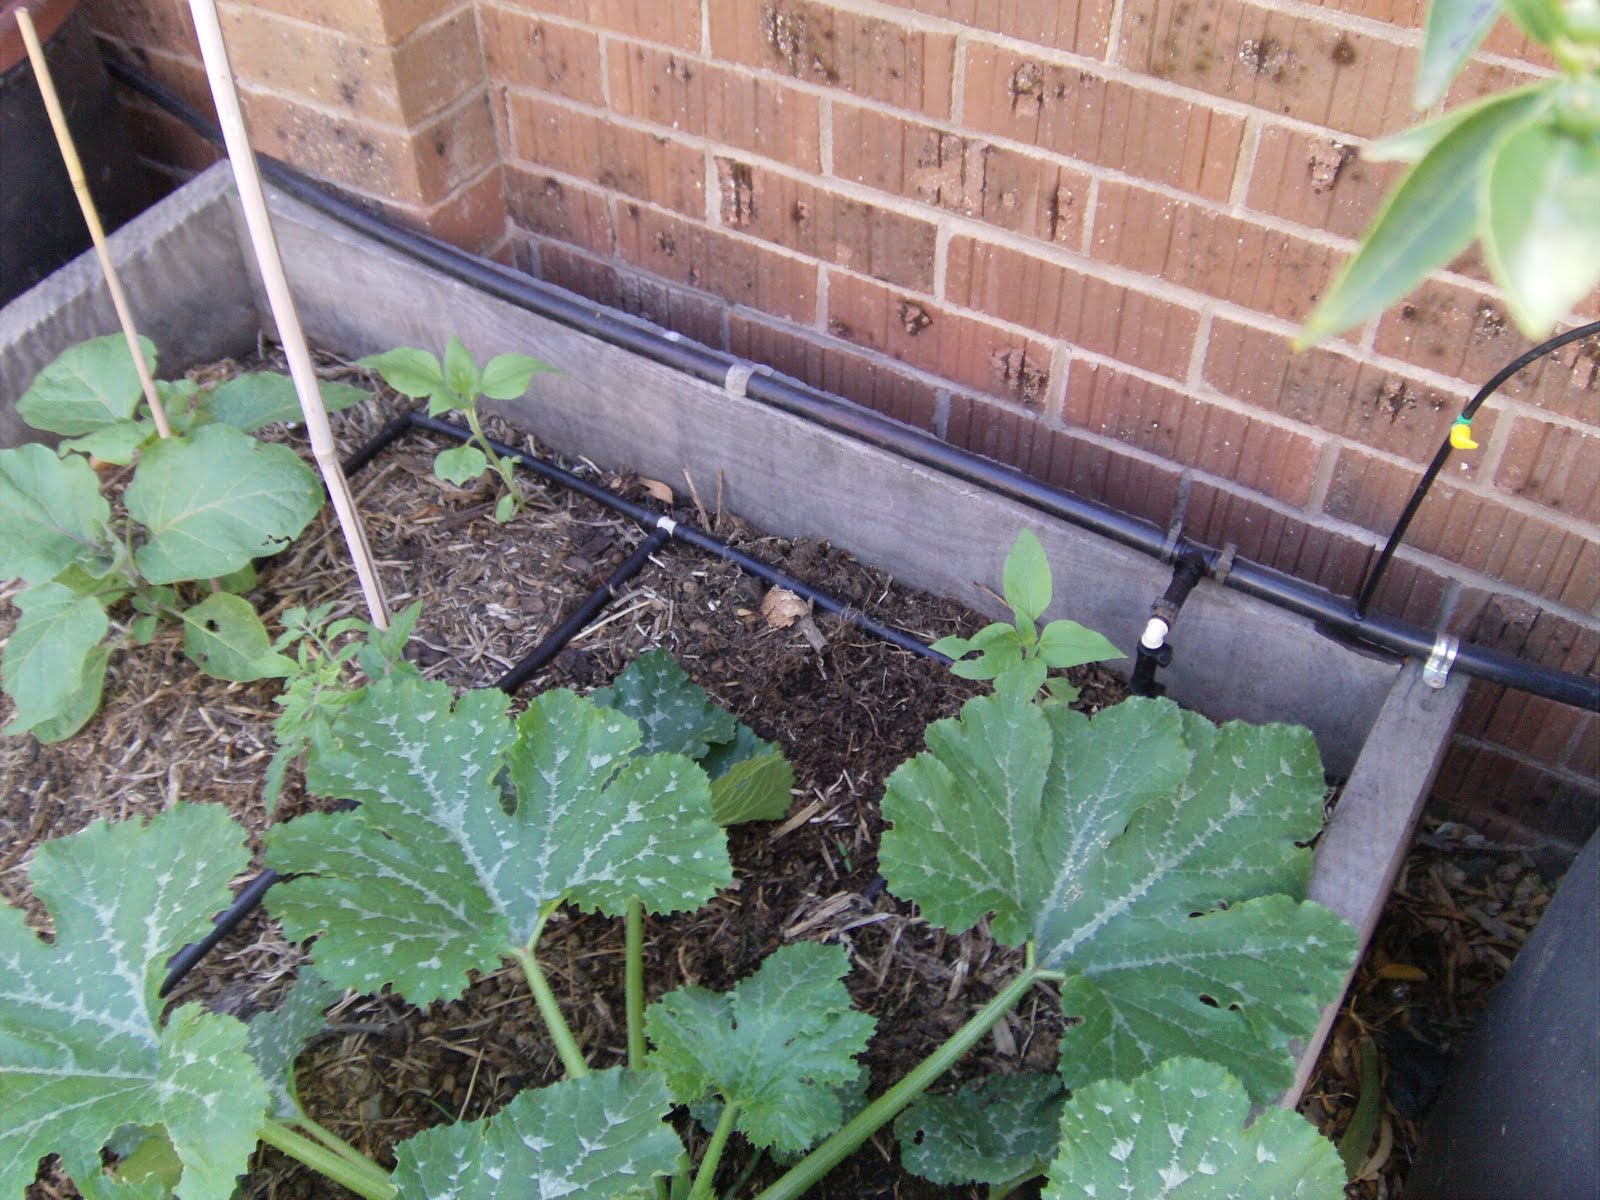
Then I put in a secondary line of 13mm pipe, down at the level of the soil, and then ran a few tertiary 13mm line down the length of each bed and used Moss Inline 13mm drippers where there was a plant. This is quite easy to do, but much simpler if you lay the pipe and drips before planting. You can get to all the bits without damaging existing plants. This is the first garden bed completed (tomatoes, leeks, and red onions);

The second bed with three tertiary lines (zucchini, cucumber, and eggplants);
The third where I used 4mm Drip Eze by Pope irrigation systems (click the link for an installation video). 20metres cost me about $25 and I still have about half of it left over. Each drip point in the hose releases 2 litres per hour (click photo to enlarge);

The fourth bed (tomatoes) where I used the inline 13mm drips;

And finally the fifth perennial bed;
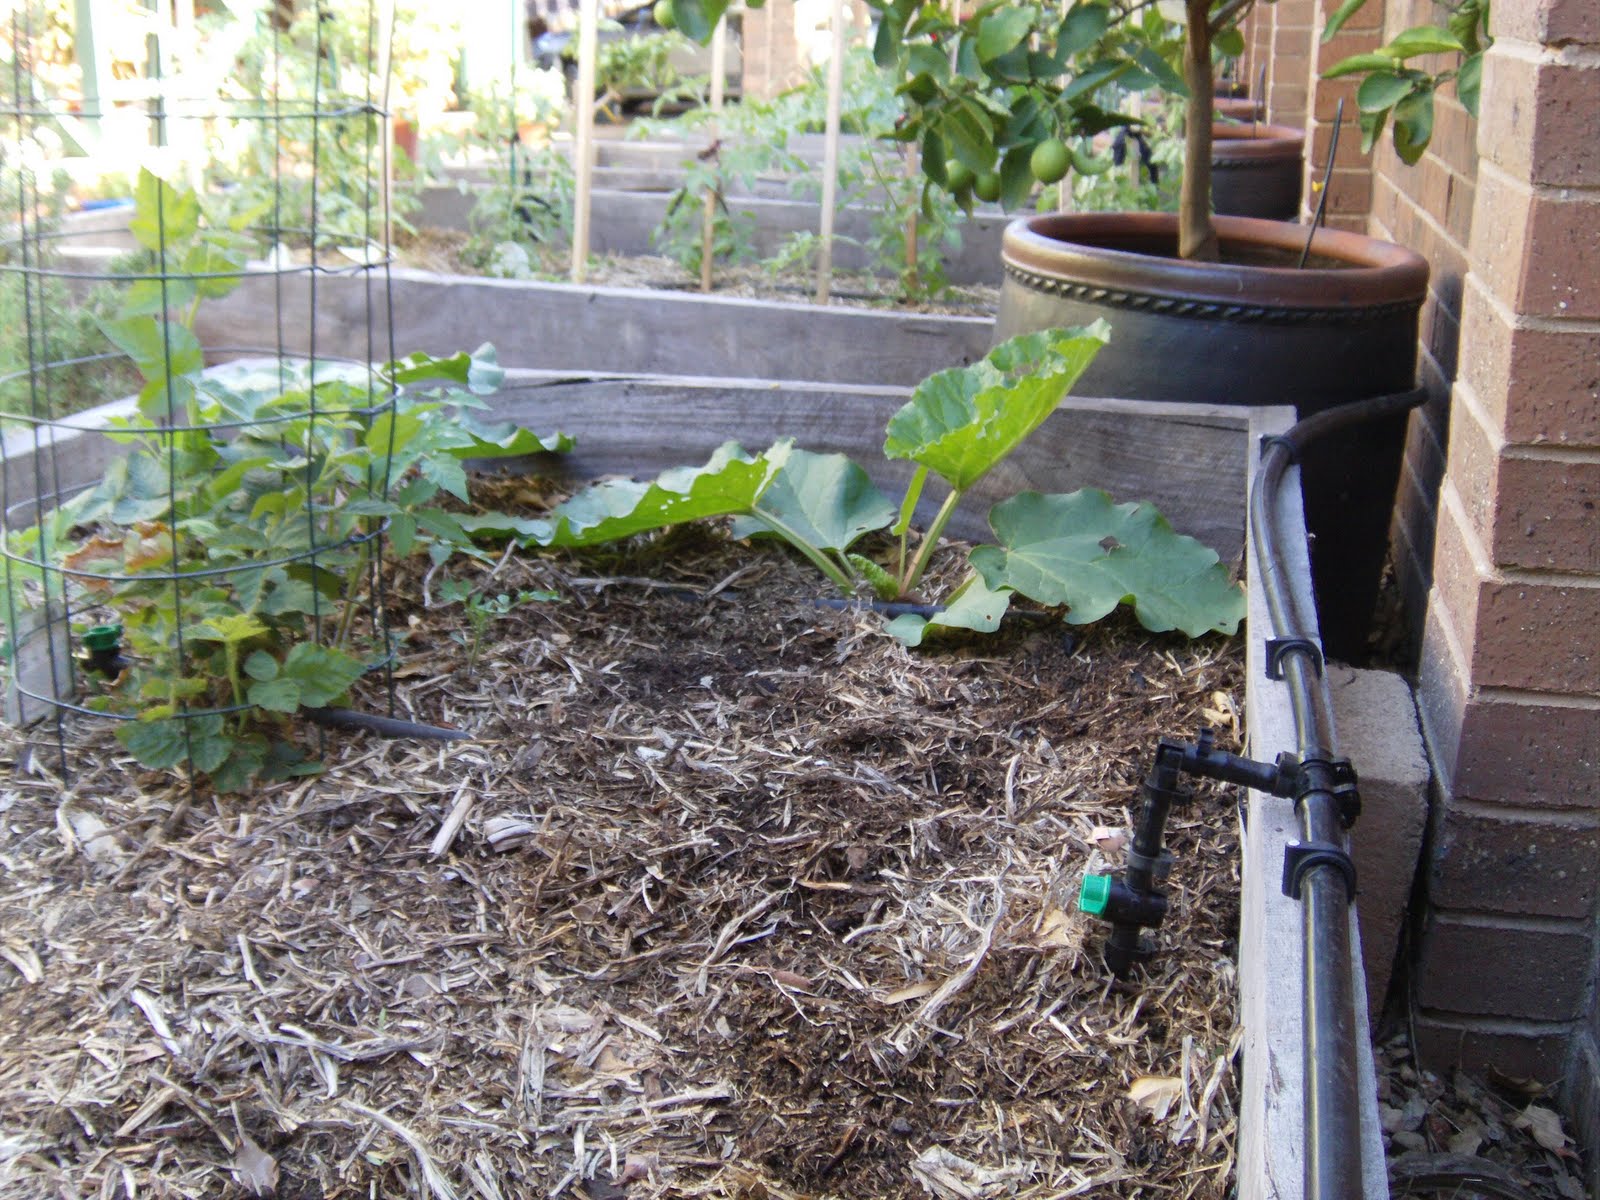
After all the beds were completed, I got stuck into putting in 4mm lines with little taps for each of the fruit trees in pots. I used the lasso method, where you use Drip Eze to make a circle around the tree all joined by a 4mm T. This method give you about 4 drips per plant and cover the entire root zone. This will make it easier to water the potted trees and I will still be able to isolate them if the need arises;

I gave Kim the grand tour, and tested each bed to make sure everything worked without any issues. As I had reused old 13mm poly pipe that I had kept from old installations, I had missed one hole that I missed during installation, but quickly fixed it up with a bit of black silicone and a goof plug. All sorted and each bed worked fine. Then I turned it all off, because the beds were already damp from all the rain we have had recently.
With all that finished, Ben helped me to planted up the empty bed with some mixed lettuce, spring onions, and celery seedlings which should all grow like crazy, now that I can irrigate straight to the root zone. I then showed Ben how it all worked by turning on one of the 100L water butts and turning off all beds except for the newly planted one. He was absolutely fascinated and wanted me to check every single dripper to make sure that our plants were getting watered. It was all working as designed, with both of us being quite thrilled to see it all working. I then poured about 2 litres of worm wee into the water butt we were using so that the plants would not suffer from transplant shock. The beauty of using these small water butts is that you can add organic liquid fertiliser or soil conditioner and you will not contaminate all of the other water tanks/butts. Also, by using the 100L water butt, you can water 2 beds at once and just let it all drain overnight until empty. That way, you will not forget to turn off the tap if using your main tank.
Over the course of an hour and a half, the Drip Eze bed only used 50L, which I thought was good, as each of the seedlings were well watered in. I then turned that bed off, and let the remaining 50L water all the fruit trees and the rhubarb and loganberry bush. In the morning as I leave for work, I will turn off all the taps and re-fill the empty butt from the main tank in case it rains during the day. I don’t want any water going down the storm water drain now that I have created this marvellous drip irrigation system.
I have quite a few bits left over, and once the red onions have been pulled, I will run two more tertiary lines down bed one, and plant some more tomatoes. That should be just before Christmas, so I better keep the seedlings I have growing well cared for until then. Also, once the rainbow chard sets seed, I will be pulling them and planting some more types of berries, and have designed the irrigation system in bed 5 to cater for this.
All in all, the entire system of Drip Eze line, Moss Inline drips, T’s, elbows, ratchet clamps, taps, filter and end stops cost me about $160 in parts (I still have about $40 worth of bits that I didn’t use), the 2 x 100L water butts were $59 each, with the 200L water butt and stand costing $110. All 19mm and 13mm pipe was free because as I mentioned before, I used poly pipe from an old system. I still have about 5 metres spare just in case I need to connect up the new tank that we are saving up for. It was great fun, and I have an overwhelming sense of accomplishment by doing it all myself. Once I put my mind to it, there is nothing I can’t achieve!
Next weekends project is to fence off some of the chicken run so that we can use the path again without having to sweep it every day, and to be able to use the garden bed in that area with out the chooks eating everything in sight. I am going to put drip irrigation in that bed is well by extending the line on that side of the house!

That looks great, Gav! I’m planning to start something similar on my vege beds at the new place.
How are you finding the Drip Eze and the Moss Inline drippers when working from a simple gravity-fed water butt? Do they have a pretty even flow? Do the drippers at the start of the run flow faster than the ones at the far end?
I’m a bit concerned that with such low water pressure, I’m going to end up with very little water coming out the far end of the line.
Thanks for the great photos and details. It really makes it easy to follow your design and to see what you’re trying to achieve.
Thank you for this… when we get to it (soon, I hope) I will get my husband to read your posts!
Hi Darren. The Moss inline drippers work a little better than the drip eze I have found, but if I only turn one bed on at a time, they are about the same. Today I turned on all the Moss based beds, and they all worked, even the furthermost away which are about 7-9 metres from the furthest water butt. If you have a natural drop on your new block, you shouldn’t have too many problems getting decent head pressure.
Hi dixiebelle, you are most welcome. If he has any questions, just get him to send me an email.
Gav
Awesome, thanks for answering Gav. We do have a nice gentle slope above the vegie beds, perfect for a gravity-fed system.
Hey if you need help or supplies there a site called http://www.dripdepot.com and they have free videos to learn from, all sorts of supplies, fertilizers and more.
Very nice blog with lots of amazing information. Anybody can use the ideas shared in your blog. Thanks for sharing this blog with the readers.