It was full steam ahead on Saturday morning. Lets get these veggie beds finished was the mission of the day. If we had time, I wanted the landscaping completed as well.
The day started at 8am when the workers arrived (Megan and Jake), who I quickly dispatched to the Produce shed to get four bales of Lucerne straw.
Whilst they were away, the garden bed soil, which is sold as Mushroom compost garden mix was delivered by truck at 9am. It was $55 per cubic metre.

I ordered 3.5 cubic metres of soil, which was dumped onto tarps laid on the nature strip.

So before we started we made sure that we had all the necessary tools at hand, and I performed a final inspection of the cardboard that we laid in the beds. All was well, so we started the next task.

Double thickness newspaper was laid over the top of the cardboard to inhibit weed growth, and provide a bit of food for the worms before they started their ascent into the beds.

Then it was down with the Lucerne straw. This adds a layer of nitrogen rich material to the bed which will begin to break down under the soil.

Ben was assigned the job of treading down the straw. He got very excited, but that soon waned.
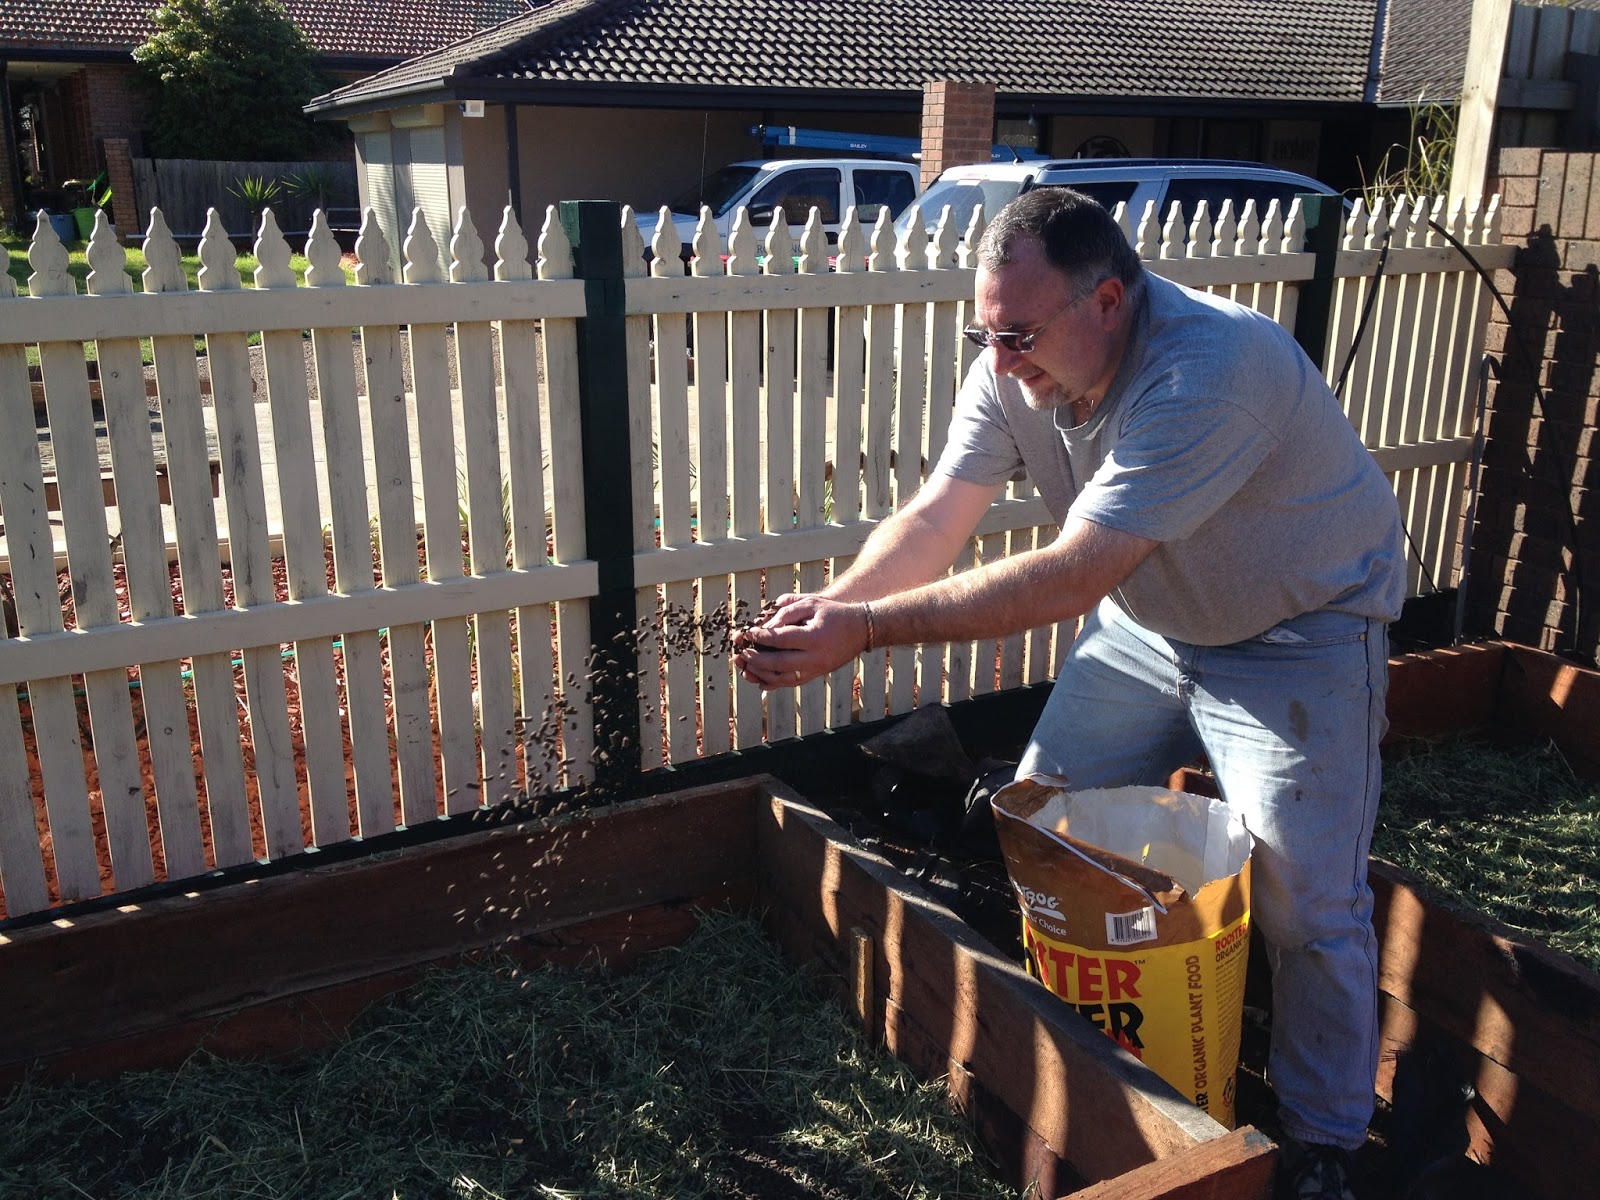
The next task was to spread manure, in this case pelleted chicken manure. Liberal handfuls were cast over the straw. This will act as a composting activator to help break it down quicker.

We watered this layer to add a bit of moisture to the straw, but it dried out quickly. We began to load up the beds with soil.

The A team filled the wheelbarrow with soil (Megan carted bucketfuls). Then they took turns in delivering the barrow to the beds.
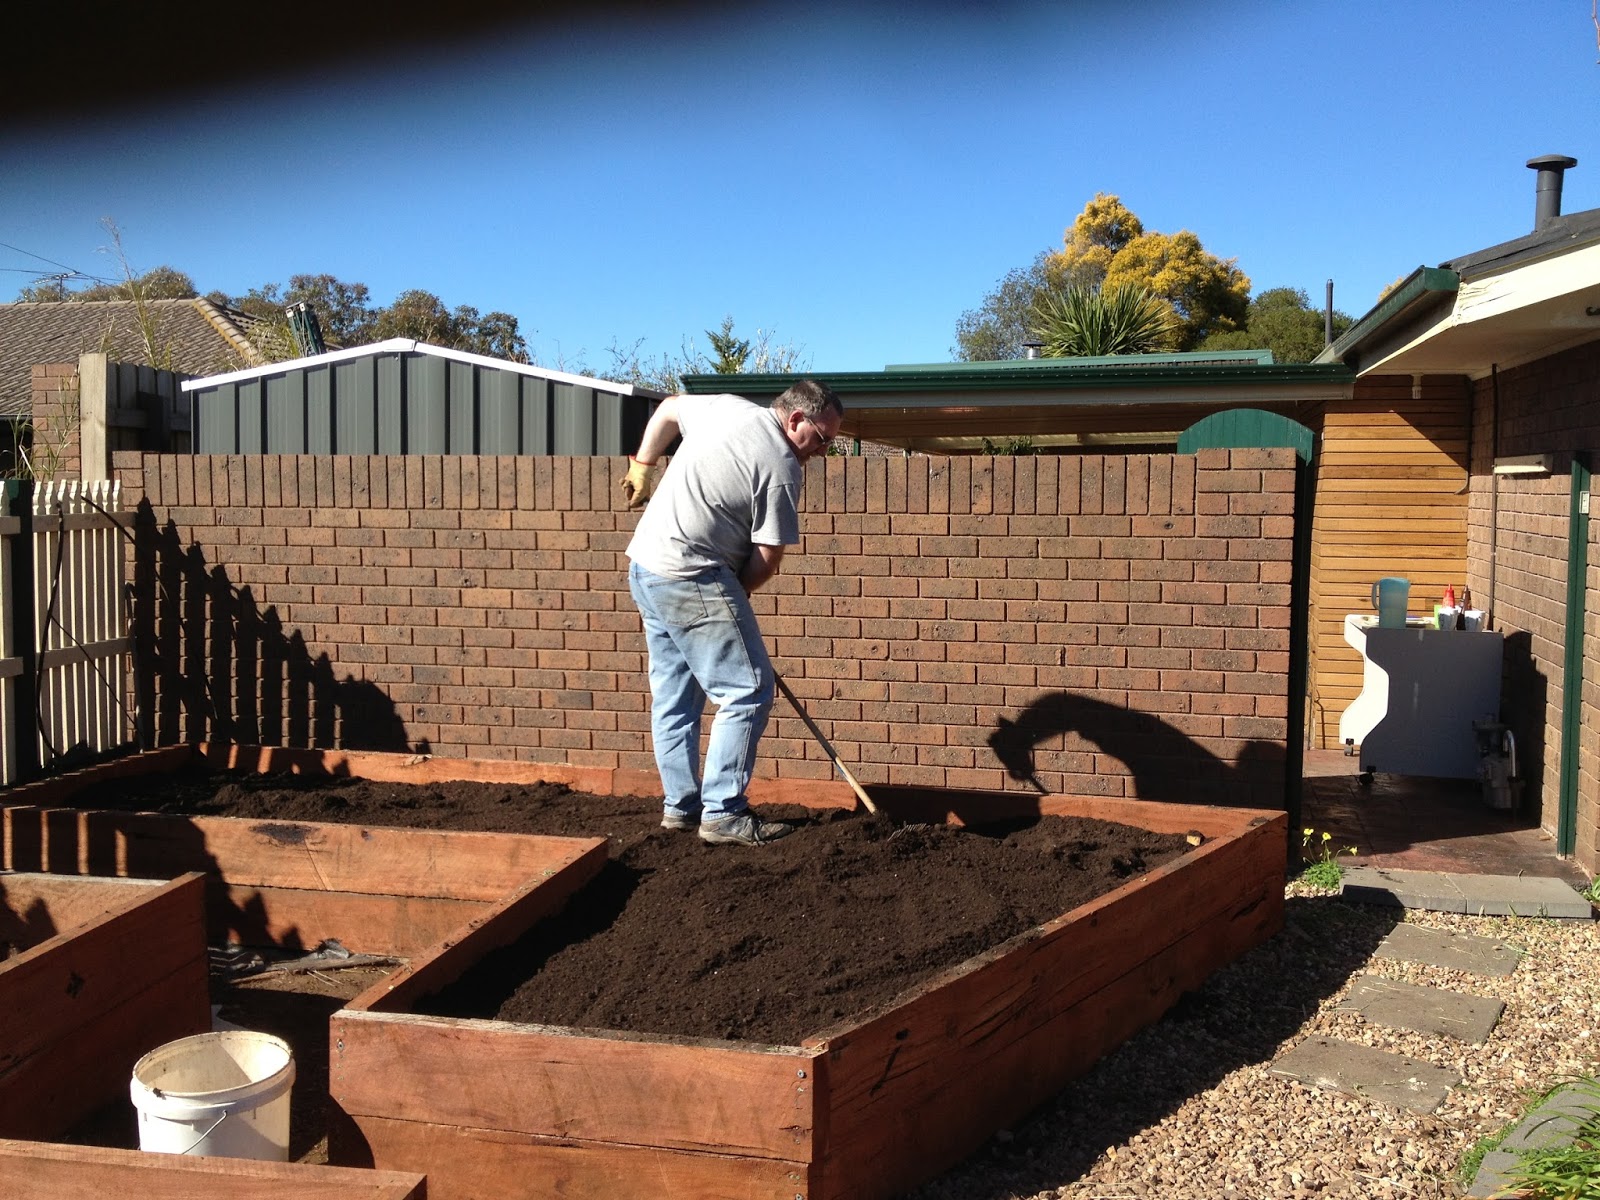
The B team (me) raked the soil into place. Both jobs were non-stop, however we did take rest breaks every 30 minutes to make sure that we would last the distance.
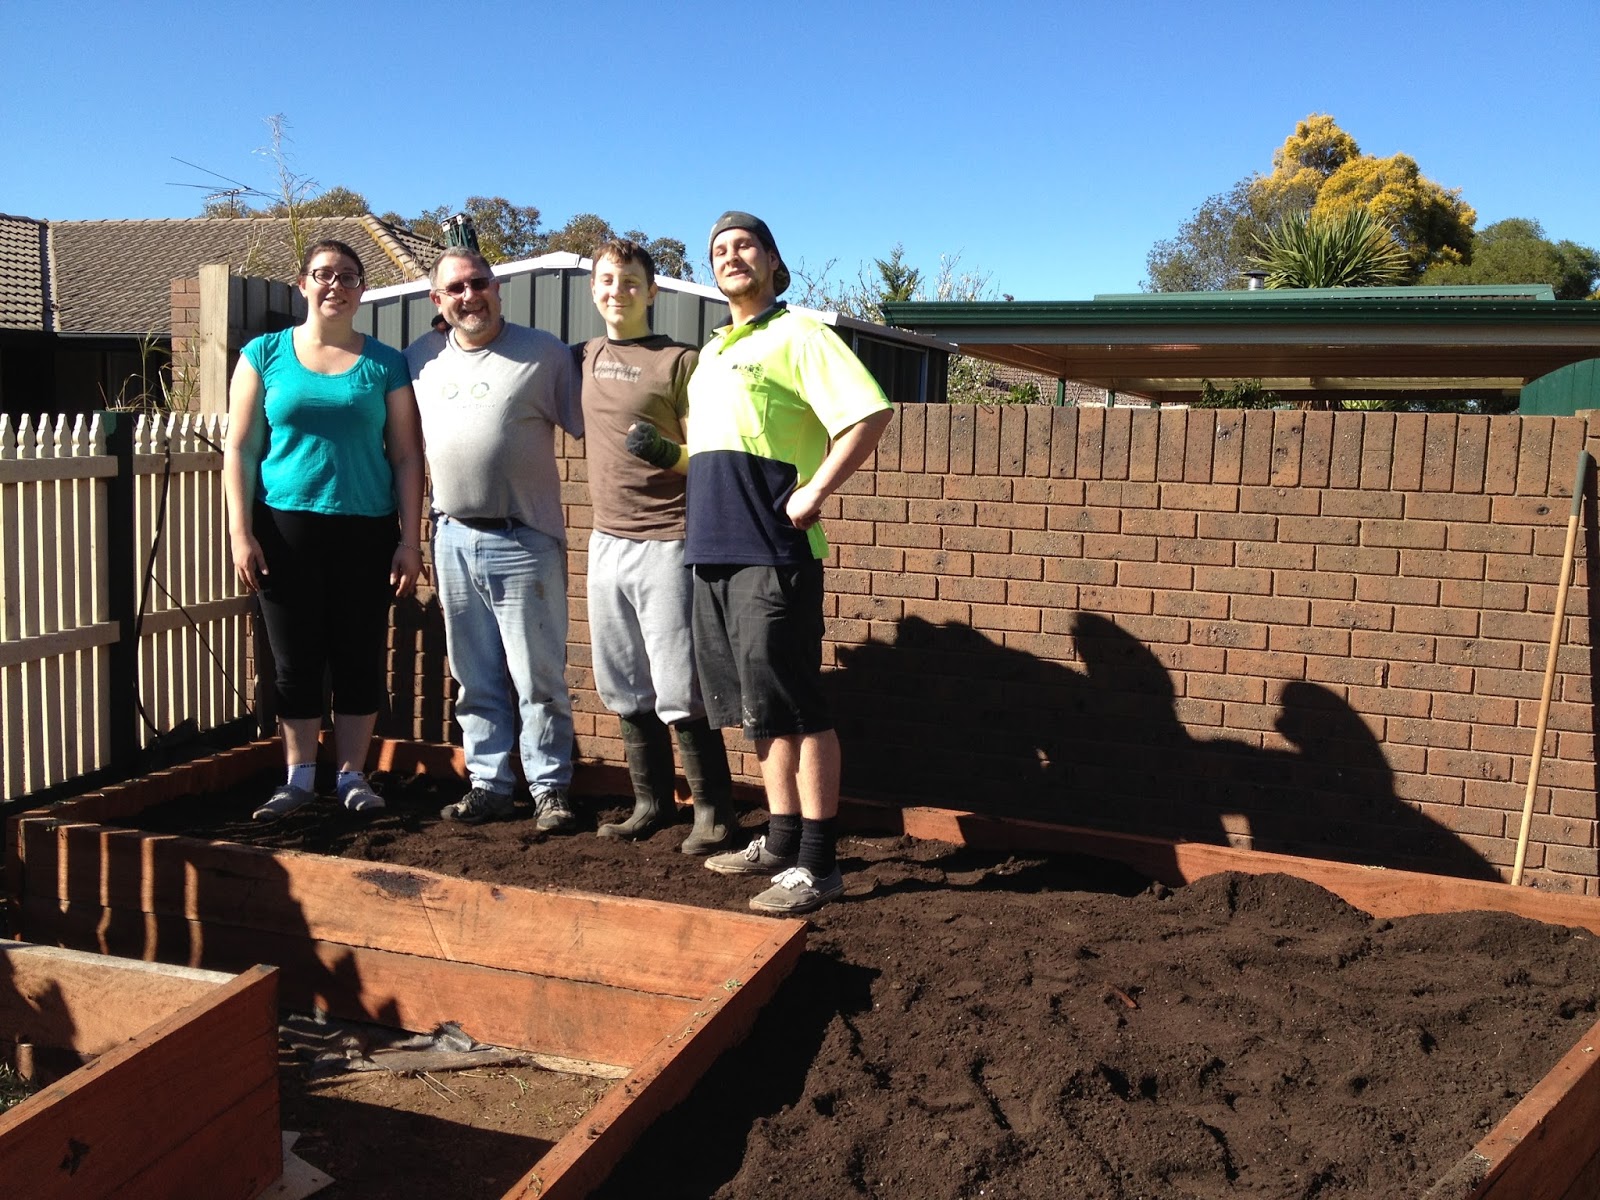
Here is the proud crew after the completion of Bed #1. We made sure the soil was compacted down a little, but still friable.

Bed #2 was filled in about 30 minutes as it was a little smaller. Then it was on to the landscaping. We reused lots of black weed matting that I had stored from when we cleared the area. I also used a light non-woven matting when that I had laying around the shed to finish it off. We then placed down some pavers that I had piled up in the shed that used to be my original rainwater tank stand.

Once the pavers were down and fairly level, we placed back the pebbles that we had in a big pile. This finished off the paths between the beds very nicely. We watered the soil so that it would begin to settle. As the straw starts to compost, the level will drop, so I expect the beds to reduce over the next two weeks. That is when I will plant my first crop of potatoes in the large bed.

Surprisingly we finished work at around 1.30pm. I thought it would take much longer, but with lots of help, and a good methodology, time went quickly. Great work by the team. You can see that Ben is conspicuous in his absence, as he tired quickly after moving all the soil. Good work though, and he kept up with the older two.
So lets have a look around the new beds, shall we?

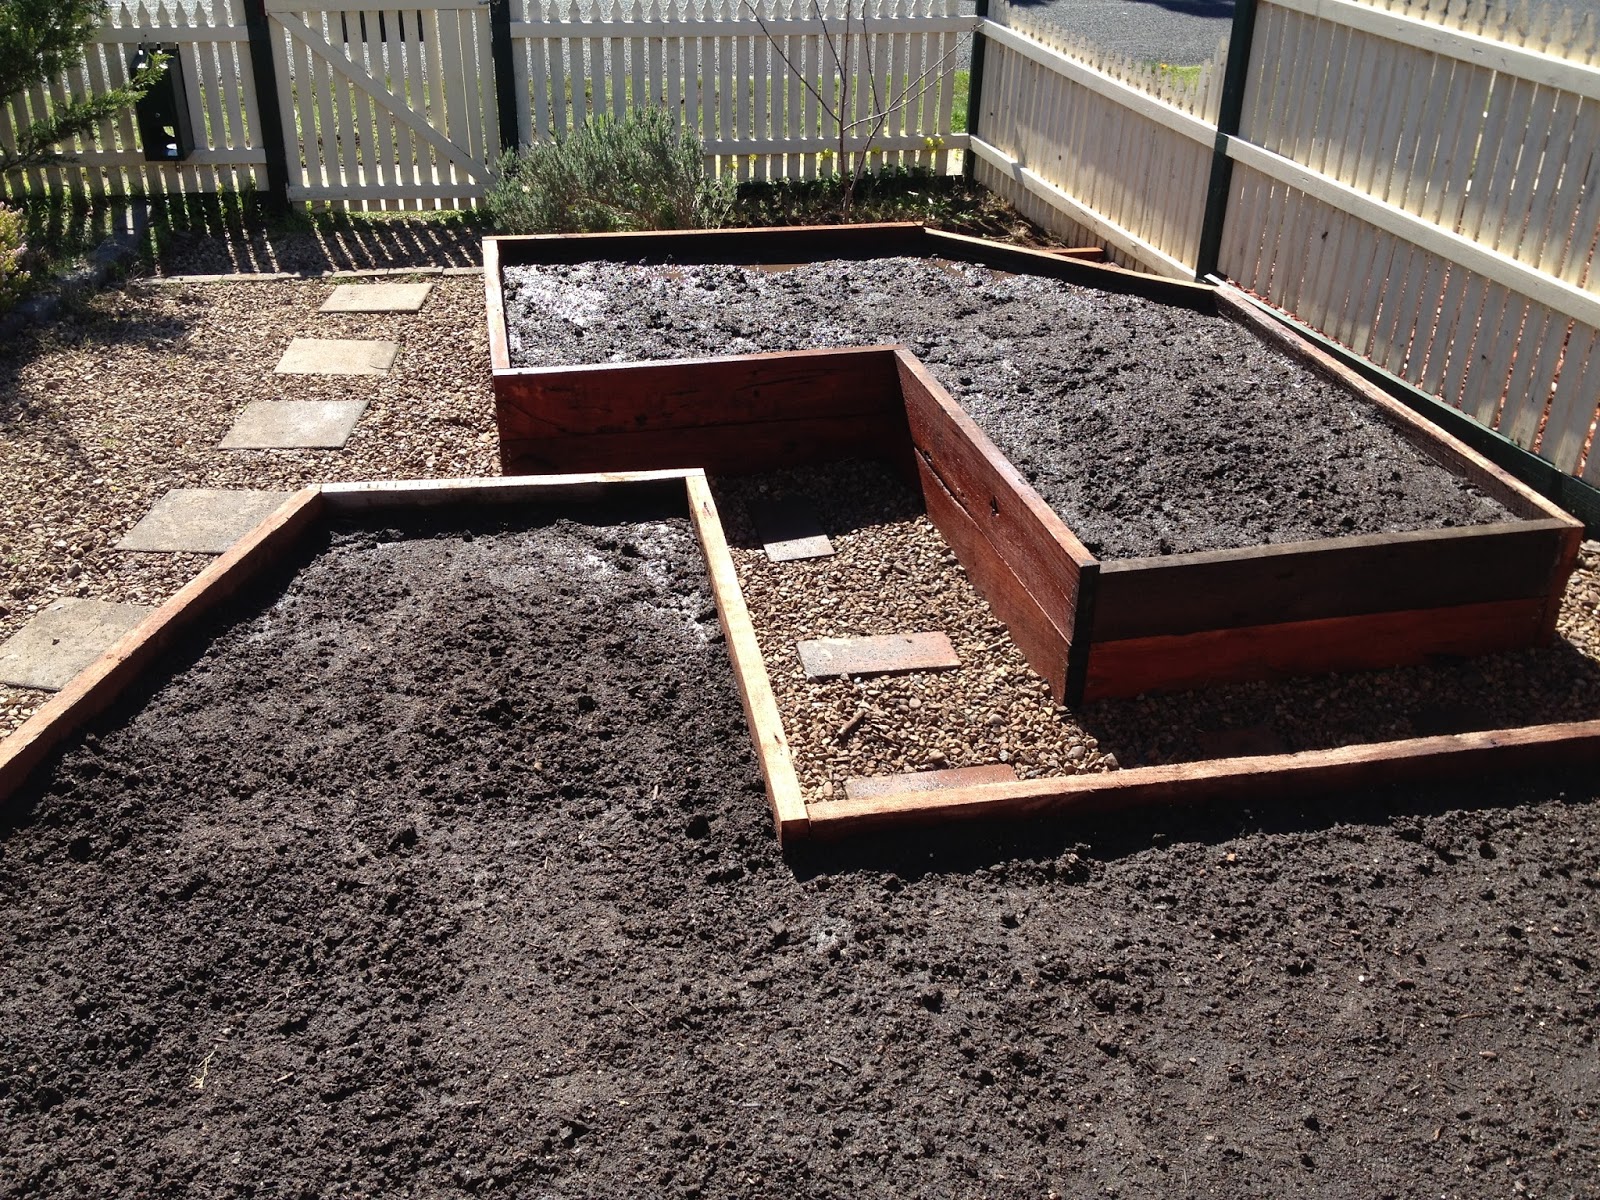
Here is the back of the beds, and the pavers I was talking about. The pavers are laid over the weed matting, and then pebbles are placed around them. The great thing about the landscaping was that we did not have to buy anything. I reused stuff that we already had, and made it blend in. Very chuffed.

At the front, Jake dug in the last sleeper to segregate the cherry tree from the garden beds. It looked really nice once it was all landscaped.

Well look who dropped by. The caterer! Kim kept us all fed and watered throughout the day. Thanks Darling. You made the day complete.
And this is the view looking over the top of the brick wall. Looks great doesn’t it. I am so pleased. I can’t wait to get some veggie planted. Even the next door neighbours said it had transformed a very tired looking area. I totally agree, and it will be edible to boot.
To finish it off, today I sewed flower seeds along the west and northern sides of the garden beds. Not in the beds themselves, but at the base of them. I raked back some of the stone, spread the seed, then spread a bit of soil from the beds on top. Hopefully in a week or two we should see the start of some Forget-me-nots, Marigolds, and Nasturtiums. I expect that these flowers will attract the bees, which will be most welcome. We do have many bees pollinating the stone fruit trees, but a few more will not hurt, especially when I plant pumpkins and zucchinis.
Anyway, a great way to end winter. What do you think? Did these beds scrub up okay?
Looks great Gav. Love the shapes, honestly.
Say, shouldn’t you mulch ’em rather than leaving the soil exposed like that?
Good pick up Pavel. Once the beds settle, I will be mulching them both. Currently the soil is too high, so the mulch will blow away.
Gav x
They look amazing. You would die if you saw my vegie patch 🙁
Thanks Sham. Hey, I have been scoffing your dried fruit products for fathers day. They are delicious. Are you okay if I do a blog post about them? Can you send me some more information?
Gav x
Need you ask, they look awesome. A lot of hard work for the team but surely worth it. Now if you just want to hop in your hybrid and toddle off town the road to my place, i could use some of those beds as well. LOL. Have a good night sleep.
OH, hope you enjoyed your Father’s Day.
They don’t come cheap. I paid them $25 an hour for their labour. I of course was free, but unable to lift heavy things, so not much use to you Lynda.
I had a great Fathers day!
Gav x
Your in the wrong job mate xxx
I don’t know about that Phil. I couldn’t do it every day, it would kill me.
Gav
You and your crew have done a great job with the veg beds Gavin!
Looks like you are having gorgeous weather there. Plenty more sunshine coming your way, it was quite hot here today 🙂
Hi Tania. It was a lovely day. Even managed to get a little sunburn. Mind you, it is far too hot for the start of spring.
Gav x
Great work, our veggie beds are all out the front. It is great getting home and walking to the front door past edible gardens filled with life!
Good permaculture principles. Keep zone 1 close to where you see it every day. More likely to tend for it better. Well done SS.
Gav x
That is very impressive, well done. We also garden in raised beds. Each one used to be 8′ x 4′ (both L shaped so in effect 4 beds) plus one board high around 6″. As we aged and my back started to play up, they were dug up, re-arranged into 3 beds of 3′ x 3′ x 2′ high. Much better. I wish I had thought about straw in the early days, would have saved adding all the soil at the start!
Thanks Dc. The higher beds are gentle on the back.
Gav
Wow the garden beds look amazing your very lucky with all your helpers, well done
Thanks Sharon
I am curious why you didn’t make these as wicking beds?
Hi Pam. Basically I ran out of funds. It would have cost another few hundred dollars to wick them. Geotextile fabric is expensive.
Gav x
Gav, they look awesome. They will look even awesomer with their skirts of flowers (nice use of an edible flower too with the nasturtiums) and their crops growing. And well impressed with your labour crew too.
hey Jessie. the flower seedlings have popped up over the weekend, so looking nice so far!
Gav x
Envious. You’re a couple of years ahead of me with your front yard garden beds. They look great and I, like you, like the fact that you were able to do the paving for no additional $$$.
Garden beds look great, but one q – do you really want to plant forget me nots? We used to have them in my parent’s front yard years ago, they spread like weeds and ended up all over the place because once the flowers finished the dried seeds would stick to your clothes/the dog, and travel! And they were a right pain remove for said clothes/dog too!
Hi Dianne, I will take it over cooch and kikuyu grass any day.
Gav x
Hey Gav do you get your mushroom compost local? Emma in Bacchus
Hi Emma. From Melton Garden Supplies. On Coburns Rd, just north of the railway tracks
Gav x