On Saturday, we held a clay oven workshop at our place which was well attended by members of the Melton Sustainable Living Group. I had ten willing workers at my disposal, and I managed to occupy them all on various tasks.
So from this:
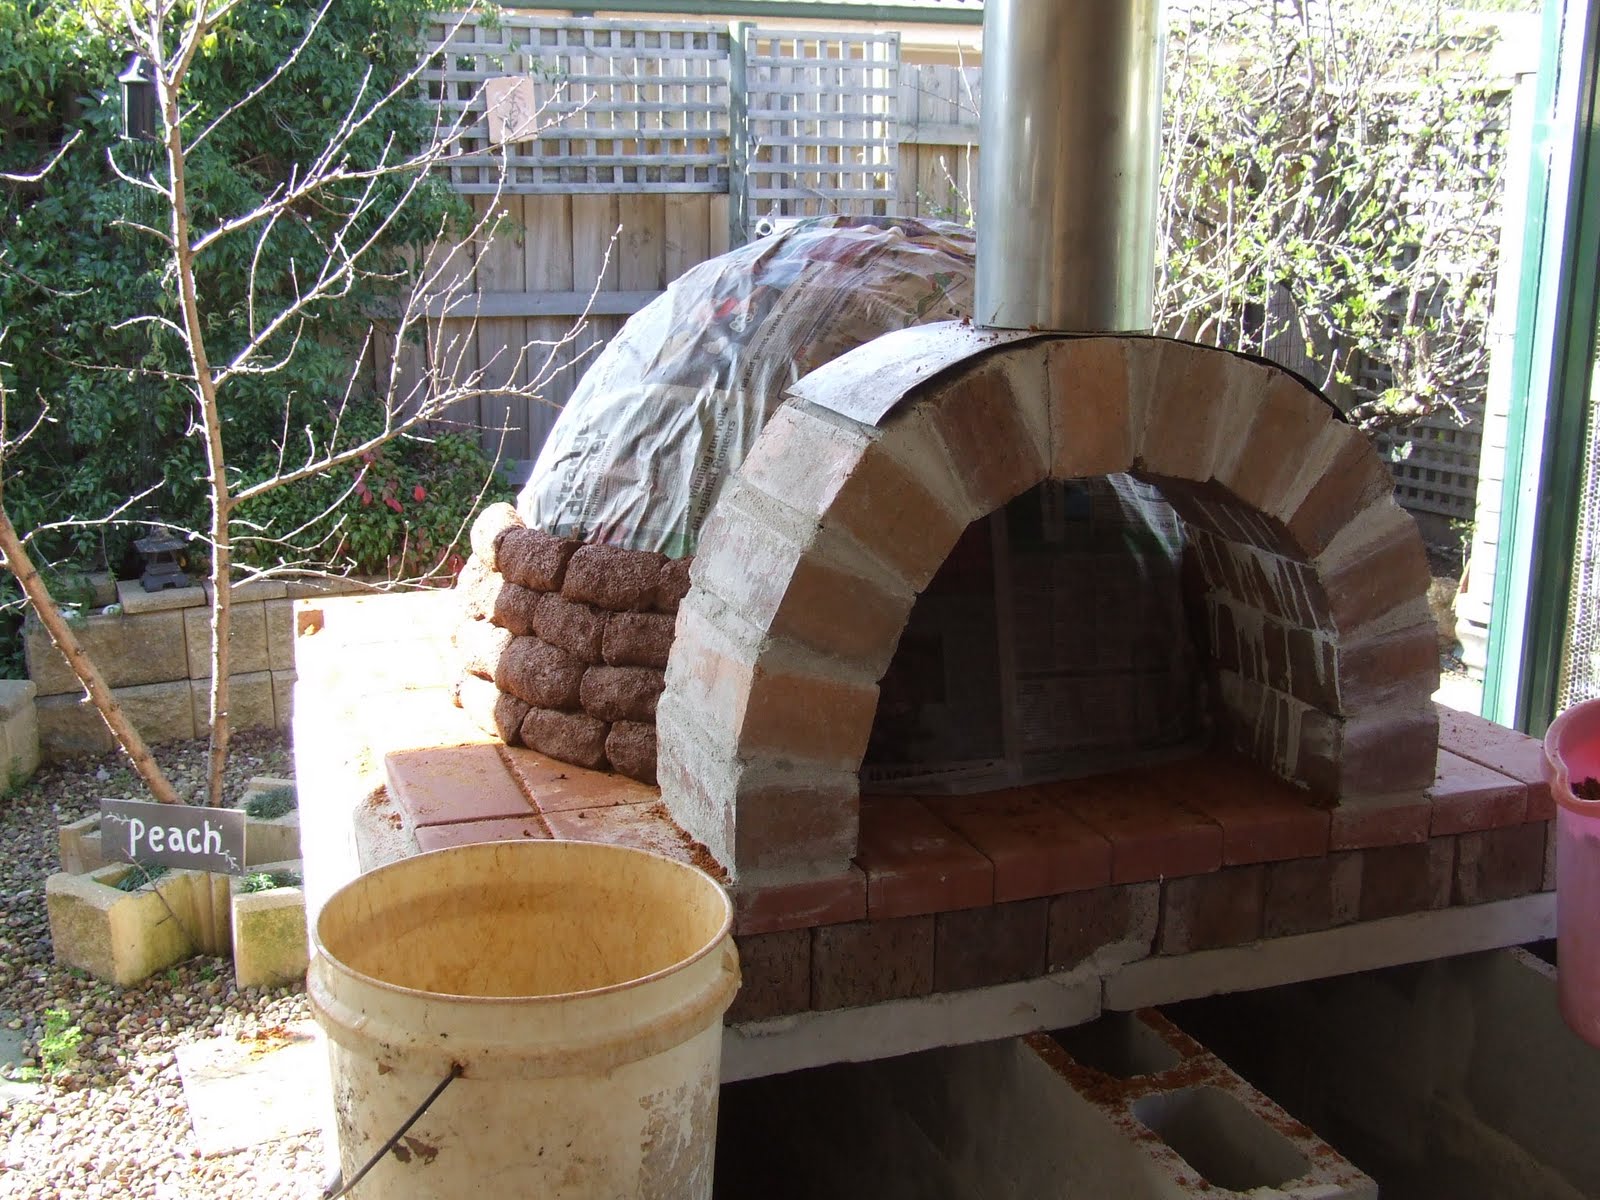
To this in two hours (plus one day’s drying and sand removal)!

So let me step you through what we did during the workshop. However, be warned, there are lots of photos (click to enlarge).

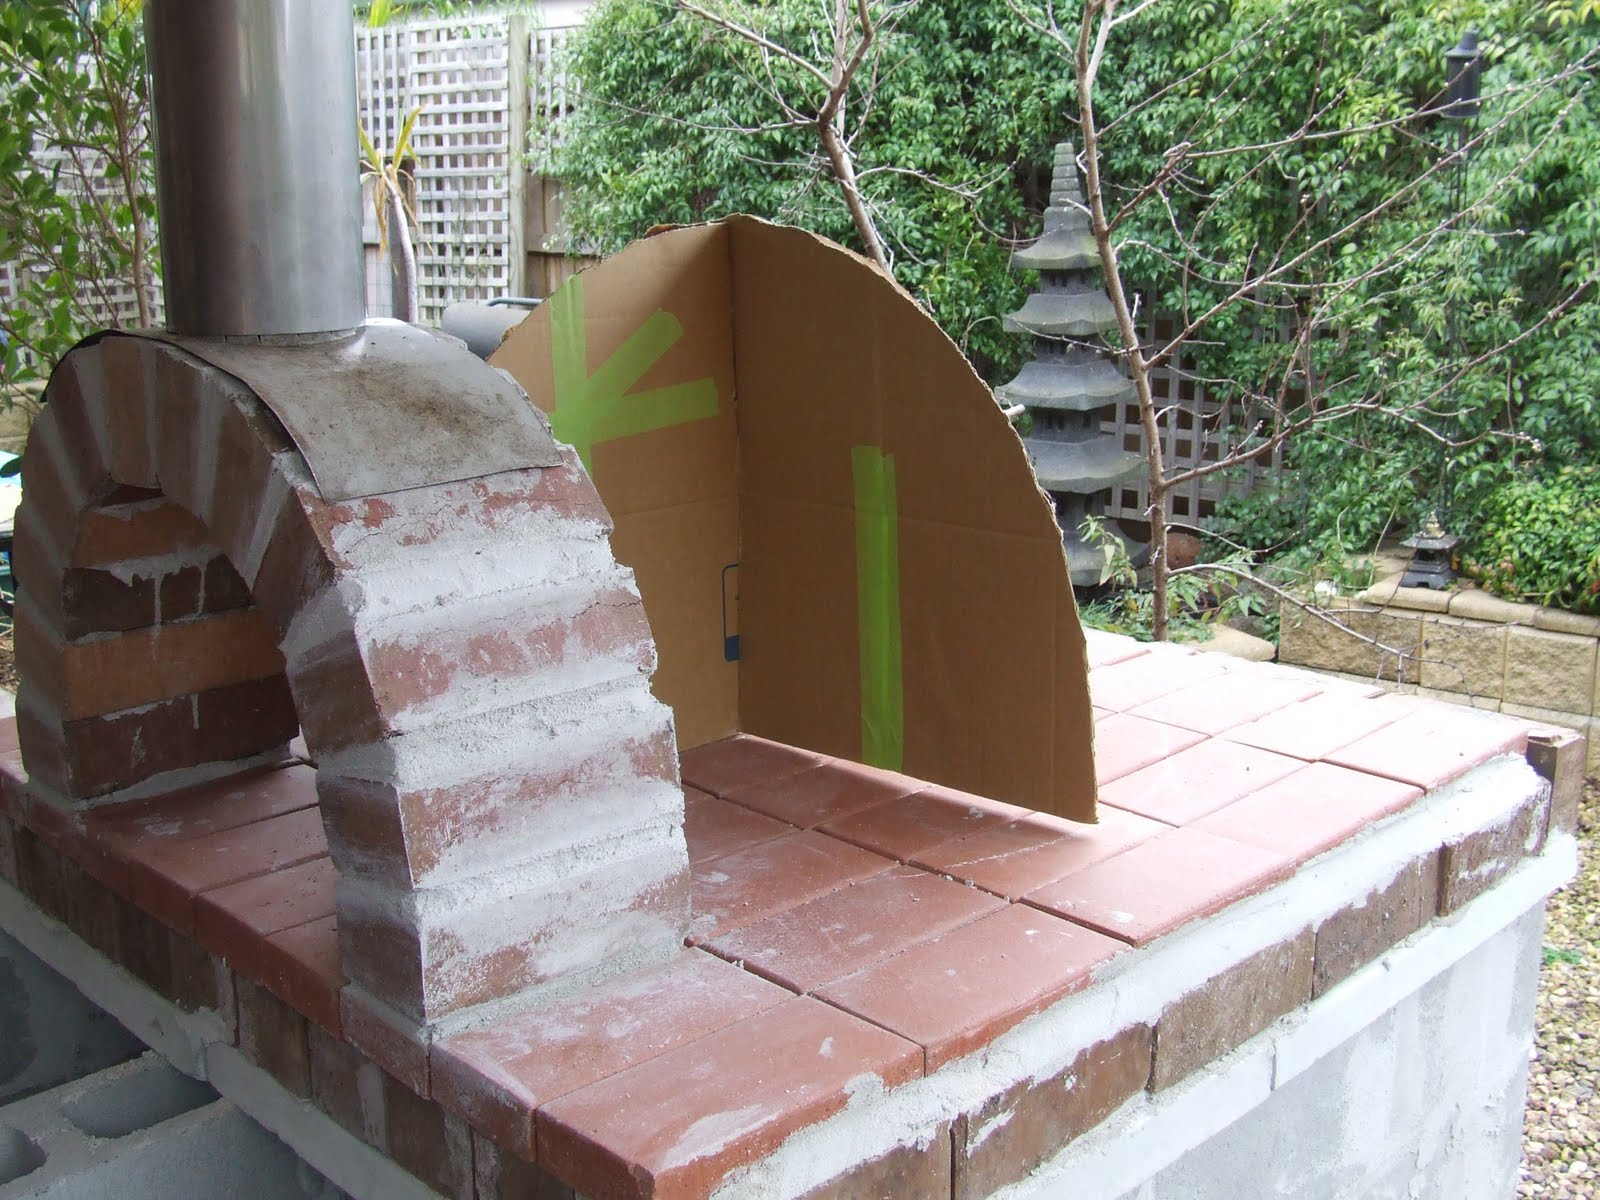
Before everyone turned up at 10am, I received an order at 8am of 1 cubic metre of packing sand, which has a high clay content. Kim and I had to shift this sand from the roadside to the area where we were making the oven. It took me the good part of an hour to do this work alone. After a cuppa and a biscuit, I made this template for the sand dome. It is 50cm high and 85cm wide.

This picture shows how the sand dome was being formed. Four people on a quadrant building up sand.
Here is the sand dome nearly finished. You can just see part of the cardboard template. Don’t you just love the smiling helpers!

And from the front angle. The sand dome just touched the front of the door arch.
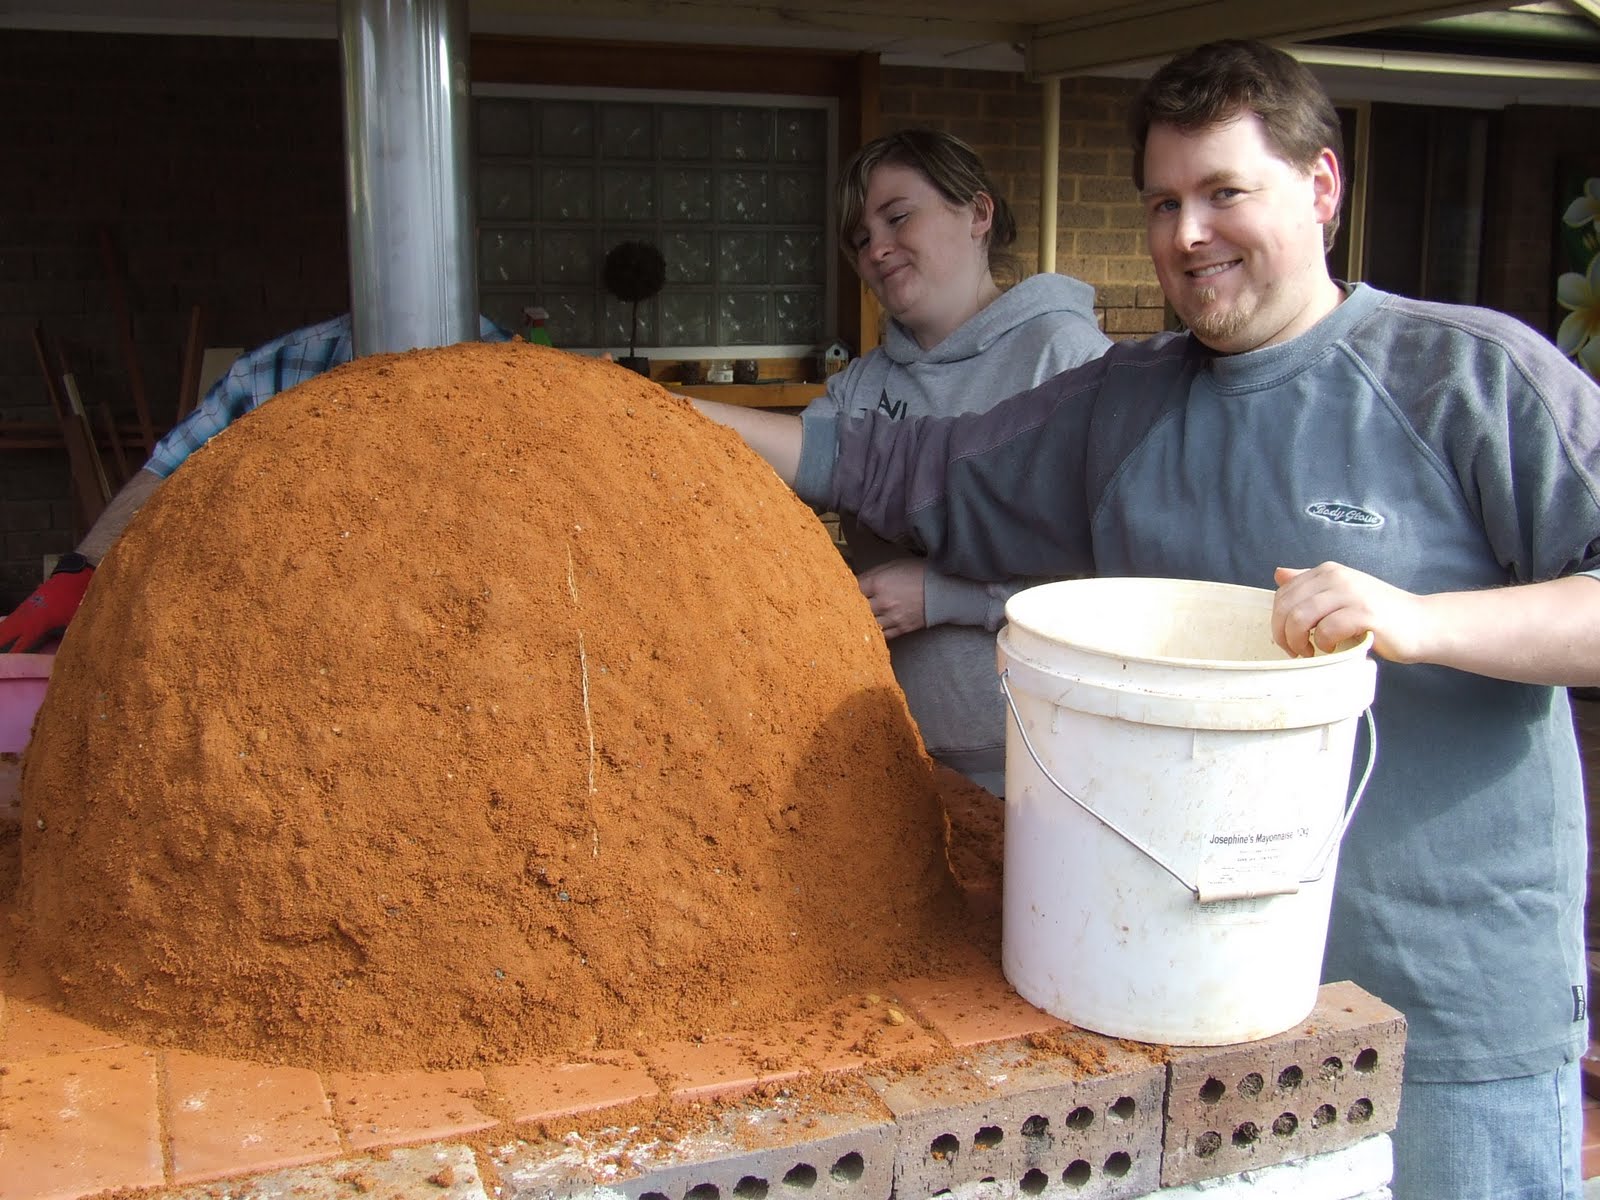
Now that the sand dome was finished, it was time to get down and dirty. We used a 50% packing sand and 50% clay mixture, and enough water to moisten it. There was quite a bit of aggregate pebbles in the sand as well, and a few handfuls of sugar cane mulch in the clay when we dug it out of the ground. I didn’t think it needed any more organic matter.
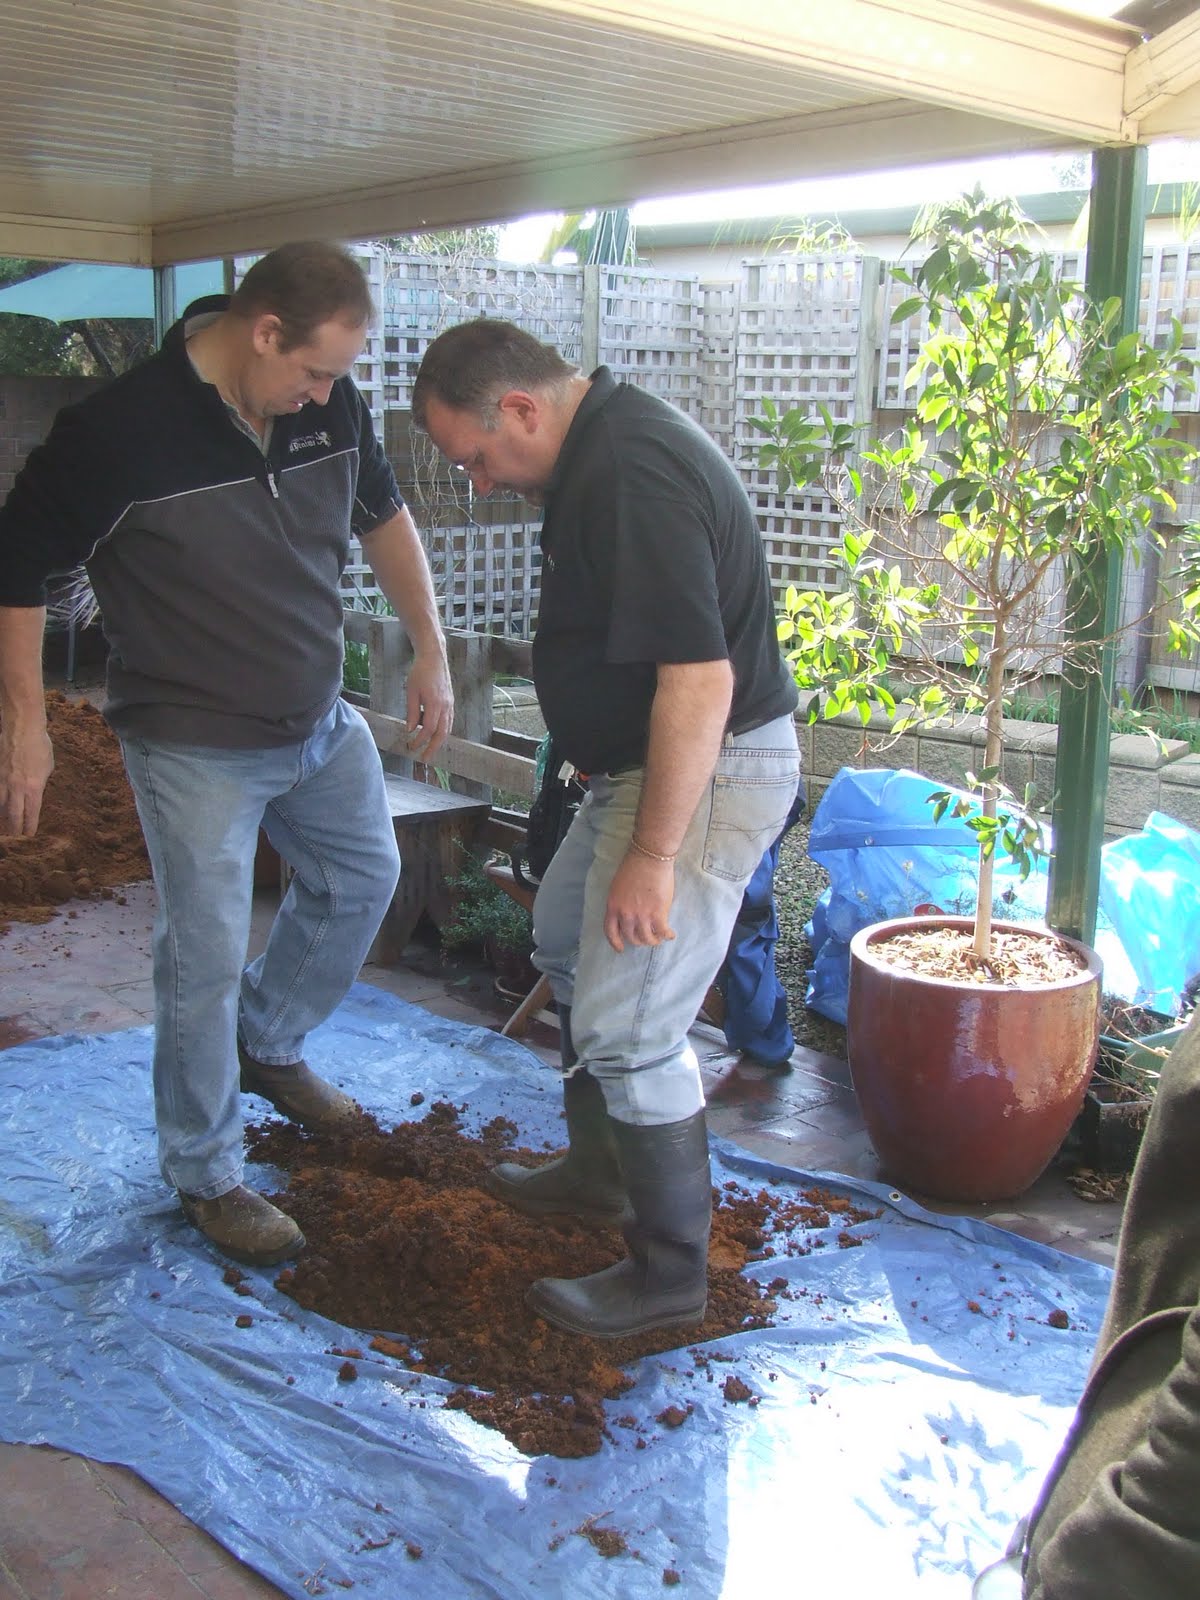
We started off with two stompers…..

Then there were four. It became contagious. It was great fun with everyone in gumboots (wellingtons to those in the UK) to stop their best shoes from getting caked in the stuff.

Then on to the table where a team of five helpers made clay logs that were about 6 cm wide and various lengths.
Then yet another team put the logs around the sand dome. The dome was covered in wet newspaper so that it would make the sand easier to remove once the clay was touch dry.

The logs are placed like bricks to add rigidity to the form (well as best as can be).

Nearly at the top of the dome. The dome at this stage was just at the edge of the door bricks.

This is the full height of the flue, just so you get a better idea.
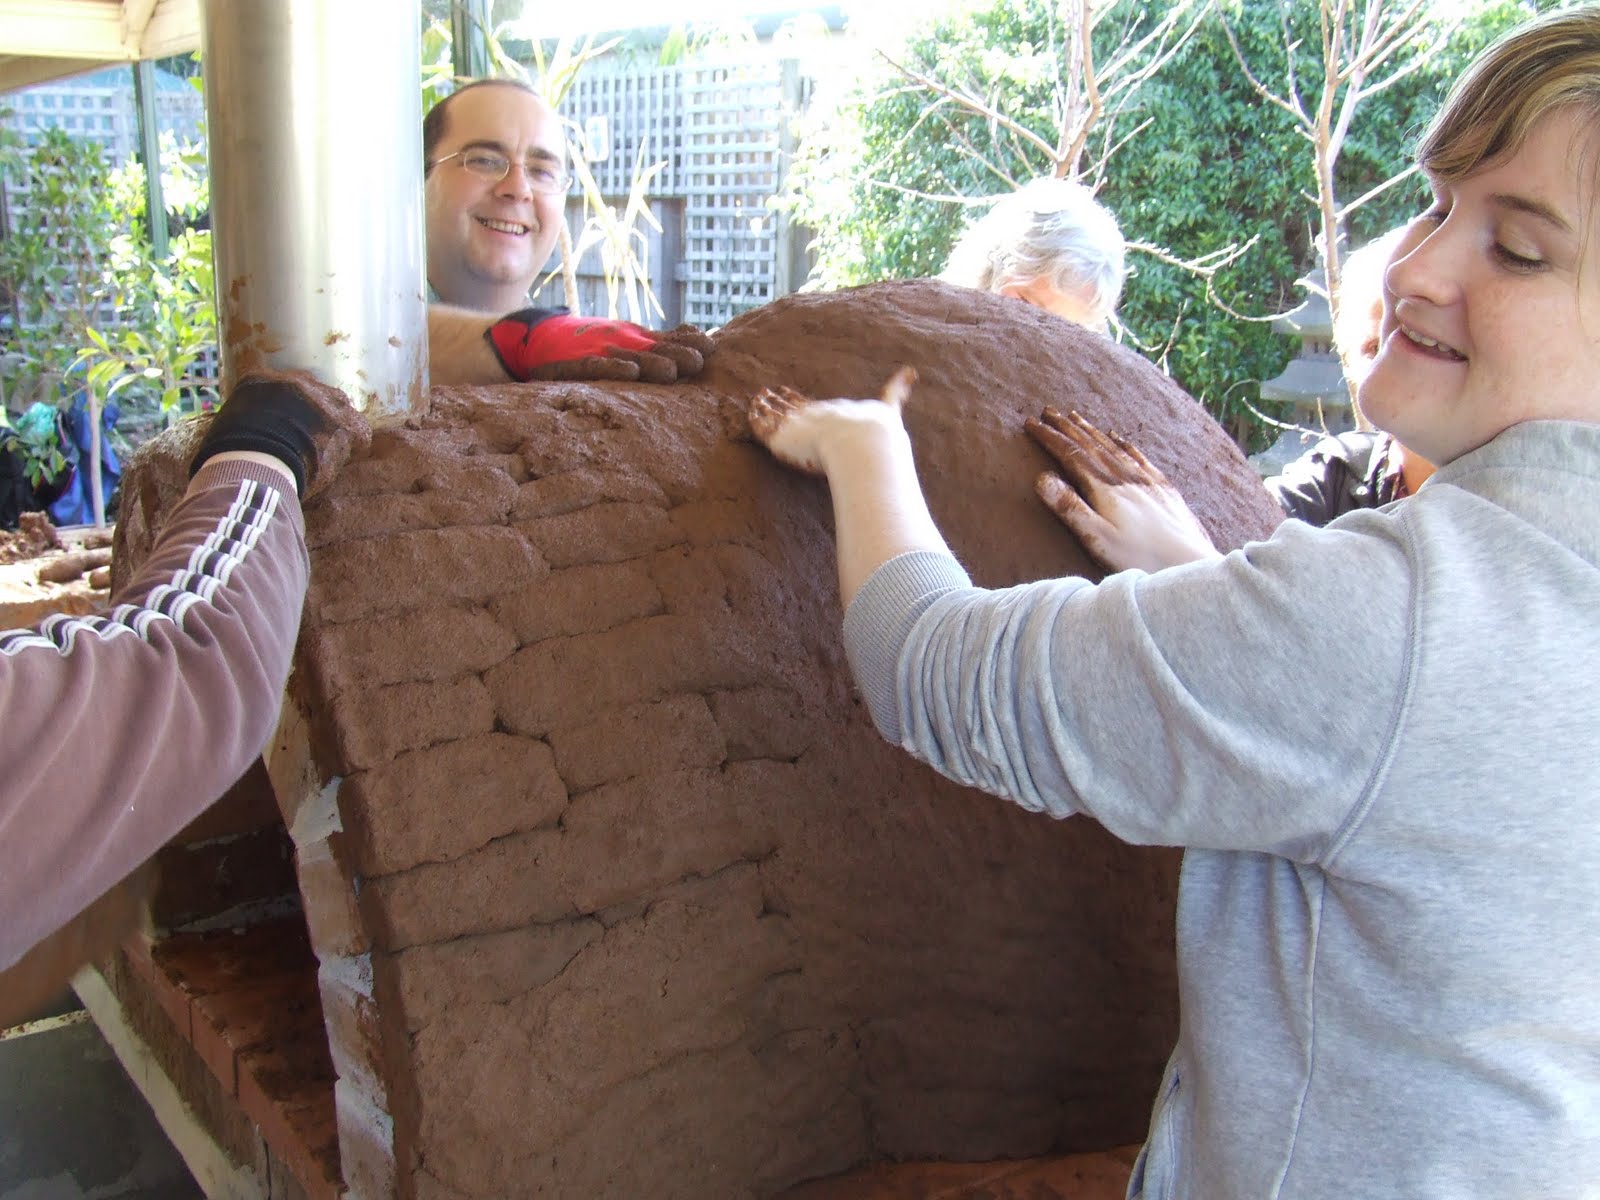
Once the dome was finished, we had to join it to the brick door arch. More clay logs!
Then we started to smooth all of the cob logs.
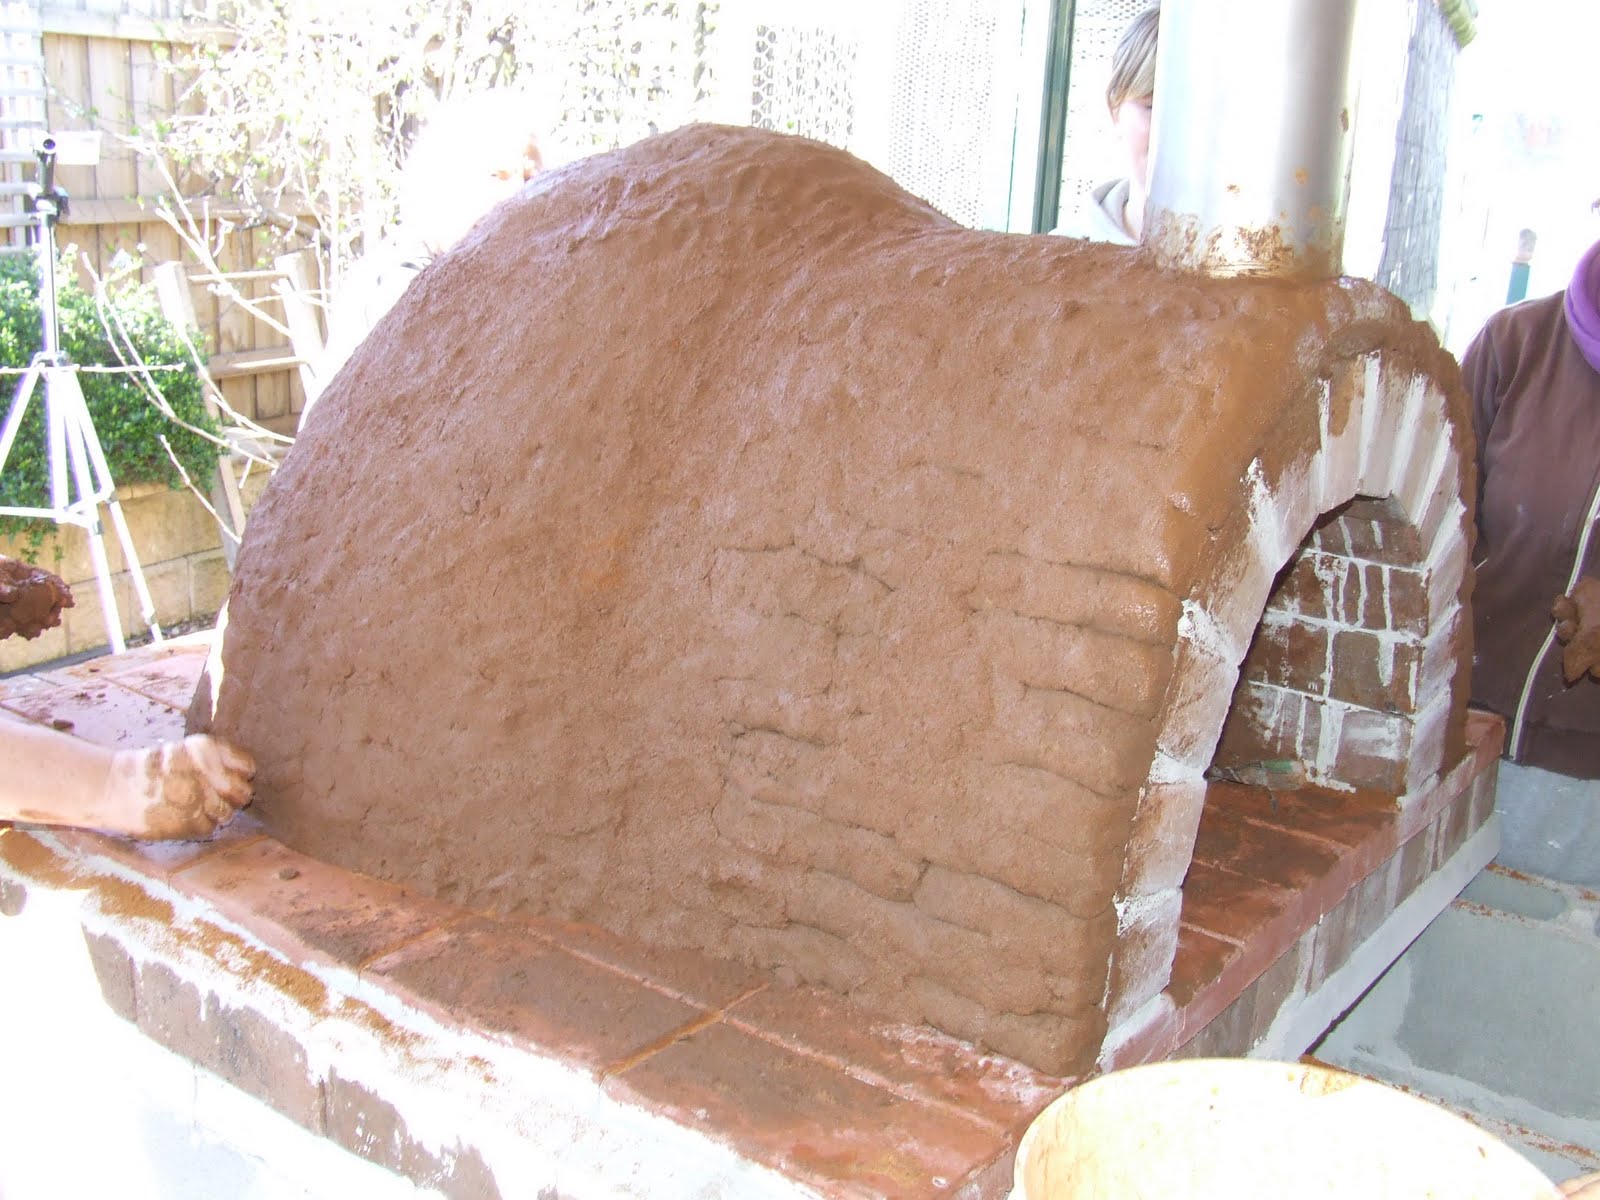
Then we wet our hands and gave it a nice sheen. We also filled any depressions in the clay dome.
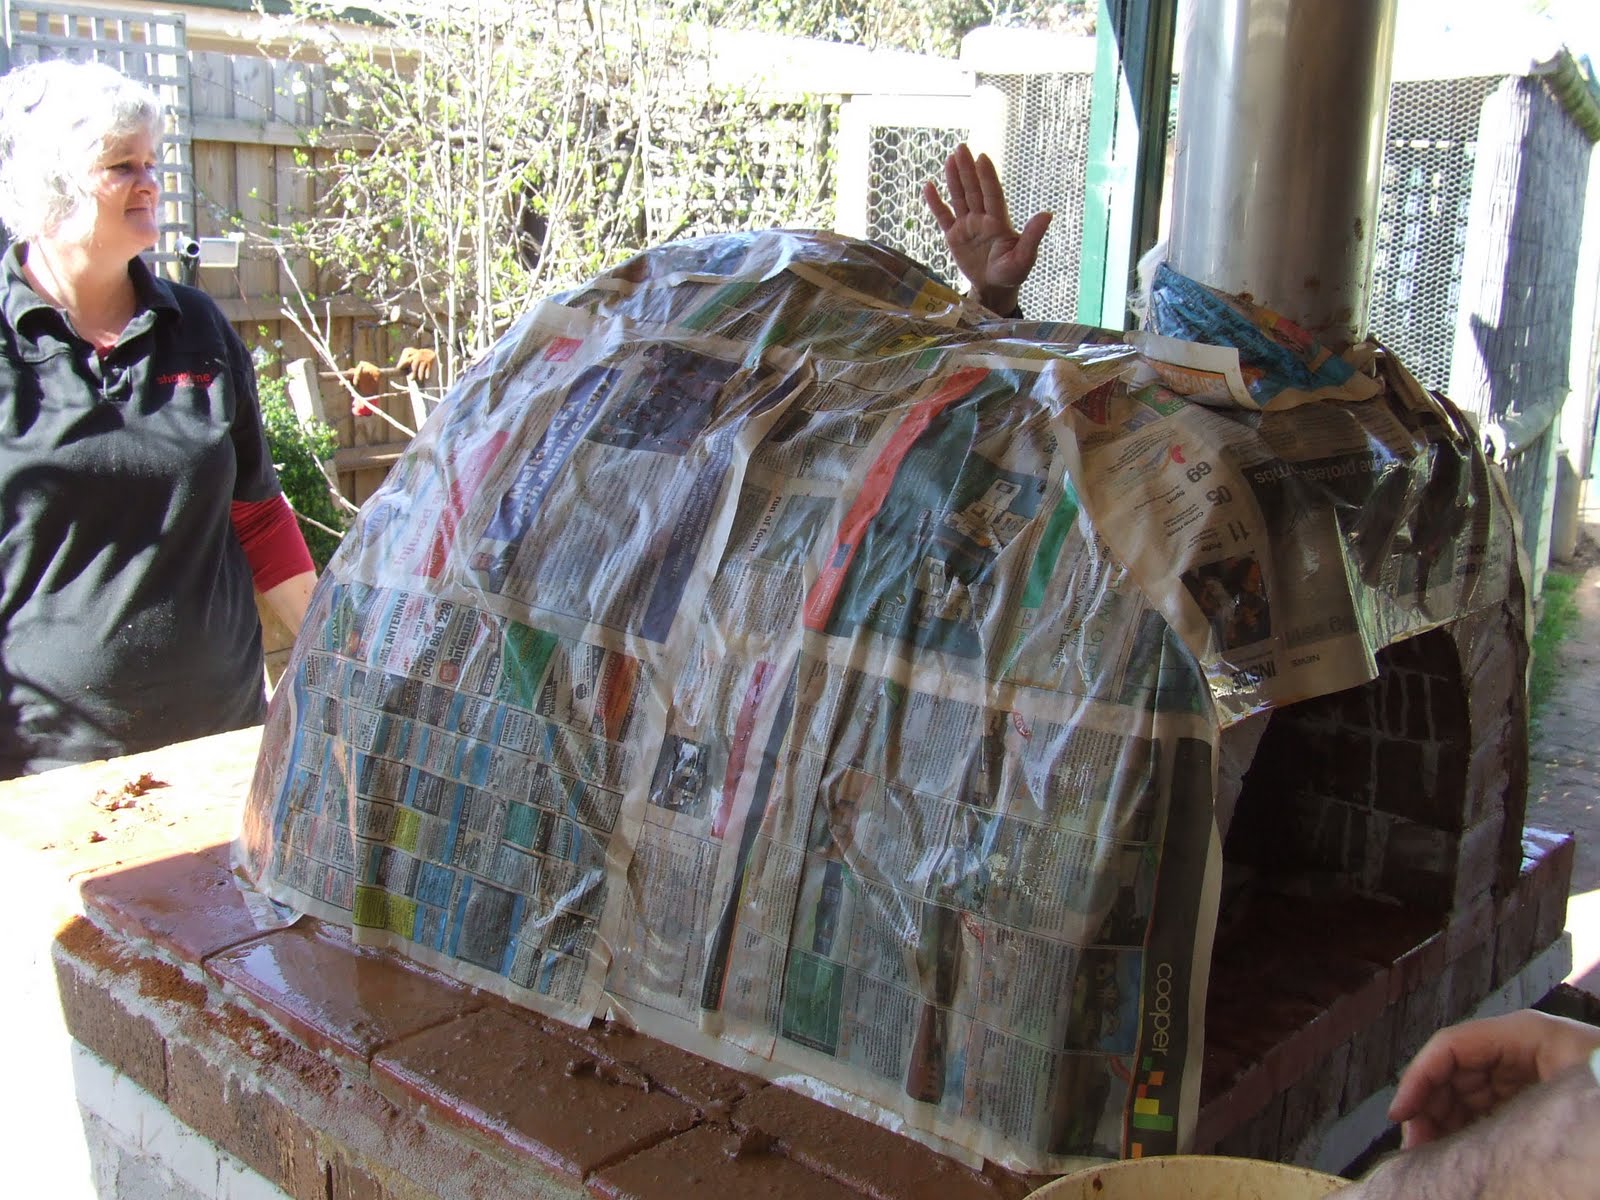
As the sun was shining on the clay, we decided to coat it in wet newspaper to slow down the drying, to hopefully avoid some cracking. This was the point that the workshop finished, and Kim served us a lunch of home made pizza to order, then dished up buffet style alfresco. Everyone really enjoyed themselves, and a few people expressed interest at holding another clay oven working bee in about 6 months time. I am certainly up for it, now that the design seams to work okay. Thanks to everyone who turned up and lent a hand.
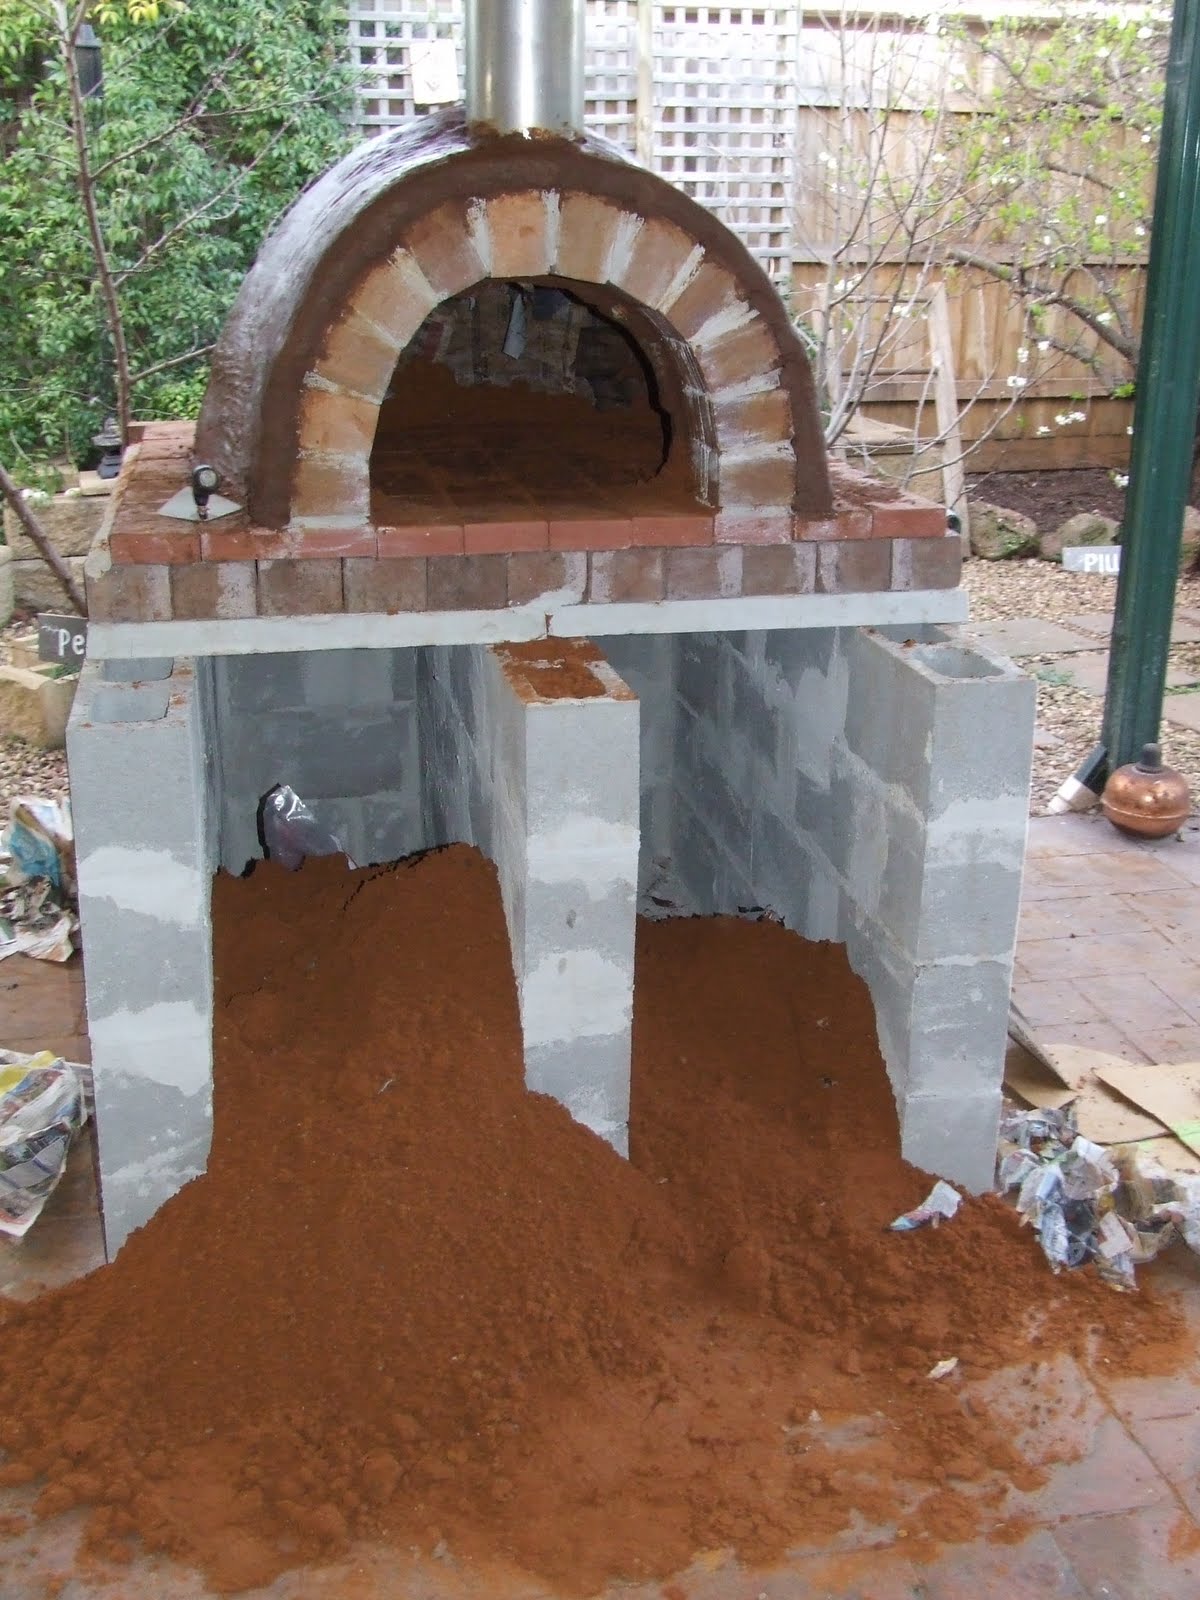
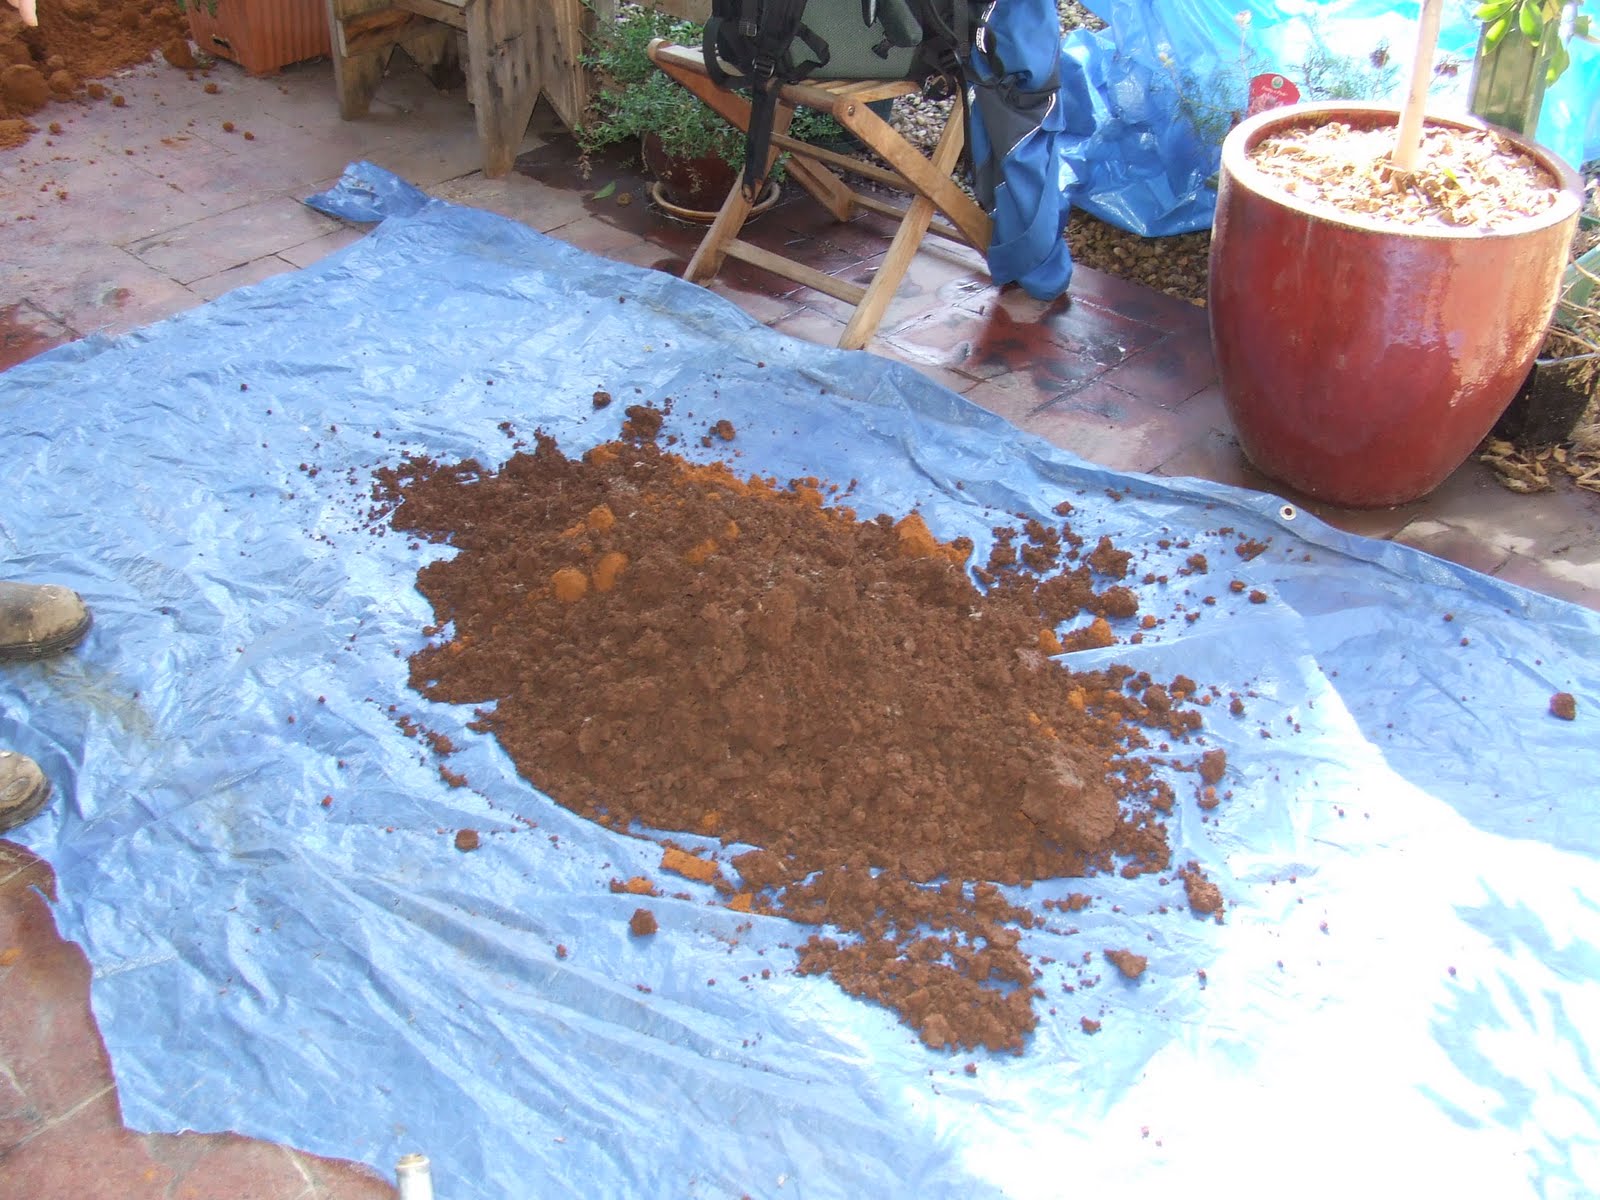
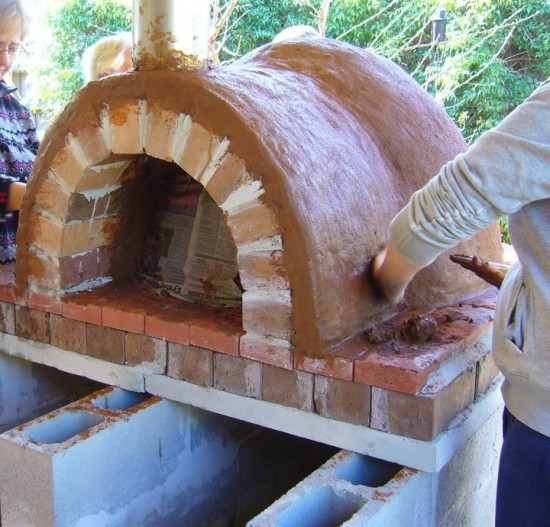
Anyway, yesterday some larger cracks started to appear, so I consulted my Back Yard Ovens Volume II book that I got from Earth Garden magazine, and it suggested that once the clay sets to a cheese like hardness then you should remove the sand. The reason being is that the clay is trying to shrink, but the sand is getting in the way. So out with the sand, which I will have to pick up when I get home.

At one stage I had both shoulders jammed in the door arch trying to get the sand out! I wish someone had taken a picture of that. The sand came out fairly easily once I had undercut the sand dome. Most of it just collapsed and I just scooped it out with my arms. The newspaper layer worked well.
I can’t believe how big it is inside. I estimate that with the hot coals pushed up around the edges, we will be able to cook 3 pizzas at a time, and afterwards about 4 loaves of bread.
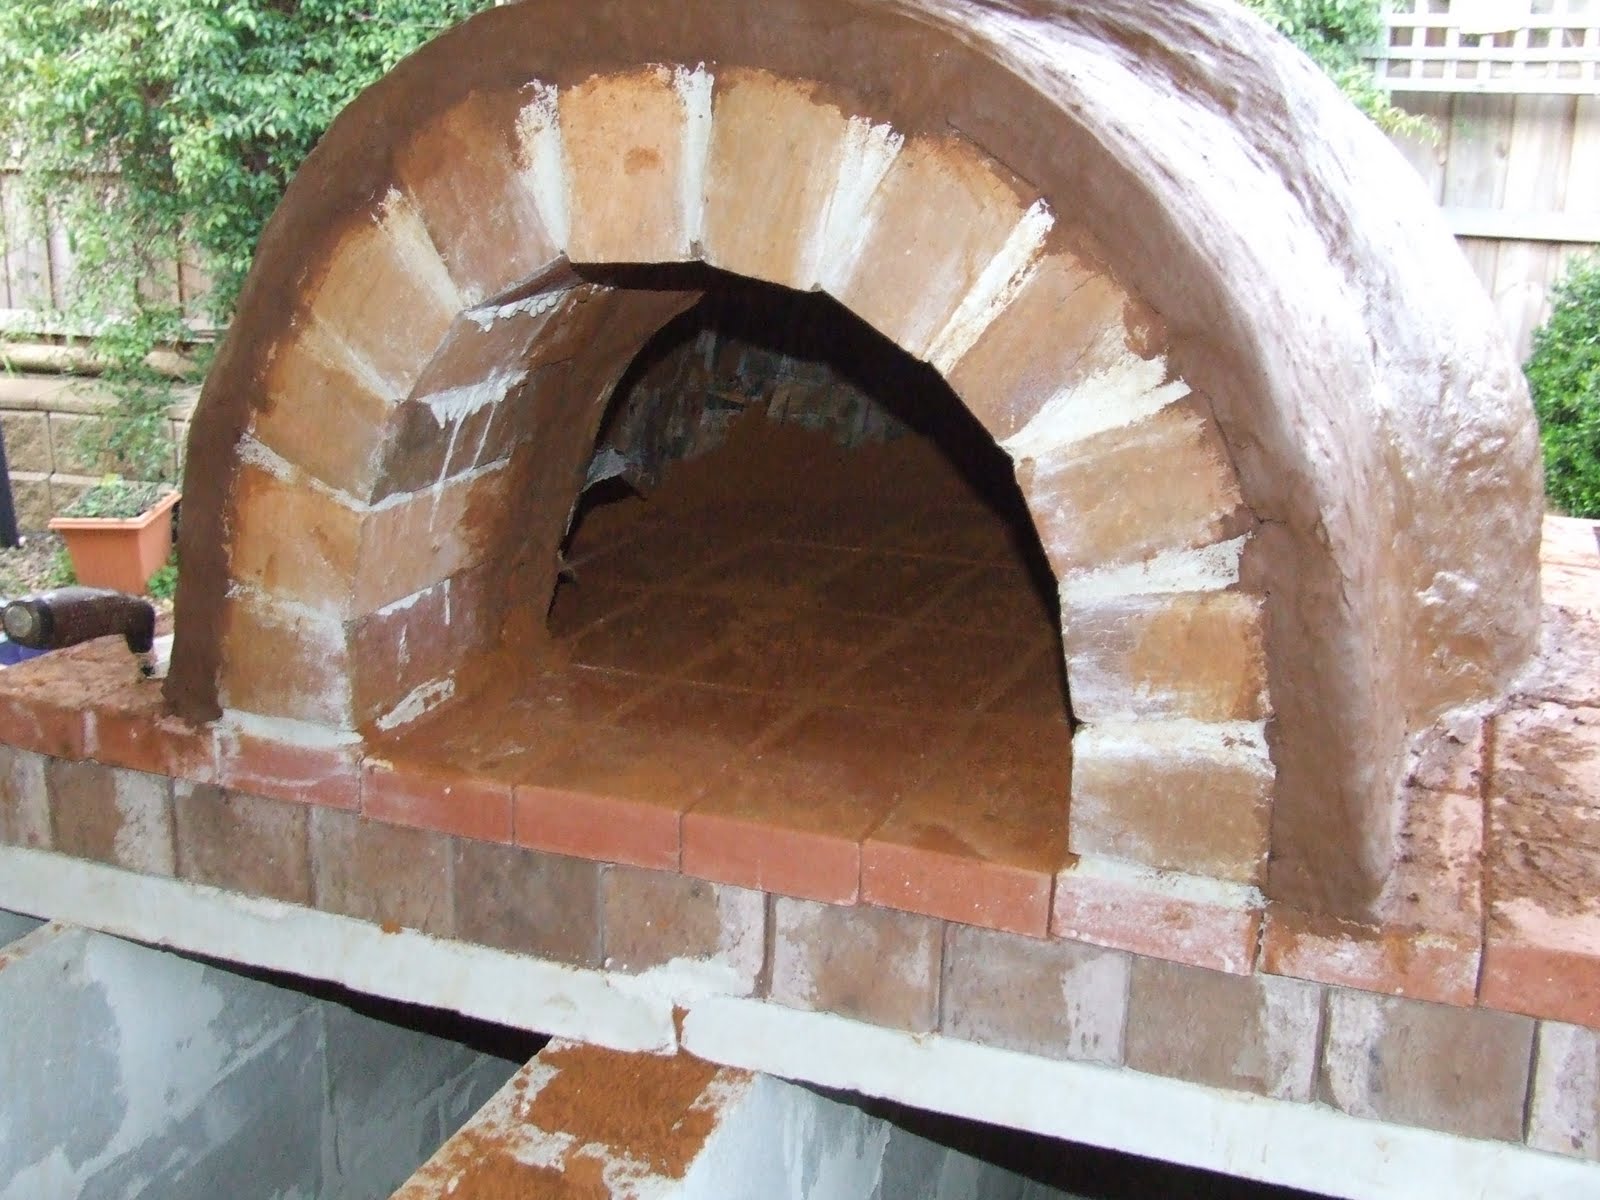
So next steps are to move the sand that I left on the floor, light a small fire on every night for the next week to help the clay dry out, then on the weekend apply the glass wool insulation, chicken wire and clay/sand/cement render.

What do you think of the progress so far? I am personally ecstatic about the progress, all in under a month of weekend work so far.
Want to learn more? Check out my eBook about how I built this clay oven!

Build Your Own Backyard Clay Oven
It seems like just about everyone wants to cook outdoors these days, and what better way to do it than in your very own backyard clay oven.
This book shows how easy it is to make a clay oven from scratch, and includes detailed instructions, with over 60 photographs and illustrations.
It is time for the humble Barbecue or Grill to move over, and for the backyard oven to step into the role of the ‘must build’ outdoor cooking accessory for the 21st century.
It looks great! I love the cardboard template and clay log idea. I plan on making one in a year or two and I may borrow these construction ideas. 🙂
It looks fantastic, Gavin. Great having so many helpers. I am so jealous. Though I don’t think I can have a clay oven, as mine won’t be under cover. I think I will have to go with bricks. Or rethink it and build a shelter for it. Can’t wait to see yours up and cooking.
I just LOVE it! We bought a book a couple of years ago, all about making pizza ovens. I have looked at it several times but unfortunately it’s way down on the list of things we need to do! I’m really enjoying watching yours taking shape.
Looks fantastic!!! I bet you are just itching to get cooking in it. Those Earth Garden books are such a handy reference..I don’t think I’ve got volume II, just the first oven book along with Woodfired Oven Recipes. Such fun to have a nosey at other people’s ovens! Looking forward to seeing your oven’s next stage.
Looks great! Couldn’t help thinking about Tom Sawyer (or was it Huck Finn) – make work look like fun and you will have lot’s of willing helpers.:)
What a great job Gavin.
If you feel like a holiday, you could come by my way, I have the perfect spot for one of these…
you know when you where a kid waiting for santa to come..this is how I feel about watching you build your oven..its looking fabulous
That looks brilliant, well done to you all and your band of little happy helpers.
I bet the food went down well after all the work, although I must say it looks like everyone was having lots of fun!
Sue xx
awesome, will enjoy watching the next phase. I’d be interested to know how much the project has cost.
it looks amazing! well done
Excellent…It looks lovely…I’m showing this to hubby when he gets home from work….well done.
Gav, Kim and helpers – it looks wonderful. You’ll be able to cook such a huge range of food in this – I remember Jamie Oliver roasting various meats and vege in his along with dough based fodder. I’m really looking forward to see the finished oven with Kim’s decorations all over it (no pressure!).
Sending care and huggles to you all (please snuggle in an extra huggle to you new doglet who seems to have settled in so well),
Michelle over the ditch in Wellington (no snow this week!!!)
So far it is looking great but why are you finishing it with the very ungreen cement? Ours is 3 layers of cob all slightly different. We used this book http://www.handprintpress.com/books/build-your-own-earth-oven/ for instructions.
It is now 5 years old a going strong.
It’s looking great, Gav. I bet you can’t wait to fire her up!
Looks awesome…. now if only I could bake some of my sourdough in there.
I have wanted one for so long. You have really encouraged me here.
This looks awesome, would love to get one of these going as I make Artisan breads, worried about sparks from the fire though as we live under thatch?
I used an exercise ball, blew up, chicken wire, Portland cement, sand and lime, spread on ball, painted with white staccato. Fire brick on bottom. Done in two hours, pulled pin on ball. Done.