Anyway, the task this week was to lay a layer of bricks, fill them with sand, lay pavers on top, and then build the door arch. Happy to say it was mission accomplished just after sunset this evening.
Firstly, I had to clean up 60 old house bricks that I saved yonks ago when we ripped up a few brick paths to make the front decked area. The bricks still had lots of hard mortar on them, so I got out the bolster chisel and hammer and spend a good hour and a half fixing them up. Kim then loaded up the wheel barrow in small batches and delivered them to the oven site.
Then I set about laying the bricks on top of the cement pavers that I put down last weekend.


You will note that there is a gap at the front. I am going to put a hardwood mantle piece at the front.

To the left are the pavers for the oven floor, and the cleaned up bricks that I used to put on top of the slab. Also you can see at the back the solid bricks I will be using for the door arch and a china mans hat for the top of the flue.

Here are the two stainless steel flue pieces that will connect to the top of the oven and go through the roof.
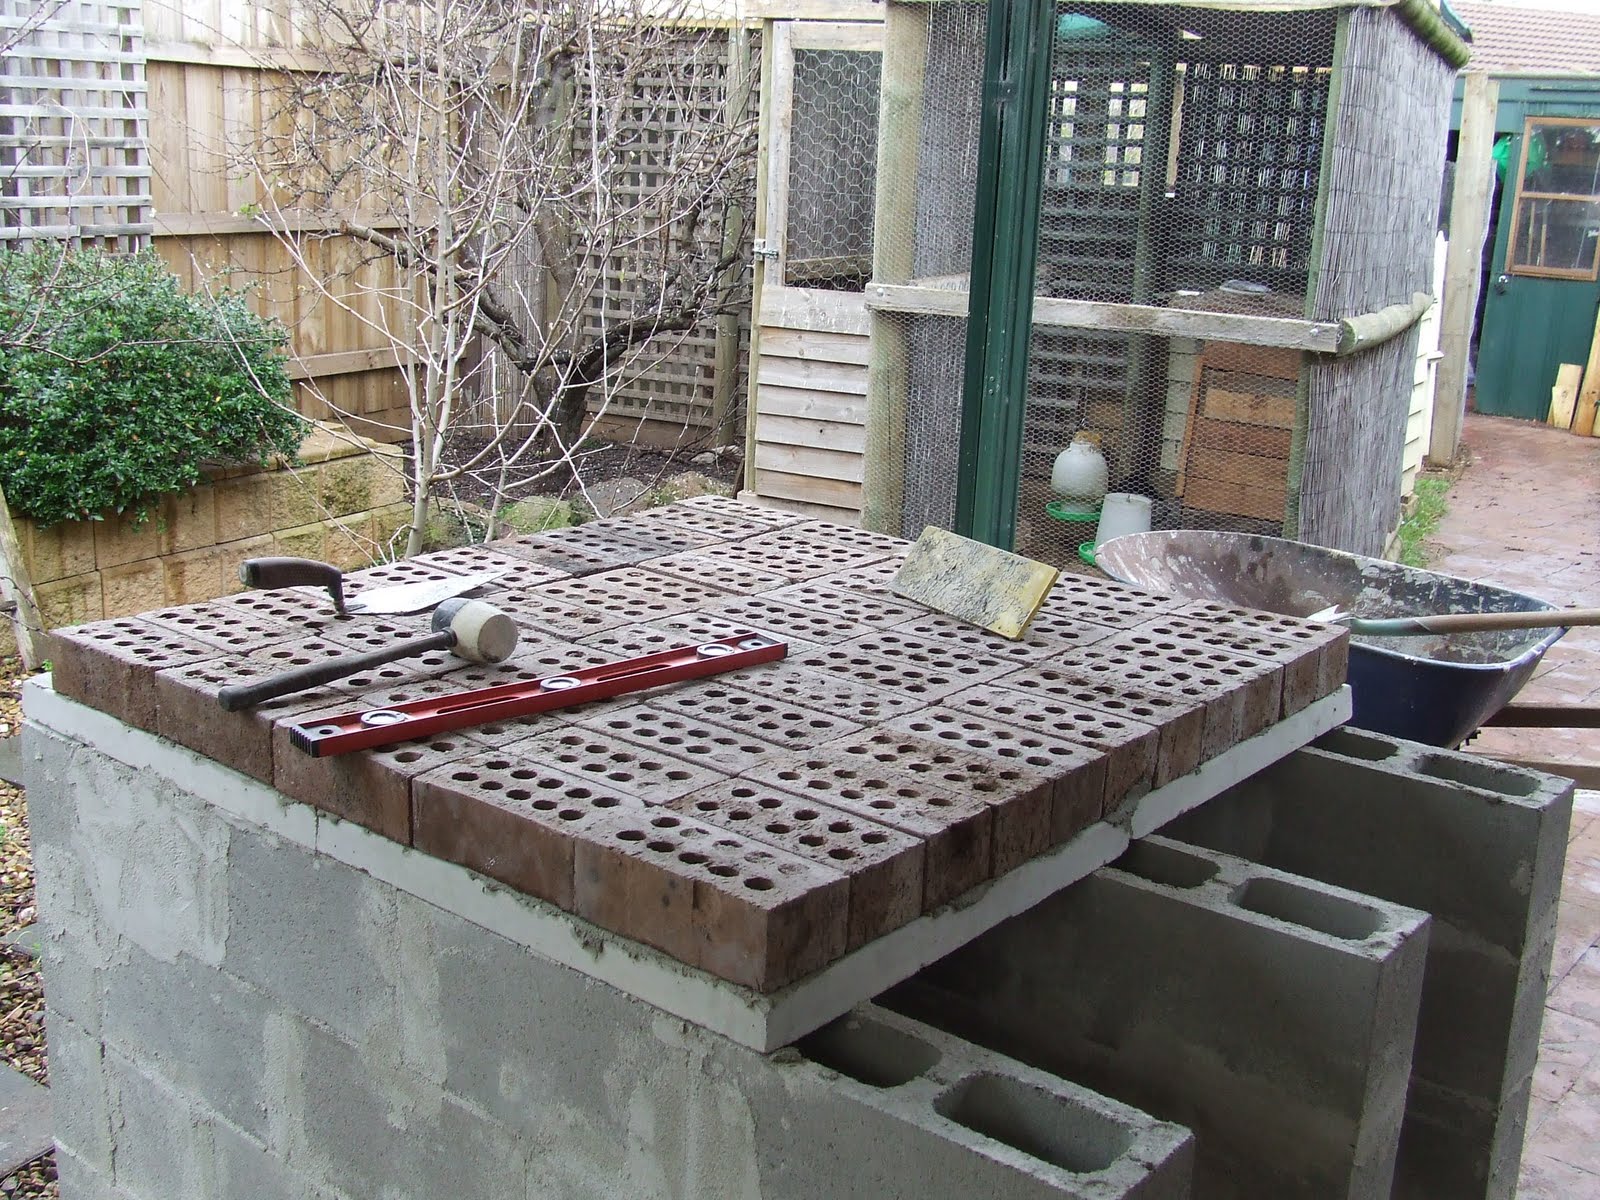
I laid the old house brick on top of the slab, made sure it was fairly level, then used a bag of sand to fill in all the holes to make a smooth base for the paving bricks. The extra layer of bricks and sand was to give the bottom more thermal mass and rigidity. We both though that we would loose too much radiant heat with only a slab and pavers, so decided to add this extra layer.

Next, I laid down the paving bricks, and put a cement edge at the back and both sides. If any bricks get damaged in the oven, I will be able to lift them easily to replace them.
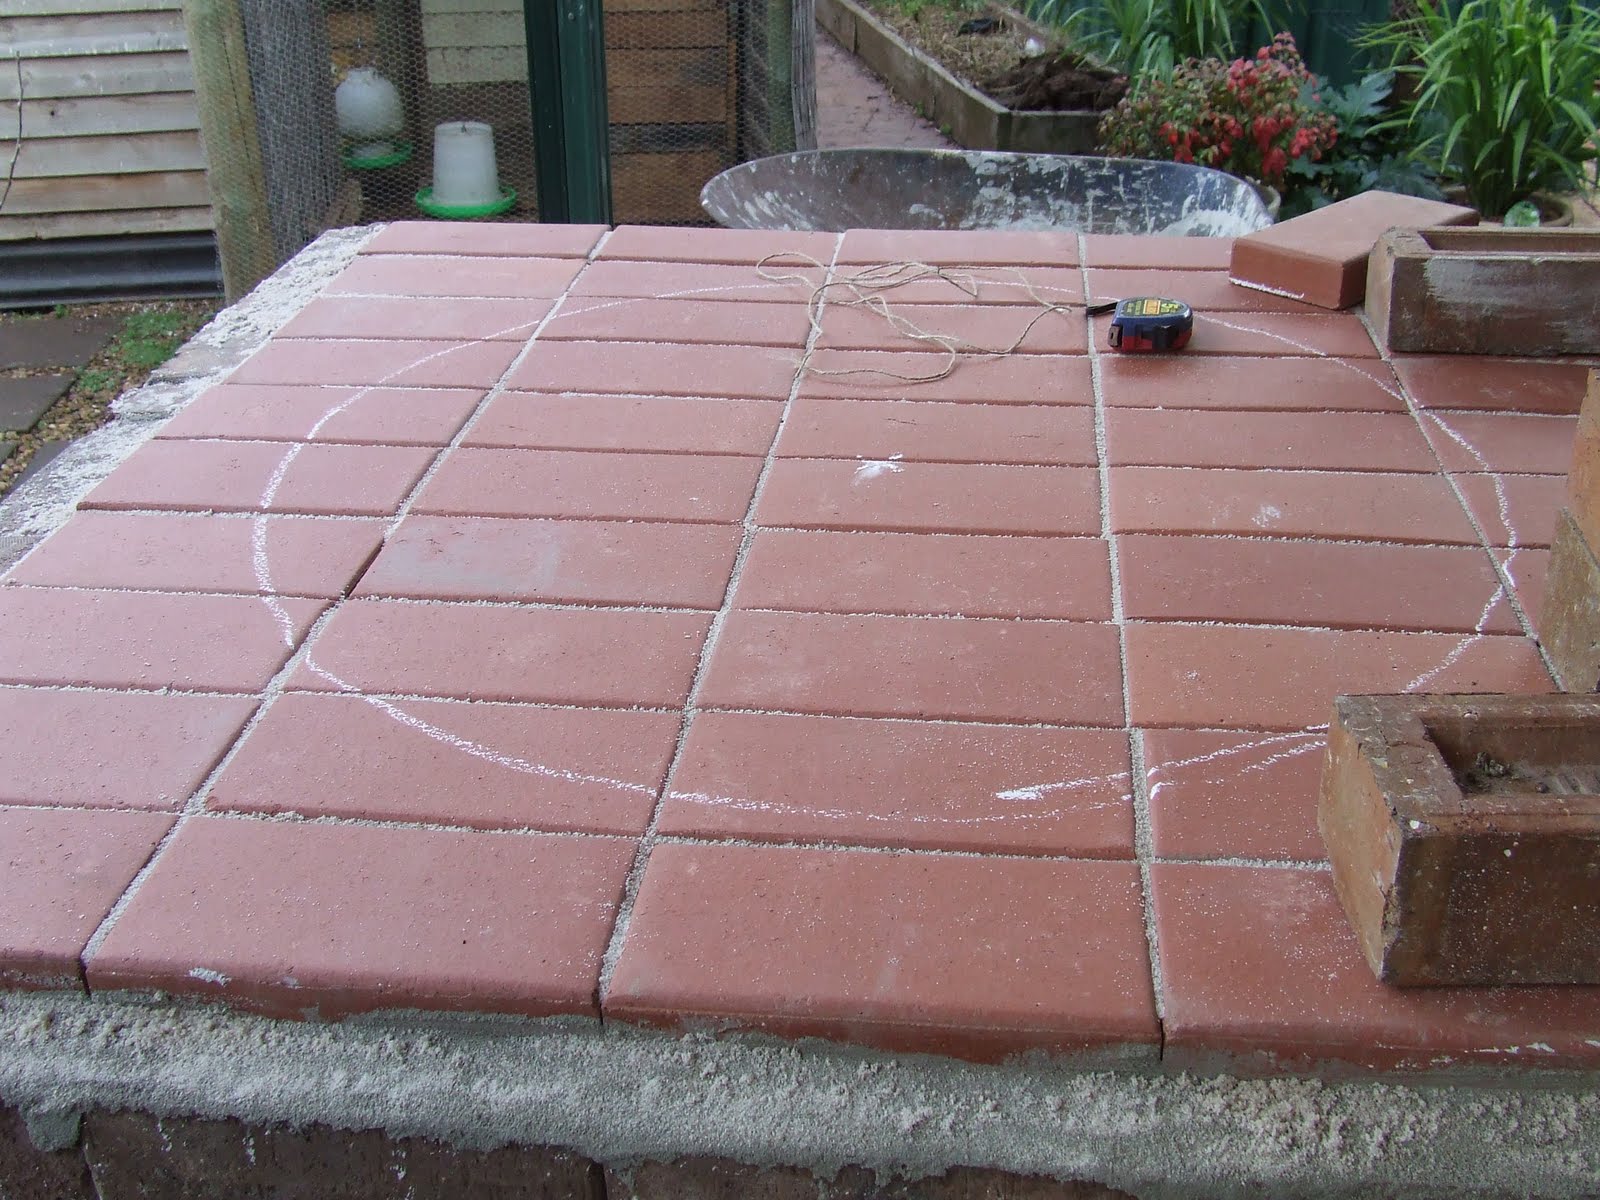
Using a length of string and some chalk we measured an 40cm radius circle (80cm diameter). This will be the inside floor area of the oven. This now gave us some indication of where we had to put the door.

To make the door, I broke out my new jigsaw, and trusty drill.

We estimated that the door had to be 45cm wide and about 30cm high so we could see the back of the oven whilst standing. I found some bits of scrap plywood and made a template for the door arch.

Here is one side, and I then screwed on some 13cm lengths of wood and attached another side.

This is the template with a dry run of bricks. We used offcuts of wood as spacers to get the desired effect.

here is a rear shot, so that you can see where the edge of the oven will be joined to the arch.

After much hard graft, here is the finished product. A little bit tricky, but I figured it out in the end. Once the mortar is dry tomorrow, I will attempt to removed the template. I will probably have to unscrew it, and it should just come apart easily.

The door arch will also act as a smoke manifold. The top two bricks were cut into thirds which left about a 10cm gap that the flue will sit on. I will be making a support for it out of sheet metal later on in the week.

Finally, the a different angle. It gave me a great sense of achievement to get so far in such a short amount of time. Next steps are to make a sand mound which will act as a template for the clay, add the clay, smooth it out, lightly fire the clay, add rock wool insulation, cover that with chicken wire, then render the whole shebang! Kim then wants to decorate it all with tiles and trinkets, which I have no objection to. In fact it will make it all look very funky.
Lastly, I will bolt on the wooden mantle at the front and give it a coat of natural turpentine and linseed oil to preserve it. Then we will have one wonderful oven to cook all manner of items in.
Happy days!
very interested in seeing the final project! you make it look extremely easy!
Fantastic.progress.in.such.a.short.time.
About.the.height.of.the.door…all.the.research.i.have.done.says.its.height.has.to.be.a.certain.percentage.of.dome…????
Also.some.people.mention.’fire.bricks’…what.is.that.about….you.have.used.pavers.
@ MM, Thanks. It has required a lot of muscle so far!
@ Hazel. The door height should be two thirds the internal dome hight so that you get a good burn. I did a lot of research about fire bricks which you could use, but with no real advantage and with increased cost. Normal solid bricks and pavers are fired at 1100C, and the average cob oven only reaches a top temp of 600C, so normal solid bricks are safe for the base. Time will tell of course.
Gav
looking good gav/ will be nice eating homemade pizza when we visit
This is looking great, Gavin -you are really speeding along. I remember when we built our oven, I spent a very long winter cleaning second hand bricks with a bolster and mallet. Can’t wait to see the sand dome and cob covering go on! It’ll look wonderful with the mosaicing to finish it off.
That is one mighty-fine-looking oven. Very impressive!
Great job and wonderful photos. Very helpful. My son and I plan on making one when the rain stops. LOL it has been late coming this year in Tassie and we are so happy to see it. We will be heading to the hardware to get a few more pieces this Friday. Your photos make it so much easier to explain to my son. Thanks for that. Shirley
Hi Gavin, i would like to ask you if the pavers you used on the hearth is pure clay(like teracota) pavers or the have cement.
Actualy they seemed to be clazed, is it?
Thanks for the great photos and instructions 🙂
Hi. Yes they are just clay pavers. Not glazed at all.