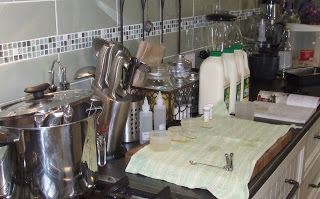
Yesterday, I busy in the kitchen. Romano was the cheese of choice to make, mainly because I like its flavour and that it goes great with most pasta dishes. In the shops it is sometimes sold as Pecorino Romano, which is vacuum packed to make it all the way from Italy to Australia, but tastes wonderful grated over pasta dishes.
Now I know that you may be disappointed to learn that I did not make a video tutorial of this recipe, however there is a good reason. I was also making mushroom risotto at the same time for dinner, so I don’t think it would have looked quite right!
Anyway, here my method that I adapted out of the book “Making Artisan Cheese” by Tim Smith.
I found that Warrnambool Cheese and Butter Factory Company now sell Jersey Milk via supermarkets. I bought 8 litres because the milk is much creamier and higher in butter fat (4%) than the normal milk you can buy (3.1-3.4%). This makes for a much fuller and richer cheese, so I reduced the amount of milk by one litre down from the normal 8 that I normally use. This is because if I used 8 litres the curds would not fit in the cheese mould after cooking them.
Romano Cheese.
7 litres whole milk (Jersey Milk)
1/4 teaspoon Thermophilic culture
1/4 teaspoon Lipase disolved in 60ml cool boiled water
2.5ml liquid vegetable rennet diluted in 60ml cool boiled water
2.5ml calcium chloride diluted in 60ml cool boiled water (omit if using un-homogenised milk)
Brine solution
2L water
1/3 cup non-ionised salt
Procedure
Sterilize all equipment.
Heat milk to 33C (90F), stir in the calcium chloride if required. Add starter culture, stir, then add the diluted lipase. Cover, and let milk ripen for 15 minutes.
Maintaining the target temperature of 33C, add the diluted rennet whilst stirring for two minutes. Cover and let sit for 40 minutes, or until you have a clean break.
Once you have a clean break, cut the curds into 6mm cubes (1/4″). Let the curds rest for 10 minutes at the target temp.
Slowly heat the curds to 46C (115F), which took about 30-45 minutes. Stir frequently, with a whisk. When you reach the target temp, maintain for another 45 minutes, continuously stirring (sore arms) to prevent matting of the curds.
Drain through a cheese cloth lined colander. Keep the whey for your animals if you like.
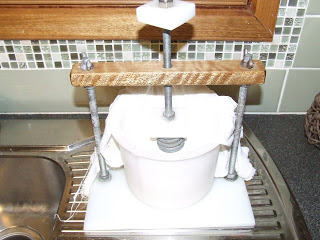
Pour the curds into a 1kg (2lbs) cheese cloth lined mold. Cover the top with the excess cloth, top with the follower, and press at 5kg (10lbs) for 30 minutes.
Remove from the press, unwrap (be gentle), turn over the cheese, rewrap and press at 11kg (25lb) for 3 hours. Repeat procedure, pressing at 20kg (40lb) for 12 hours. Repeat again, pressing at 9kg (20lb) for 12 hours.
Remove the cheese from the mold, and unwrap and immerse the cheese in the brine solution. Flip the cheese every 6 hours and let it sit in the brine for 24 hours at room temp approx 21C (70F).
Take the cheese out of the brine, pat dry, and place in the cheese fridge at 13C (55F) at 80-85% humidity for 10 months (shorter if you like).
Turn the cheese daily for the first three week of aging, and weekly thereafter. Remove any mould that forms on the exterior with a clean cloth and brine solution.
After 1 month, rub the cheese in olive oil to keep it from drying out, and again after a week. Repeat oiling every month until maturity.
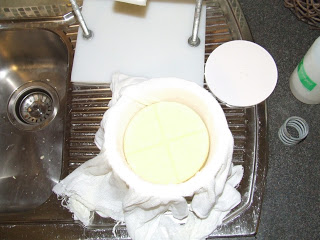
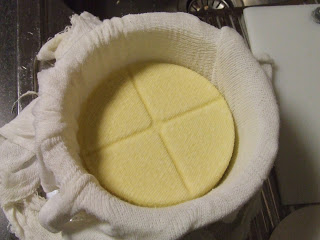
At the moment I am only up to the last pressing, but have a look how yellow this cheese is already.
I have never had a cheese this yellow at this stage of its life. I did notice that the milk was certainly not a white as normal milk, and more like a off-white to yellow colour. Also with this milk, the curd set stronger than I have ever seen. The clean break test was very positive with a nice solid curd. I am looking forward to full maturity and don’t know if I can wait for the entire 10 months 😉
The last few cheeses that I have made (feta, ricotta) have had very bad curd structure even with the addition of calcium chloride. I used the cheapest store bought full cream milk which had been pasteurised and homogenised and a butter fat of 3.4%. It would not surprise me if it was ultra-pasteurised, and not labelled as such. This would account for the poor curd structure with this milk. I suppose you pay for what you get!


Where milk’s concerned you certainly do get what you pay for. I buy un-homogenised organic milk and it is worth every cent – even on a tight budget.
My kitchen’s nearly finished so it wont be long until I have a go at cheese making. But, I think I’ll start with the simple stuff!
has a jersey cow and her milk and the cheese i’ve made from her milk is much yellower than other milks
but it tastes yummier too
You might try milk from a Gernsy or Brown swiss as well as a Jersey. Most store bought milk is from Holstien stock. High volume but often lower butter fat.
@ Diane. So true about the milk. I am never buying the crappy stuff again. Hope you have some early success with your cheese-making!
@ FG67. I would love to have the room for a cow, especially a Jersey! I bet your cheese tastes fantastic.
Gav
Gavin, I just HAVE to start making cheese!!!! Hey, in latish April I am giving a few workshops…. maybe, just maybe, you could come over and do a cheese one???
Too clever!
@ Kate
Give me a call on Skype tomorrow night to discuss. I am hoping to be on long service leave from end of
April to end of June, and Kim wants to visit Tassie!
@ Dixiebelle
Right back at ya!
Oh I hope you do visit Tasmania. I’m still having a love affair with the state.
Your cheese- awesome.
Your milk- bloody exciting. I’m always moaning about the lack of different milk availability in my area.
is making cheese from store bought milk cost effective? how much cheese does your 7-8 L of milk make?
When I read you were making cheese I figured you must have had a source for raw milk!
i’d be really interested to know!