• About
  • Archive
  • Contact
The Greening of Gavin
  • Home
  • Our Green Shop
    • Little Green Workshops
  • Green Workshops
    • Cheese Making
    • Soap Making
    • Soy Candle Making
  • eBooks
    • Clay Oven eBook
    • Keep Calm and Make Cheese eBook
  • Podcast
    • TGOG Podcast
    • TGoG Podcast Archive
    • Little Green Cheese
  • Vlog
  • Cheese
  • Green Living
    • Chickens
    • Gardening
    • Soap Making
    • Recipes
    • Climate Change
    • Peak Oil
    • Solar Power
  • Resources

How to Make Soy Yoghurt

November 19, 2015 @ 20:31 By Gavin Webber 3 Comments

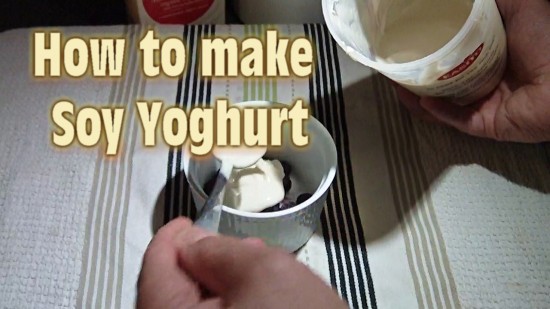
Lactose intolerant?  Crave a good yoghurt without getting bloated, or just want a break from dairy?  Here’s something that you may want to try.  This post will teach you how to make soy yoghurt easily and cost effectively.

How to Make Soy YoghurtWe decided to try something other than ordinary dairy yoghurt, partly because our daughter Amy is lactose intolerant.

We wanted to serve up something she could eat as a snack when she visited because she used to love eating my home-made cheese, and partly because I wanted to know what I was talking about because we stocked a non-dairy yoghurt culture at Little Green Workshops.

So after a bit of testing and research, I developed an easy method of how to make soy yoghurt. Here is how I made this non-dairy yoghurt.  By the way, Amy loves this yoghurt!

Equipment

You will need the following equipment

  • A yoghurt maker.  If you have an EasiYo, then that is perfect.
  • A stainless steel pot, or glass jug if planning to heat the milk in a microwave.
  • Dairy thermometer.
  • Mini measuring spoons
  • Small Whisk
  • a yoghurt maker or EasiYo.

Ingredients

To make your soy yoghurt you will need;

  • 1 Litre of “Soy” milk.  I used one made from organic soybeans.
  • 1 Tablespoon of Sugar (it acts as food for the culture to breed as soy milk has no lactose)
  • 1 dose of Non-Dairy Yoghurt Starter Culture, approx 1/64th teaspoon (a heaped drop).

Directions for making Soy Yoghurt

  1. Pour your soy milk into a 2 litre saucepan and clip on your thermometer.
  2. Add your starter culture to the soy milk and mix well to ensure the culture is evenly distributed.
  3. Mix the sugar into soy milk and warm to 40°C.
  4. Pour your milk into the yoghurt maker, or EasiYo pot.
  5. Maintain the milk mixture between 37° and 43° C (98F to 110F) for 12 hours, or even longer for a thicker soy yoghurt.
  6. Refrigerate your yoghurt for a couple of hours then serve whichever way you fancy!

You can serve it with berries, or stir in some homemade jam, or even some honey!

You’ve probably heard of the term that a picture, or in this case a video, is worth a thousand words, so to help you all out to create successful soy yoghurt, I have created a video tutorial.


We love this soy yoghurt on our muesli for breakfast and for dessert with berries.  If you follow these instructions, you can enjoy the creamiest soy yoghurt around, and best of all, you can make it yourself easily and for a lot less money than you can buy it in the supermarket!

Not wanting to sound salesy, Kim and I do have all the necessary equipment and ingredients in our Yoghurt Making section of our online store.  If you already have an EasiYo or can beg, borrow, or steal one, then you just slashed your yoghurt costs!

How many of you have tried making soy yoghurt?  Did you use a different method?

Will this article help someone you know? If so help them out by sharing now!

  • Click to share on Facebook (Opens in new window) Facebook
  • Click to share on X (Opens in new window) X
  • Click to share on LinkedIn (Opens in new window) LinkedIn
  • Click to share on Reddit (Opens in new window) Reddit
  • Click to share on Pinterest (Opens in new window) Pinterest
  • Click to share on Tumblr (Opens in new window) Tumblr
  • Click to print (Opens in new window) Print
  • Click to email a link to a friend (Opens in new window) Email
  • More
  • Click to share on Pocket (Opens in new window) Pocket

Filed Under: Cheese, food, Vegetarian

Homemade Vegetable Quiche

October 6, 2015 @ 20:42 By Gavin Webber 4 Comments

Who says that real men don’t eat Quiche, especially one without meat?  Well, this one does, thanks to my lovely and talented wife!  Kim makes the best vegetable Quiche I have ever tasted.

We had friends over on Saturday for a basic and advanced soap making workshops, and invited them to lunch.  Kim whipped up this wonderful Quiche with green salad and jacket potato.  It was light working lunch in between classes.

Kim has graciously allowed me to share the recipe with you all.

Vegetable quiche uncooked

Ready to go into the oven at 180°C for 35-40 minutes.

Homemade Vegetable Quiche

Ingredients

Shortcrust pastry

  • 225gm (8 oz) Plain Flour
  • 100gm (4 oz) Salted butter
  • ¼ teaspoon salt
  • Cold water to mix.

Filling

  • 1 red onion
  • 1 cup grated carrots
  • 2 cups washed spinach
  • 1 cup broccoli cut into small pieces
  • ½ red capsicum, slice half, and chop the other half
  • ½ yellow capsicum, slice half, and chop the other half
  • 2 tomatoes, chopped
  • 2 large eggs, whisked
  • 1 cup grated cheddar cheese
  • Salt to taste.

Method

  1. Pre-heat oven to 180°C (350F).
  2. Sift the flour and salt into a bowl
  3. Add butter.  Cut into flour with a knife then run in with fingertips.  The mixture should resemble fine breadcrumbs.
  4. Sprinkle water over the crumbs.  Mix to a stiff crumbly looking paste with a large spoon.
  5. Draw together with fingertips, turn out on to a lightly floured surface.  Knead quickly until smooth and crack-free.
  6. Roll out and lay over a pie or flan dish and trim the edges.
  7. Blind bake with pie weights for 10-15 minutes until golden brown.  Allow pie crust to cool.  Turn oven down to 160°C (320F).
  8. Fan-fry the onion, carrot, broccoli, and the chopped capsicum until just soft.  Turn off the heat and add spinach, allow to wilt.  Allow veggies to cool.
  9. Add the cooled veggies, tomatoes, cheese, and salt to taste to bowl and mix.  Add the egg and stir through.
  10. Pour the entire mixture into the pie crust base and press down to fill.  Decorate with capsicum slices.
  11. Bake Quiche at 160°C (320F) for 35 to 40 minutes until golden brown and no longer runny.
  12. Can be eaten hot from the oven or served cold the next day.
Vegetable quiche cooked

Vegetable Quiche fresh from the oven

All I can add is that we had it cold the day after she baked it, and it was bursting with flavour.  It was one of the most amazing Quiches I have ever eaten.  My contribution was the eggs, cheese, and spinach, but her’s was her baking talent!

Simply delicious!  Give it a try, you will be surprised that this veggie dish tastes so good.

Will this article help someone you know? If so help them out by sharing now!

  • Click to share on Facebook (Opens in new window) Facebook
  • Click to share on X (Opens in new window) X
  • Click to share on LinkedIn (Opens in new window) LinkedIn
  • Click to share on Reddit (Opens in new window) Reddit
  • Click to share on Pinterest (Opens in new window) Pinterest
  • Click to share on Tumblr (Opens in new window) Tumblr
  • Click to print (Opens in new window) Print
  • Click to email a link to a friend (Opens in new window) Email
  • More
  • Click to share on Pocket (Opens in new window) Pocket

Filed Under: eggs, recipes, vegetables, Vegetarian

3 Veggie Soup High in Vitamin A

August 18, 2015 @ 21:07 By Gavin Webber 8 Comments

Kim hasn’t been feeling the best lately.  Not quite sure what it is but it has the typical symptoms of MS fatigue.

So to boost her immune system a bit more, I cooked up a 3 veggie soup that is high in Vitamin A.  The soup was recommended to us by one of our students on Sunday’s soap making workshop.  We had nothing to lose as Kim had felt blah for over a week and I had been working from home to care for her, so I was cooking dinner anyway.

Now as I was only given scant instructions I kind of made it up as I went along, so here is my version of a high Vitamin A soup.  I think it turned out quite well if I do say so myself.

3 Veggie Soup

3 Veggie Soup with crusty bread

3 Veggie soup

Ingredients

  • 500g Pumpkin, peeled and diced (home-grown)
  • 5 Carrots peeled and diced
  • 3 medium Sweet Potatoes, peeled and diced
  • 2 teaspoons grated Ginger
  • 1 teaspoon vegetable stock powder
  • 1 pinch chilli powder
  • ¼ teaspoon ground turmeric
  • 1.5 litres hot water
  • Salt and Pepper to taste

Method

  1. Add all veggies to a 4 litre stock pot.  Add stock powder, spices and water.  The water should just cover the vegetables.

    Add Stock to veggies

    Add Stock, spices, and water to veggies

  2. Bring to the boil, then cover and simmer for 30 minutes.
  3. Once the veggies are soft, stick blend the 3 veggie soup in the pot until smooth.
  4. Season to taste.  Makes 4 generous portions.  Serve with crusty bread and butter.

Who would have imagined that you could make something so delicious with just 3 vegetables and a few spices.

I can tell that this is going to be a regular at our dinner table, especially because I have so many pumpkins from my last harvest yet to eat.

This soup was surprisingly delicious and it warmed the cockles on this cold winters evening.  Just the boost I think we all needed!

And has it helped Kim?  Well, she seems to think so.

Will this article help someone you know? If so help them out by sharing now!

  • Click to share on Facebook (Opens in new window) Facebook
  • Click to share on X (Opens in new window) X
  • Click to share on LinkedIn (Opens in new window) LinkedIn
  • Click to share on Reddit (Opens in new window) Reddit
  • Click to share on Pinterest (Opens in new window) Pinterest
  • Click to share on Tumblr (Opens in new window) Tumblr
  • Click to print (Opens in new window) Print
  • Click to email a link to a friend (Opens in new window) Email
  • More
  • Click to share on Pocket (Opens in new window) Pocket

Filed Under: recipes, vegetables, Vegetarian

Next Page »

Search This Blog

Follow my work

About Gavin Webber

About Gavin Webber

An Ordinary Australian Man Who Has A Green Epiphany Whilst Watching A Documentary, Gets a Hybrid Car, Plants A Large Organic Vegetable Garden, Goes Totally Solar, Lowers Consumption, Feeds Composts Bins and Worms, Harvests Rainwater, Raises Chickens, Makes Cheese and Soap, and Eats Locally. All In The Effort To Reduce Our Family's Carbon Footprint So We Can Start Making A Difference For Our Children & Future Generations To Come.

Delve Into the Archives

Visit Our Online Simple Living Shop

Little Green Workshops

Top Posts & Pages

Hot Chilli Chutney
Black Aphids On Garlic
Broad Bean Rust
Quince Paste
Outdoor Solar Shower
Curing Black Olives
Strawbridge Family Inspiration
Tips for Growing Citrus in Pots
Growing Queensland Blue Pumpkins (Winter Squash)
The Seven Stages Of Change

Recent Awards

Recent Awards

Local Green Hero

Categories

Favourite Daily Reads

Debt Free, Cashed Up, and Laughing

The Off-Grid Solar House

Greener Me

The Rogue Ginger

Little Eco Footprints

Down To Earth

Surviving the Suburbs

Little Green Cheese

Eight Acres

The Witches Kitchen

TGOG Readers On-line

Carbon Offset website

Copyright - Gavin Webber © 2025