• About
  • Archive
  • Contact
The Greening of Gavin
  • Home
  • Our Green Shop
    • Little Green Workshops
  • Green Workshops
    • Cheese Making
    • Soap Making
    • Soy Candle Making
  • eBooks
    • Clay Oven eBook
    • Keep Calm and Make Cheese eBook
  • Podcast
    • TGOG Podcast
    • TGoG Podcast Archive
    • Little Green Cheese
  • Vlog
  • Cheese
  • Green Living
    • Chickens
    • Gardening
    • Soap Making
    • Recipes
    • Climate Change
    • Peak Oil
    • Solar Power
  • Resources

Archives for September 2015

Our Beautiful Chooks

September 22, 2015 @ 21:56 By Gavin Webber 7 Comments

We love our beautiful chooks!  For those of you outside of Australia, most Aussies lovingly refer to their chickens as “chooks”.  It’s kind of a catchy nickname.

Anyway, all our chooks are back on the lay after a winter break, and thankfully we are back regularly to eating eggs again.  I have missed my omelette once a week for lunch.  They are delicious (the eggs not the chooks).

Bunty Chicken

Bunty Chicken

When I say all are laying, I naturally omit Bunty.  She is the matriarch of flock and top of the pecking order.  She was hatched in April 2008 and we bought her in September of the same year.  Technically that makes her 7½ years old, which is pretty good for a chook of her breed.

I shouldn’t say that she doesn’t lay, because about once a month I find a very small papery shelled egg in the nesting box that only contains the albumen (egg white), which I give to the dogs.  Not bad for an old girl!  She keeps the other chooks in check, and even makes sure the dogs don’t get too close when they are free ranging.  A bit like a pseudo Rooster.
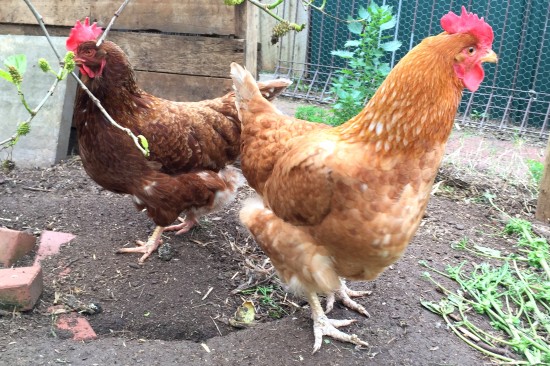
Babs and Edwina II

Babs and Edwina II

Babs is now about 4 years old, and Edwina II is about 3 years old.  Both still lay most days of the week, but take a break over winter to allow their feathers to grow back after moulting.  Babs is a bit flighty (but has her left wing clipped).  She’s not very friendly.

Edwina is a timid and tame lass.  She likes being hand fed and picked up and stroked and she is my favourite chook.  I shouldn’t say that I have favourites because it only leads to heartache when they get sick and eventually fall off their perch.  Heaven knows that has happened a few times since we started keeping backyard chooks.  It’s just a part of life I suppose.
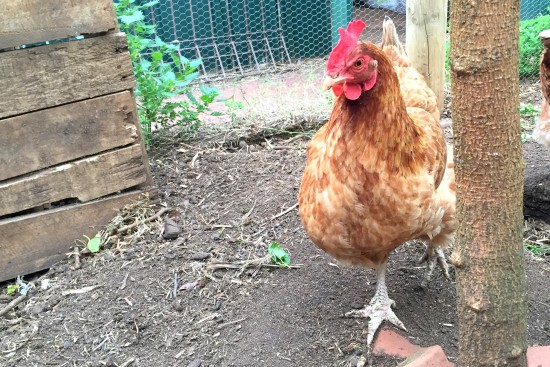
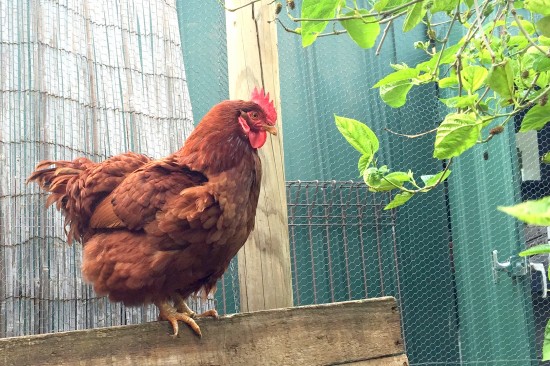
Chooky Chicken

Chooky Chicken

And allow me to introduce Chooky Chicken.  For want of a better name, this seems to be the one she comes running to!  She is tenacious, bold and likes jumping a lot.  Chooky is always the first out the coop door in the morning and first to the food.  She even does parkour when waiting for me in the morning.  She is an egg laying machine!  During winter she laid eggs nearly every day, and hasn’t stopped.  I would expect that Chooky will slow down over the coming year as she gets older.

Chooky is Edwina’s sister as we got them from the same flock.  She also has been getting treatment for scaly leg mites which picked up from some of the local pigeons that try to steal the chook food.

Most of the diseases that my flock have caught over the years have been introduced by visiting birds.  That is why it is best to keep your girls as healthy as you can.  I give them lots of greens as well as most of the kitchen scraps and their daily grain allowance.  They also get crushed garlic with their feed once a week which keeps intestinal worms at bay, and I add about ¼ cup of apple cider vinegar to their water once a fortnight as a tonic.  It seems to keep them healthy and happy.

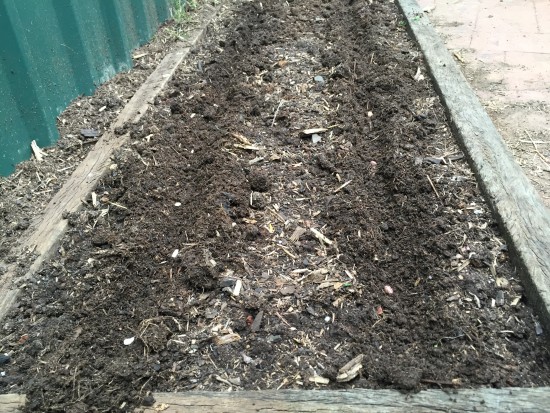
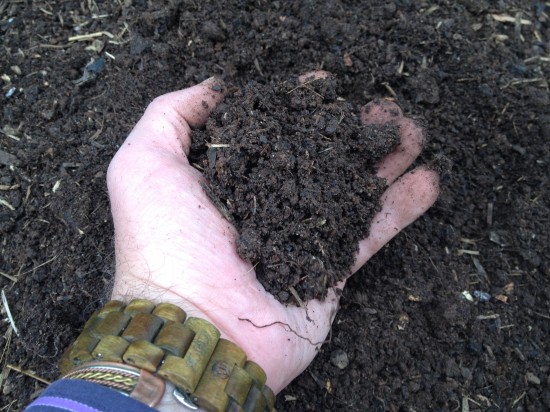
They also get their little house cleaned out once a fortnight to prevent keep away pests.  It’s an easy task and provides brown material for the compost bin which is also a great activator.  The bedding that is not too soiled is laid on garden beds as mulch.

As Bunty is getting on, I checked out my YouTube video collection and found a video that I made the very first day they arrived in our coop with her three sisters (who have since passed on).  Seven years is a long time, so see if you can spot her as a youngster!

Our suburban food farm wouldn’t be the same without our chooks.  They are the best weed and bug controllers around, and turn them into the most amazingly rich eggs.  Besides that, I treasure their compost making ability with all that scratching and pooing for creating the most fertile soil to using in my veggie patch.

If you haven’t got chooks in your life, I highly recommend you get some if local laws permit.  We haven’t looked back since getting our numerous girls over the years.

Shout out if you love your chooks too!

Will this article help someone you know? If so help them out by sharing now!

  • Click to share on Facebook (Opens in new window) Facebook
  • Click to share on X (Opens in new window) X
  • Click to share on LinkedIn (Opens in new window) LinkedIn
  • Click to share on Reddit (Opens in new window) Reddit
  • Click to share on Pinterest (Opens in new window) Pinterest
  • Click to share on Tumblr (Opens in new window) Tumblr
  • Click to print (Opens in new window) Print
  • Click to email a link to a friend (Opens in new window) Email
  • More
  • Click to share on Pocket (Opens in new window) Pocket

Filed Under: 160km Diet, Chickens, compost, food

How To Plant Beans

September 17, 2015 @ 21:58 By Gavin Webber 6 Comments

Beans are one of the easiest vegetables to grow in the suburban backyard.  Not only do they taste fresh and crisp, they are usually abundant croppers.

The more beans you pick, the more that grow.  This veggie just keeps on giving and giving.  Most beans are ready to start harvesting in about 8 to 10 weeks after sowing.

Now if you are worried about garden space, there are two main varieties of bean to plant during spring here in our temperate climate.  If you are pressed for horizontal space, then you plant a climbing variety, and if you want to fill up a long narrow bed, then plant some dwarf bush beans.

How to plant beans - climbing frame

Climbing frame for beans

Climbing Beans

For those horizontally challenged gardeners, you only need a little bit of space to grow climbing beans.  You will need a frame on which to grow the bean stalks.   I made this  frame out of an old gazebo frame.  Anything will work as long as it is round.  Let your imagination go wild when it comes to beans.

How to plant beans - Lazy housewife beans

Lazy Housewife beans

My favourite climbing bean is the Lazy Housewife bean.  They are a stringless bean, that just needs top and tailing before cooking and are very prolific.  They are delicious eaten raw or cooked as a green bean, or dried for soups and stews.

Planting is easy.

Planting climbing beans

Planting climbing beans

Make sure your soil is rich with dug in compost and with your hand make a shallow furrow twice the depth of the bean.  Climbing beans can be planted about 10 cm apart as they don’t compete for horizontal real estate.  They just want to climb!

Cover the seeds with soil and pat gently, then water them in.  You won’t need to water again until the first leaves emerge from the soil.  Once you have a seedling, just keep the soil moist and watch them grow!  They are an annual so have a single season lifespan.

Gavin and Lazy housewife beans

Gavin and Lazy housewife beans

Dwarf Bush Beans

Dwarf Bush beans are another easy bean to grow if you have a long narrow bed or tight space.  I prefer varieties such as Borlotti and Snap Beans.  Borlotti is usually dried for cooking, and Snap beans are better eaten as green beans as the seeds are quite small.

Borlotti beans

Borlotti beans


Snap Beans

Snap Beans

Bush beans are planted in a similar way to climbing beans except they are spaced further apart.  Make sure the danger of frost has past as freezing will kill the seedlings.  I plant these beans in well composted soil, about 20cm apart and about 30-40 cm between rows.

Dwarf beans in rows

Dwarf beans in rows

Plant double the depth of the seed (about 2.5 cm or 1 inch).  Backfill the furrow and pat gently and water well.  Don’t water for the first few days to prevent seed rot.  The seedlings should emerge between 7-10 days and the bushes will grow about 50 cm (20 inches) height.  You can start to harvest after 8-10 weeks and pick regularly for more beans.  They are an annual so pull the plant and compost it after the beans stop developing.

The bushes rarely need support.  Keep the soil moist and to prevent them from drying during Summer mulch the soil well with sugar cane mulch or pea straw once the first true leaves appear.  If you have don’t have much room in your patch, dwarf bush beans love to grow in containers as long as you keep the potting mix moist.

Pests

Some seasons I have found that white fly is attracted to the climbing beans.  To get rid of these little sap suckers, I spray with eco-oil mixed as directed, before the white fly takes over your bean patch.  This pest will stunt the growth of your beans and reduce flowering if you let them take over.  Aphids can also be an issue if the plants are weak.  I use eco-oil because it is an organic spray that is allowed in organic systems.

Eco_oil_1ltr

However if you keep you bean stalks well watered, mulched, and give them a fortnightly application of Seasol or Worm Wee Tea, then the plants stay much healthier and are resistant to most pests.  Plus healthy plants will reward you with a bumper harvest.

Get Planting!

So now you know how to plant beans, there’s really no excuse not to plant a few in your veggie patch this summer.  They are just that easy to grow and reward you over and over again.  In Melbourne it’s best to get your beans in the ground from mid September to late December.

Don’t forget to let a few pods dry out and save the seeds for next season!  Store over winter in an airtight jar.

[spp-optin]

Will this article help someone you know? If so help them out by sharing now!

  • Click to share on Facebook (Opens in new window) Facebook
  • Click to share on X (Opens in new window) X
  • Click to share on LinkedIn (Opens in new window) LinkedIn
  • Click to share on Reddit (Opens in new window) Reddit
  • Click to share on Pinterest (Opens in new window) Pinterest
  • Click to share on Tumblr (Opens in new window) Tumblr
  • Click to print (Opens in new window) Print
  • Click to email a link to a friend (Opens in new window) Email
  • More
  • Click to share on Pocket (Opens in new window) Pocket

Filed Under: Gardening, vegetables

TGoG 125 – 22 Things You Should Start Adding to Your Compost Bin

September 16, 2015 @ 22:07 By Gavin Webber 2 Comments

[spp-player optin=”off”]

This show is all about the 22 things you should start adding to your compost bin.

If you don’t have a compost bin, I highly recommend you source one, because there are many used household items that you can add to it that gives back nutrients to your garden!

22 things you should start adding to your compost - well composted soil

Well composted soil

From hair to cotton balls, there are so many unusual things that compost bins love to break down for you so that you can share these often wasted nutrients into your garden.  Your fruit and veggies will thank you for it!


Don’t forget that this podcast is supported financially by you, the listener.  This not only keeps the show (and blog) advertisement free, but keeps us on the air each week.

If you would like to support the show and pledge as little as US$1 to keep us up and running, please pop over to www.patreon.com/greeningofgavin/ and pledge away!

Also if you like the show, use the iTunes button and leave a rating and a review.  We love to hear what our listeners think about our show.

Until next episode, keep it green and divert some of that landfill into compost today!

Will this article help someone you know? If so help them out by sharing now!

  • Click to share on Facebook (Opens in new window) Facebook
  • Click to share on X (Opens in new window) X
  • Click to share on LinkedIn (Opens in new window) LinkedIn
  • Click to share on Reddit (Opens in new window) Reddit
  • Click to share on Pinterest (Opens in new window) Pinterest
  • Click to share on Tumblr (Opens in new window) Tumblr
  • Click to print (Opens in new window) Print
  • Click to email a link to a friend (Opens in new window) Email
  • More
  • Click to share on Pocket (Opens in new window) Pocket

Filed Under: compost, Gardening, Podcast, TGOG Podcast

« Previous Page
Next Page »

Search This Blog

Follow my work

About Gavin Webber

About Gavin Webber

An Ordinary Australian Man Who Has A Green Epiphany Whilst Watching A Documentary, Gets a Hybrid Car, Plants A Large Organic Vegetable Garden, Goes Totally Solar, Lowers Consumption, Feeds Composts Bins and Worms, Harvests Rainwater, Raises Chickens, Makes Cheese and Soap, and Eats Locally. All In The Effort To Reduce Our Family's Carbon Footprint So We Can Start Making A Difference For Our Children & Future Generations To Come.

Delve Into the Archives

Visit Our Online Simple Living Shop

Little Green Workshops

Top Posts & Pages

Hot Chilli Chutney
Curing Black Olives
Home Made Bread Rolls
The Seven Stages Of Change
Black Aphids On Garlic
How To Remove Scaly Leg Mites
2 Fruit Marmalade
Outdoor Solar Shower
Tips for Growing Citrus in Pots
Pickled Limes

Recent Awards

Recent Awards

Local Green Hero

Categories

Favourite Daily Reads

Debt Free, Cashed Up, and Laughing

The Off-Grid Solar House

Greener Me

The Rogue Ginger

Little Eco Footprints

Down To Earth

Surviving the Suburbs

Little Green Cheese

Eight Acres

The Witches Kitchen

TGOG Readers On-line

Carbon Offset website

Copyright - Gavin Webber © 2026