And who wouldn’t really. Not only do you get to meet new and interesting people, but you learn lots useful stuff as well.
On Saturday, I attended two workshops for free no less. The first one was about Wicking garden beds and was presented by Karen Sutherland from Sustainable Gardening Australia. The second was at my friend and fellow member of the Melton Sustainable Living Group, Michael Howard’s extensive food garden and was about Summer vegetables and irrigation. It was last years workshop at Michael’s place that inspired me to install drip irrigation in most of my veggie beds.
The first workshop was sponsored by Melton Shire Council as part of National Recycling week, and was held at the Men’s Shed. It was the first time I had visited the Men’s Shed, and it was really cool. It is massive with lots of blokey type activities. Anyway, there were about 30 people in attendance, with more ladies than men, which I was surprised with. I thought that this was a good construction job that blokes would really get involved in. No matter, so here are some photos, and I will explain how it was put together.
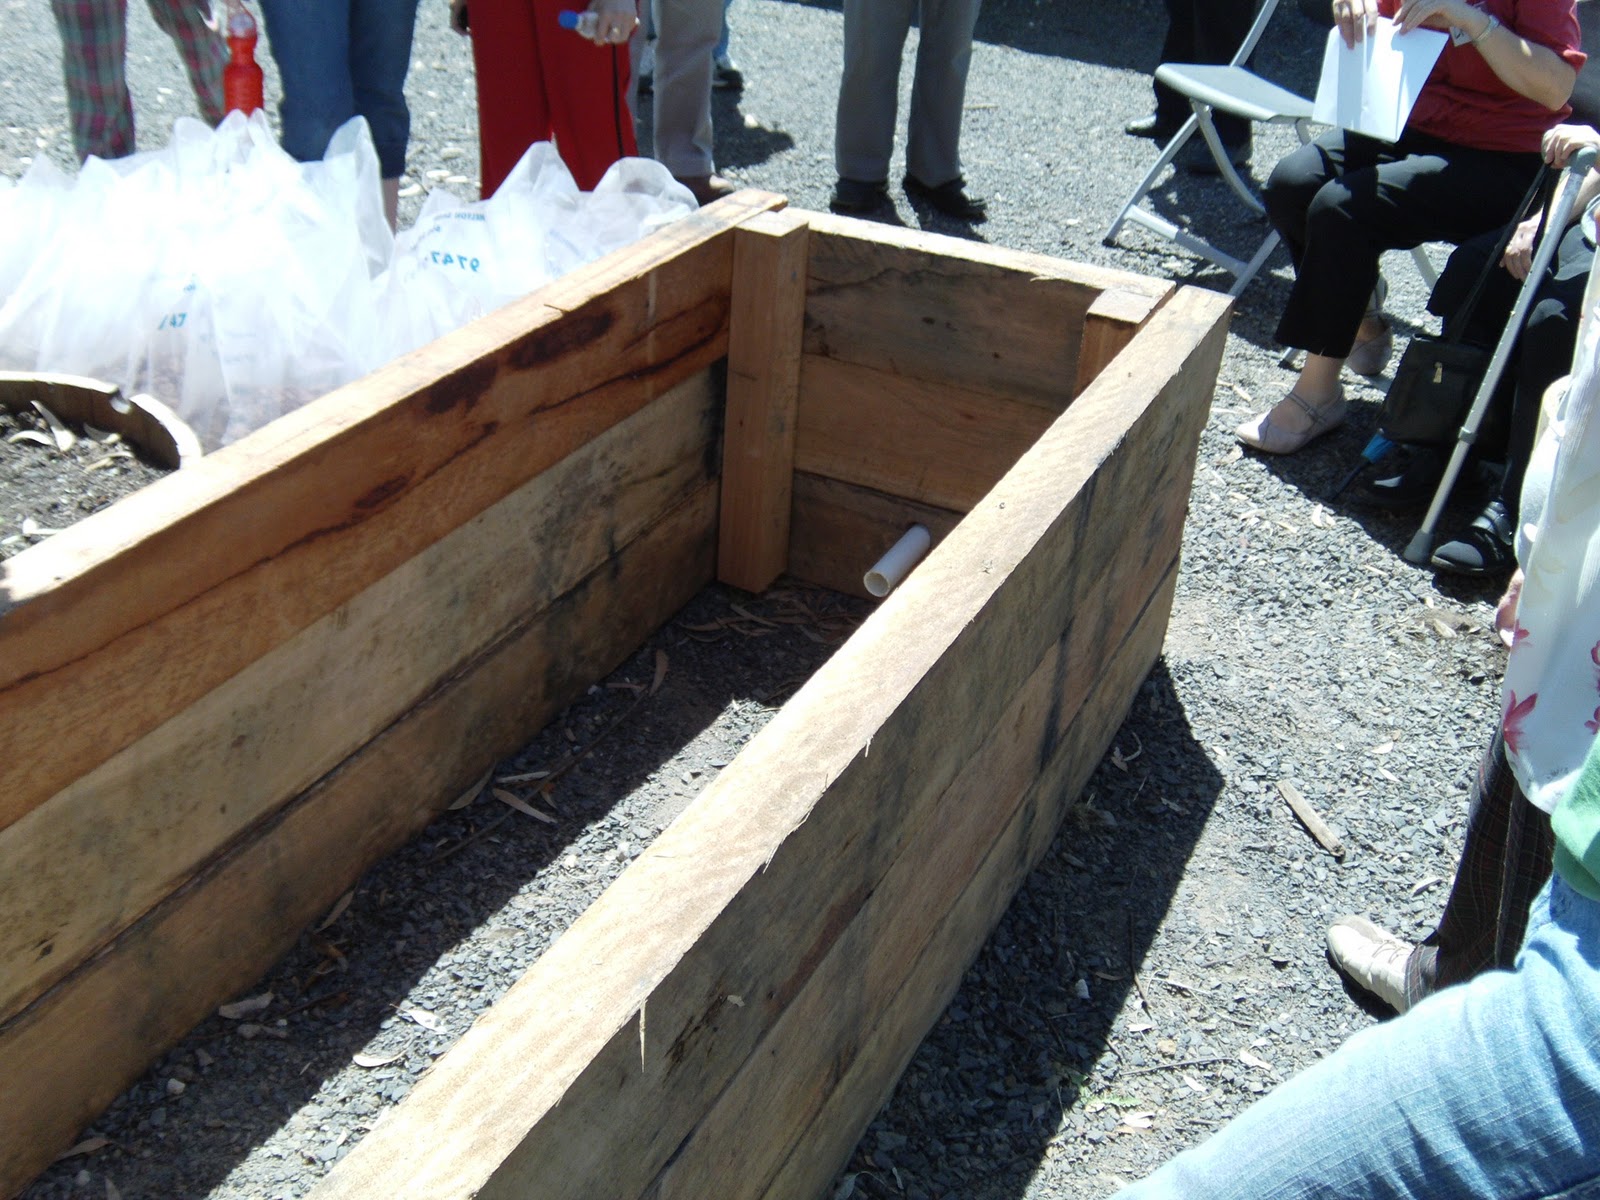
This was one big bed. I was kind of shocked to see how tall it was compared to the wicking bed that I had made. My bed only came up to the bottom sleeper, and for this bed, that was the size of the reservoir. It was 60cm wide, 150cm high and 240cm long. It was already made prior to the demonstration by the fellows at the Men’s Shed, which was nice of them.
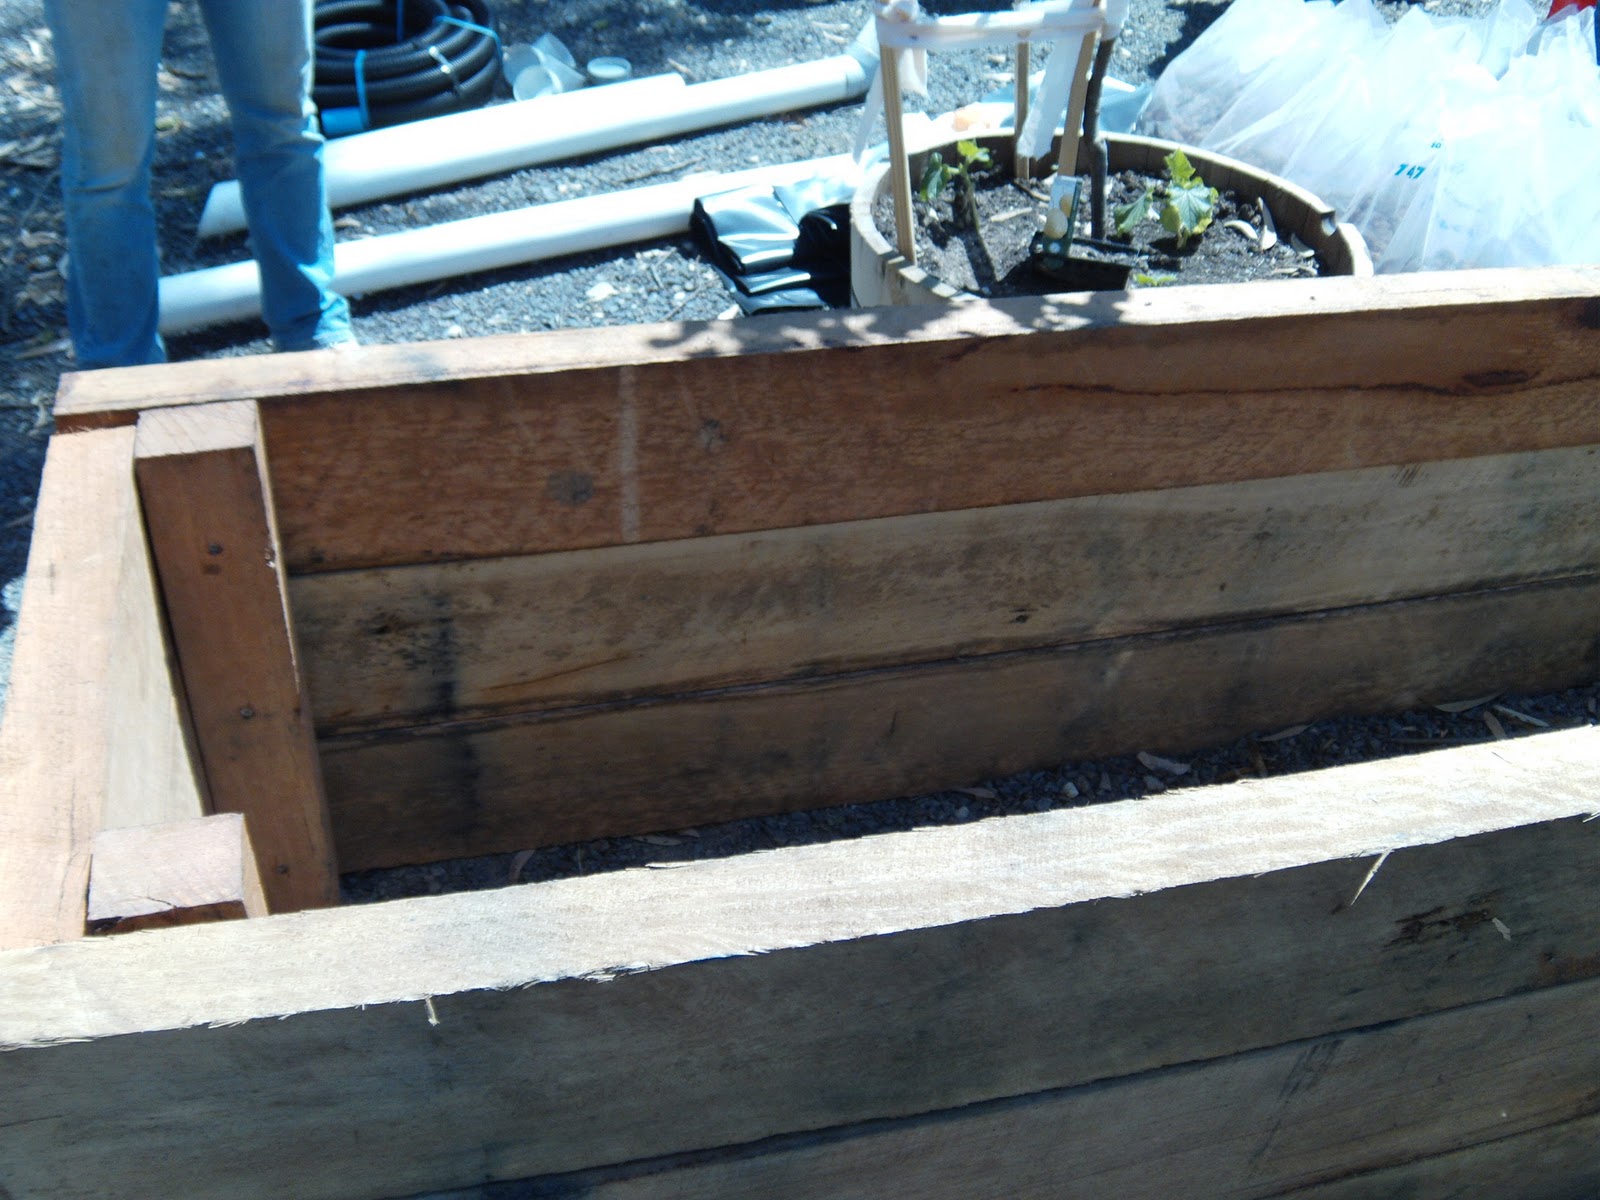
If you click on the photo above you can see that they used coach bolts to fasten it all together, similar to some of my main raised garden beds.
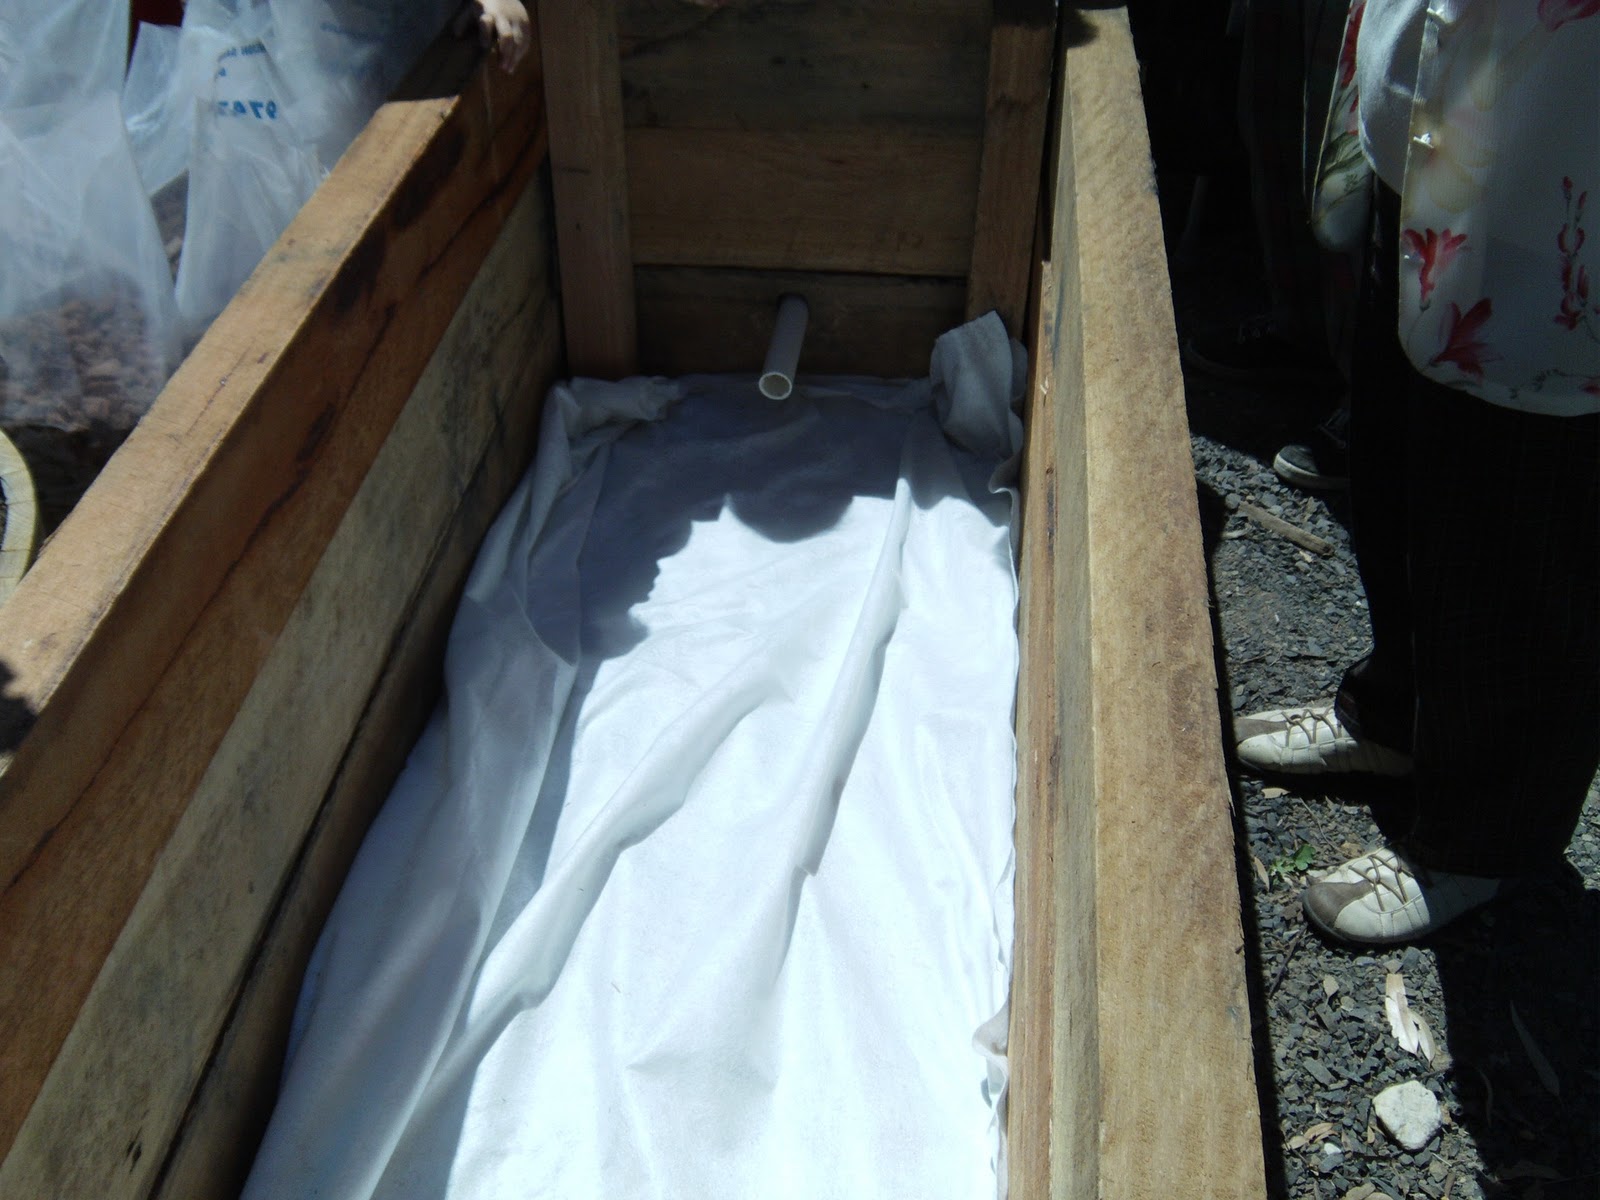
As the bed was on gravel, we had to protect the liner with some geotextile fabric. You can also use old carpet if you have some. Not the overflow pipe at the far end. Karen said that it was too low and needed to come up another 10 cm.

The we laid in the liner which was builders black plastic. The type they use to separate the main concrete slab on a house and the first course of bricks. It was quite thick but became plyable in the sun. Then we put in 90mm slotted aggie pipe with two elbow joints. This was to deliver the water to the bottom of the bed.

Then we connected the 90mm riser pipes which had caps applied to ensure that no snails or mozzies decided to call it home. You remove the caps to water the bed. Then we dumped in enough scoria up to the level of the pipe. This is the reservoir which stores all the water.
This is me listening attentively to instructions from Karen as the rest of the group were.

Another layer of geotextile fabric is laid over the top of the gravel to create a barrier so that soil doesn’t mingle with the water reservoir.

We were then directed to a large mound of garden soil and shown some shovels. It was a bit of a bucket brigade with everyone helping out to fill this huge bed. After about 10 minutes it was all done and levelled out. A garden hose was found and we filled up the reservoir. The only thing we didn’t finish off was securing the plastic and fabric to the side of the bed. A staple gun was suggested to perform this task, and from experience, you go through lots of staples.
So that was the first workshop. The second irrigation workshop, I didn’t take any pictures of because you can see Michael’s garden here at Vasili’s garden. It was taken last year, still basically the same but with quite a few improvements and extra drip irrigation devices.
I was so inspired by both these workshops that I spent all of Sunday afternoon in my own patch, planting, weeding, trimming, and fertilising. By the end of the day, there was enough time to go for a bike ride with Ben a couple of laps around the block and back home to make two delicious curries for dinner with all the kids (except Adam, we miss you Son!), and Renata from next door.
A great end to a wonderful weekend of workshop magic!