I once thought that making Camembert would be very difficult. I didn’t know how they got that soft, almost fuzzy rind around the cheese, and would not have imagined in my wildest dreams that one day I would make one. Camembert cheese originate in the French village of the same name.
It was discovered in 1791 by Marie Fontaine who got the recipe from a monk, and has become one of the most prized cheeses in the world. Penicillium candidum growns on the surface during curing, and the mould develops the sharp taste of the cheese and aids in creating its runny consistency at room temperature.
Well, guess what. I didn’t make one, I made 4 rounds of Camembert!
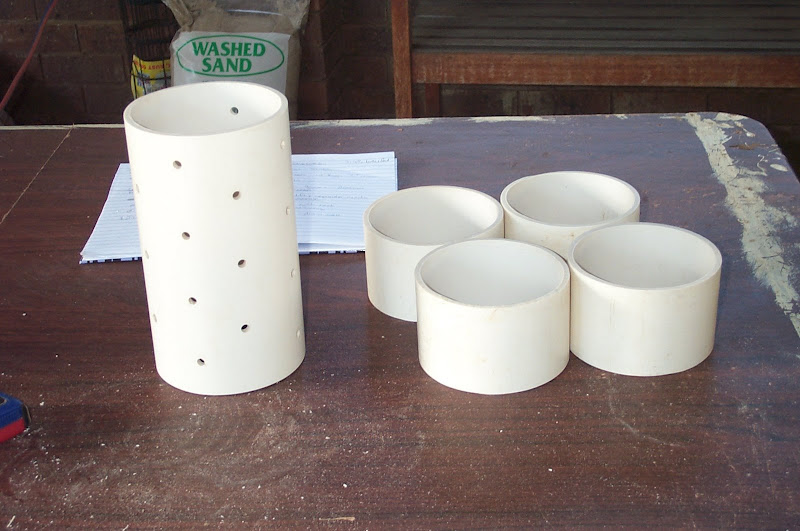
First of all I had to make the hoops or moulds that the Camembert would form in. I took a big piece of food grade plastic pipe and cut it into four 3″ lengths and gave the ends a sand with a sanding block to smooth them all down. While I was at it, I made a Stilton mould as well and drilled holes all around the mould. Here is a picture of my efforts;
So once I had finished the hoops, I washed them in hot soapy water to get rid of any plastic powder, and then I sterilised them in boiling water. Unfortunately the hot water warped them somewhat, so I had to reshape them when I took them out. There was a lesson learnt, don’t boil the hoops. So instead I sprayed them all over with white vinegar to kill any mould or bacteria that might be lurking.
I then followed the recipe in the “Home Cheese Making” by Ricki Carrol, which I won’t describe in details here. You will just have to borrow the book from your local library!
Anyway, normal process, heat the milk, add the starter, then the penicillium and ripen for 90 minutes. This is the longest ripening period I have found for any cheese so far. Then add the rennet and rest for an hour. Cut curd into 1.25 cm cubes, gently stir. Dorothy from the cheese making course suggested the lift and separate method, just like the bra add. The book goes into some detail about cheese boards and mats and moulds, but I found a simpler way that I learnt by observation of other students at the course. Use good old chux and two trays for the hoop process.
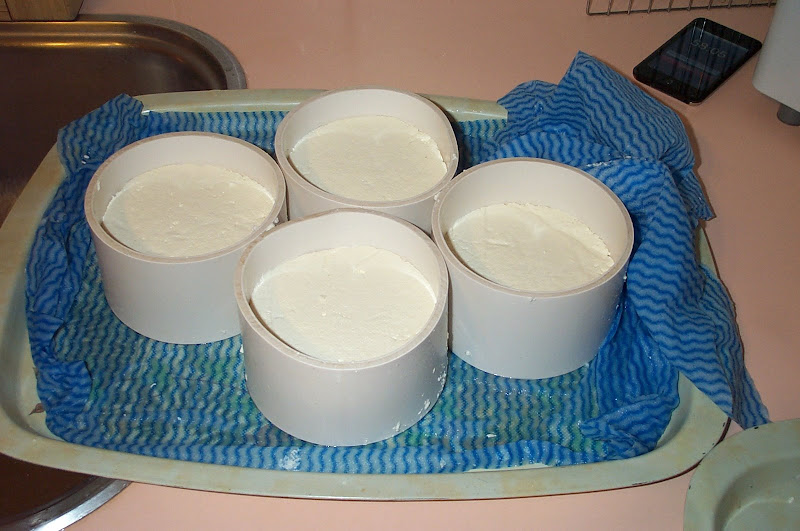
This is about half way through the turning process. When I filled the hoops they were over full and I just managed to get all of the curd into them with a bit of perseverance. As you can see, the curd shrinks as it expels whey. You can just see in the photo a second tray. To turn the hoops, place the second blue chux over the hoops, put the tray on top, squeeze the trays together, drain whatever whey there is, and quickly flip them over. A little bit of skill involved, but not too hard.
Now after 5 hours of doing this every hour your Camembert will look something like this;
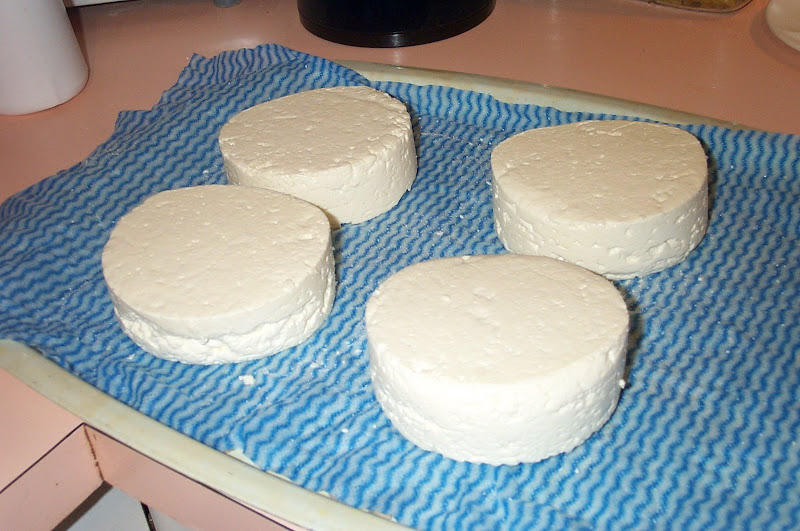
As you can see, they shrink quite a bit. They shrank from about 7.5cm to about 3cm once all the tray flipping was over. You then salt the cheese by sprinkling with non-ionised salt and rub all over. They are mostly firm, but I had to be gentle.
For a more comprehensive post, including a video tutorial, have a look at my full article about making Camembert over on my cheese blog, Little Green Cheese. It is worth a visit.