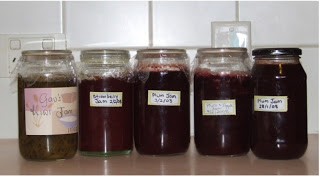
I love Jam! And better still I love my jam!
I have never made jam up until two months ago and now I wish I had learned the skill years ago. You see, we have a plum tree in the back yard and every year it has fruited reasonably well. In the past we ate as many plums as we could and left the rest for the birds. Well not this year!
First of all I made sure that the tree was well fertilised by scattering fistfuls of dynamic lifter under the canopy. Then I watered the fertiliser in so as not to burn any surface roots. Then I made sure it was well mulched. I connected up a greywater hose from the washing machine and watered the plum tree twice weekly when the first leaves showed. So the result of all this love and attention was a bumper crop. Part A of my cunning plan had worked.
In mid January, the fruit started to ripen, however before I could get too excited, I need a way to preserve some of the fruit for later. One can only make so much jam. With Kim’s assistance, we searched eBay Australia for a Fowlers-Vacola preserving kit. After a few missed auctions (why do people let them finish at 10pm), we managed to win one. The kit was about 20 years old but in good condition, and consisted of the preserving pot, bottle brush, about 60 jars of various sizes, some lids, clips, and a thermometer. There was mention of a book in the auction description but it never arrived. All that was missing were instructions, tongs, and some rubber rings. I picked them up at the one and only Fowlers store in North Melbourne.
About a week after we bought the kit I started to put some of the jars to good use. I had picked some plums that were just ripe and ate a few. The fruit was so sweet and juicy. Instead of watching them go rotten in the fridge, I had a go at making some jam. This is how we did it. Kim and I stoned and peeled the plums until we had 500g. I then put them into the bread maker (yes, you read correctly). As we have solar power I didn’t mind using the machine. I added 500g of white sugar and two tablespoons of “Jamsetta“. Then set the bread maker to the jam setting, pressed start, and came back in about 1 hour and 25 min. The result was very hot, but very tasty jam ready to put in jars. To prep the jars, I washed them in the sink with hot water and a little detergent and scrubbed hard with the bottle brush. Rinsed in cold water to get rid of the soap, and then rapidly boiled the jars for 15-20 minutes to kill any nasty bacteria. Sterilisation is one of the most important parts of any preserving as this stops botulism from growing and poisoning your food. This was all timed well, because no sooner had I taken the jars out of the boiling water, that the jam was ready. I poured the hot jam straight into the hot jars and used cellophane covers and elastic bands to seal the jars.
Each batch was enough to fill one 500-600mL jar. I have used size 20 preserving jars and 600mL cooking sauce jars successfully. There is always a little jam that doesn’t make it to the jar and it is taste tested by everyone in the family. They like my jams as much as I do. So far I have made; plum, plum and apple, strawberry, and kiwifruit jams. All are wonderful on hot toast with a little butter. I think that the five jars will just get us through winter! Did I mention that I love jam?
In the next post I will describe how I went about preserving the excess fruit and vegetables from the summer crop. Happy jam making!

I would love to learn how to make jam. I am going to try to grow strawberries this year. Maybe I will try then.
hi gav just like the old days dad
I’ve just bought a breadmaker (we use conventional electricity but a problem with muscle weakness means I can’t knead without pain anymore) and have decided to make jam in it but am a bit concerned as to how long it will last. Do you have any idea? It’d be nice to give as gifts but I wouldn’t want to be giving jam that’s gone off.
Thanks in advance.
Sharon J